
Generally, most people prefer desktop computers to laptops. Myself included. So, I took an AST Ascentia 800n laptop that I got off of eBay for $10 inc. shipping, and proceeded to gut it so I could put it inside a case that I got as a free sample from OKW Enclosures. I then got out the good ol' soldering iron and started removing all the fluff I didn't need such as battery contacts, LEDs, etc. (by the way, surface mount stuff isn't as hard to work with as some people make it sound if you have a small enough tip.)
After that I attached a piezo speaker to one of the daughter boards (the original was missing...
I figured that the CMOS battery was probably running low so I soldered two AAA batteries together in series and wrapped it in electrical tape to make it look more like a battery pack. It was attached to the CPU board with double sided tape. That was about all of the hardware modifying.
After I had done that I proceeded to modifying the BIOS with a hex editor so instead of saying "AST Ascentia Notebook PC" it now says "NEPTUNE Quantum PC Q4". Hey, it sounds like something that nerds would go crazy over during the early 90s.
I was somewhat skeptical that after all my work on the sensitive motherboard that it would still work, and alas, it didn't. After looking around on the board I noticed that I had pushed one of the pins on the CPU far enough that it was touching another. >.< It wasn't enough to cause magic smoke or anything, but it did cause the computer to reset itself over and over again in a loop. So, I fixed that problem by using an Xacto knife to seperate the pins. Again, I tried to boot the machine. After I flipped the switch I added the fan started and the computer beeped! After doing a memory test the computer booted into MS-DOS 6.22.
Here are the specs on the computer:
Processor: Intel 80486 DX2/50
RAM: 12MB (4MB soldered on the motherboard, 8MB socketed)
Hard Drive: 250MB
Floppy Drive: 3.5" 1.44MB HD (only on a system this old could this be considered a specification
Display: Western Digital 64KB (supports up to 1024x768x256)
Ports: x1 Serial, x1 Parallel, x1 PS/2, x1 VGA
Now pictures on what's been completed.
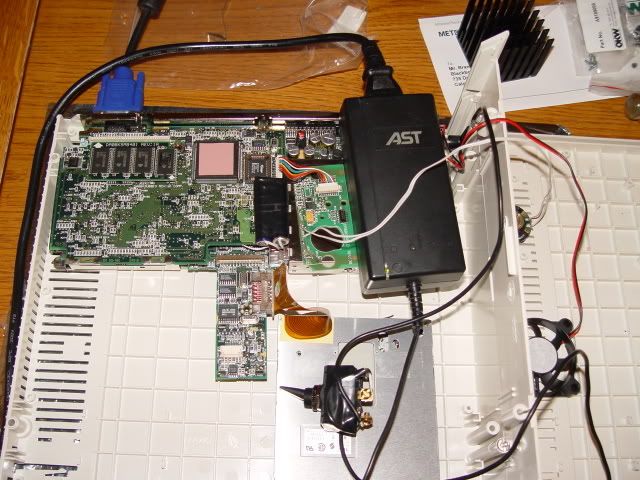
The inside of the case before being assembled. The power brick will stay inside the case. I still need to mount all the boards inside though... Also, see that heatsink near the top? I'm going to cut it down and put it on the 486.
<a href="http://photobucket.com" target="_blank"><img src="http://i132.photobucket.com/albums/q32/ ... C02494.jpg" border="0" alt="Photo Sharing and Video Hosting at Photobucket"></a>
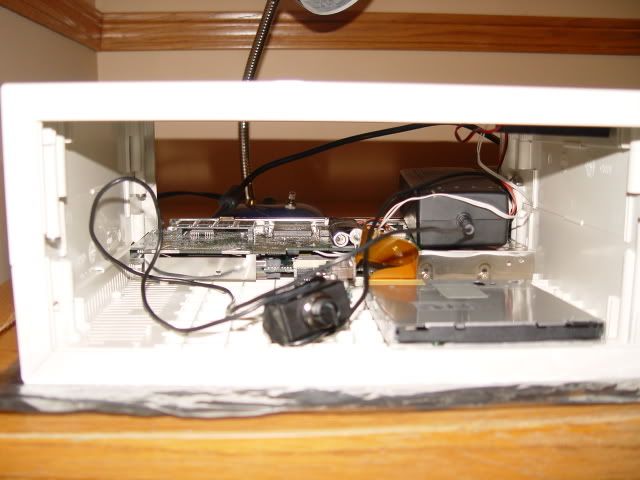
And everything inside from the front:
<a href="http://photobucket.com" target="_blank"><img src="http://i132.photobucket.com/albums/q32/ ... C02497.jpg" border="0" alt="Photo Sharing and Video Hosting at Photobucket"></a>
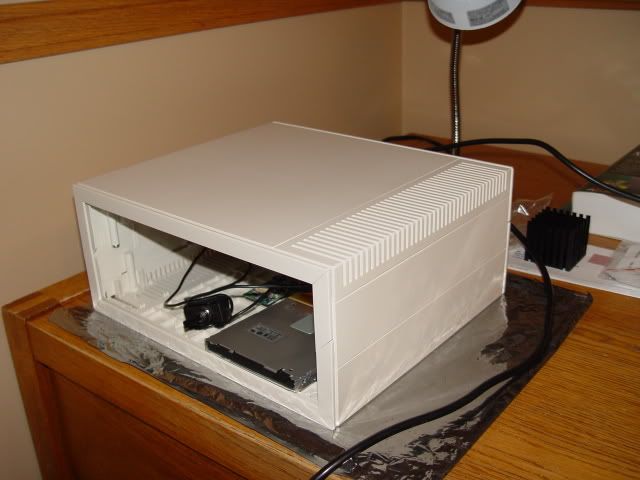
This is what the case looks like, minus panels.
<a href="http://photobucket.com" target="_blank"><img src="http://i132.photobucket.com/albums/q32/ ... C02498.jpg" border="0" alt="Photo Sharing and Video Hosting at Photobucket"></a>
So what's left to do?
- Cut the front and back panels
- Attach everything to the case
- Add the heatsink to the processor
- Install Windows 95
Also, I need to write a program to change the CMOS settings from DOS. To get into the Setup Utility you need to use the Fn key, which will not be on any external keyboard I'll be using.
Hopefully I'll finish cutting the case panels next weekend.
-iam


