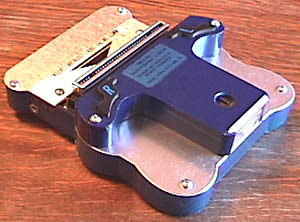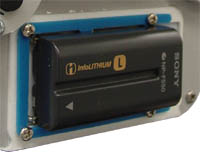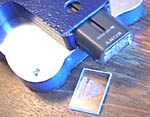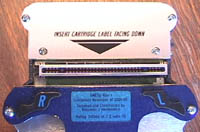
With the SNESp all assembled, I would like to discuss some design concepts I used on this unit.
BATTERY
COMPARTMENT

The
rear of the unit required a portion that could hold the battery and the L
& R shoulder buttons. Designing this was an opportunity to resolve
some issues I had with the PSp's battery clip.

On
the PSp, the battery was exposed, as with the VCSp Gold. This allows a
person to use larger batteries if they wish. A problem with that sort of
setup, however, is that the battery can come loose.
Also on the PSp, the battery was mounted horizontally to save more space
for the CD drive. Therefore, there is less room for your fingers to hold
the unit.

To
resolve this issue, the battery of the SNESp is completely contained
within the casing, and has a sliding cover. (Just like the good old
workhouse VCSp Rev 5) It is also mounted vertically, leaving a large space
for gripping. The match plate bolts to the T shaped battery case, then
that assembly is attached to the front of the case.

A
second brushed-aluminum match plate was installed at the top. Using these
aluminum match plates was an advantage over the match plate on the PSp,
which was plastic. Plastic can warp, especially when thin. Brushed
aluminum is quite rigid,
which allows me to add strength but not much thickness. (thickness is
bad!)
I guess you could say that the SNESp uses a lot of the design & construction techniques that were used on the PSp, but improves upon them.


He's an isometric view of the SNESp's screen portion. As you can see, it's raised above the surface of the unit to allow some of the screen to fit inside it. If you recall on the last page I mentioned that I removed the power supply for the cold-cathode tube on the TV. Had I not removed it, the TV would not have fit within the circular shape of the raised section. Again, everything affects everything else. A broad statement to be sure, but something that applies to portable system making quite a bit!
One of the biggest issues when building a device such as this is the Z depth of things, the thickness. To successfully build a device, you need to add up all the depths. It has a flow, a relationship. Like this: "the front of the case is .063 thick, the buttons are .2, they have a .05 indent in the botton of them, the switch under them is .2 with a .05 depress, the PCB under that is .063, the TV's PCB is .2 behind that, which leaves .25 for the SNES board which is .2 including surface-mount components."
The thickness of the objects is kept track of on the computer to see if anyone overlaps anything else, of course. But it still requires a lot of good old fashioned math and book learnin'. Hey, Huck! Let's go jump in the river!
Often
times I look for ways to save space, or cheat. On the SNESp, I cheated
using the brushed aluminum around the buttons...

Here is a side-view diagram of how the buttons were done on the SNESp. (Ironically, it looks a lot like an Atari 2600 game...)
The purple thing is the button. It has a ring around the bottom to keep it from falling out. A good feature, I think. The blue stuff represents the SNESp case itself. The black thing is the tactile switch. Lastly, the gray line is the brushed aluminum.
Ok, now if the ring around the button was below the level of the case, that would push the switch down lower, which would pushed EVERYTHING inside the case lower, and then it might not fit within the usual 1 inch!
So, what to do? Use an excessive number of paragraphs? That, and use the brushed aluminum to my advantage! The ring of the button is at the same level of the casing, and the button is held in place by the brushed aluminum! As I like to say, 'Hey, it was there anyway"
This idea was stolen from my Vagabond project. Someday I should finish that... To let out a secret, the SNESp's design is very much like what I had in mind for the Vagabond. Lots of brushed aluminum plating!

Another day ends in Wisconsin...
...with my mission completed. The SNESp is now a reality. What system, what project, what adventure could be next? What stories are left to be told? To what end will my portable projects take me?
I guess we'll have to wait and see!
After all the excitement
of this "How I Did It", and especially the surprise
anti-climatic ending, it's time to return ![]() so you can catch your breath.
so you can catch your breath.