|
|
|||||
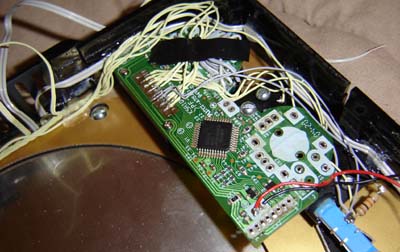
Now comes the tricky part... wiring stuff together! The first thing up was the controller board from the PS2 controller. I rewired the left analog stick at a 90 degree angle so I could place the board like this in the case:
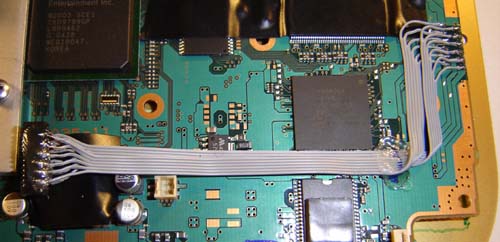
I then used a bunch of thin Ultra ATA hard drive cable to wire all the buttons to the board. (Square, X, shoulder and what not) In the lower-right-hand corner of the above photo you can also see the PS2 power on/off switch. Doing this doesn't allow the buttons themselves to have analog function anymore, just on/off... What? You didn't know they were analog? They are! No, really! VERY useful you know! Sarcasm drip drip. The DVD drive has 3 cables going to it: the DVD access cable (not the official name), the DVD motor cable (also not the official name) and finally the DVD head positioning motor cable (get this - not the official name). Luckily the trickiest cable - the access cable - was long enough to reach the existing jack on the board. The other 2 had to be rewired. The motor cable is shown rewired below:
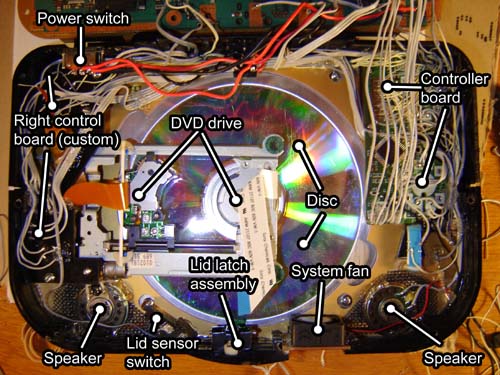
As you can see the jack has been moved to a new position. This may look like a pain in the butt but it's nothing compared to the sheer horror the access cable WOULD have been. Now I will stop talking about how difficult something I didn't do would have been because it's rather pointless. That's like saying "Wow, Mt Everest looks like it would be really hard to climb had I climbed it!" This next photo shows EVERYTHING installed in the front of the PS2p case, complete with labels to help!
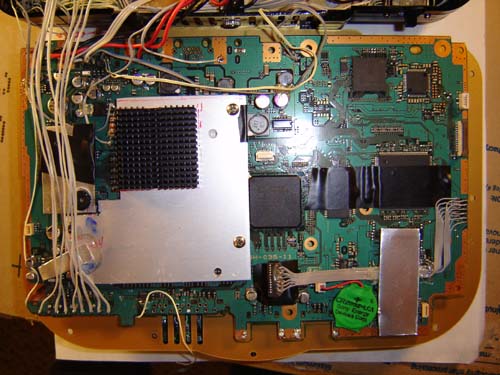
All this junk barely fit in the main 1" portion of the case... but "barely" is better than "didn't" so I was happy! And here's the rear half of the case, the part with the battery. The PS2 board just kind of sits there unsecured, which is OK because once the unit is assembled there's NOWHERE it can go. Not a heck of a lot of cable actually connects to the board. You can see the system battery and an amazing tin-snipped aluminum heatsink in the lower right-hand corner.
Well, all that wiring sure was fun! (Almost as much fun as a root canal during a 12 hour flight in coach on a plane that ran out of beer) Time to move onto the final assembly! Final Assembly
|
|||||