|
|
|||||
The time had come to
create a rough idea of how the unit should be constructed. I grabbed all
the essentials, and using electrical tape I taped all the parts together
in different configurations.
I worked long into the night, experimenting to find the right one…
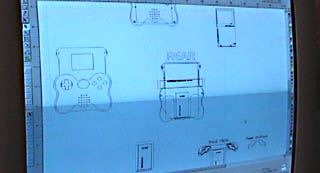
All the parts, such as the main PCB, screen, controls & battery are measured and reproduced as shape on the computer. These shapes are then arranged as I see fit. Typically, each part is given about .031 inch clearance on all sides. Then, to create the ‘walls’ of the case I add another .1 inch, on average. The hardest part in the design of any of my systems is the case. First off, you've got parts that are all intended to be used in something else. They can only be sliced up so small before they stop working. Second, you've got to find room for everything. It may not sound like a big deal, but often times moving the battery compartment an eight of an inch can cause the joy pad to move, which then bumps into the post holding the screen, and so on.
Now,
the minimum size the case can be is the size of the SNES circuit board.
That's a square shape. Now, you can make a system square, Lord knows
I've done it enough. But to add functionality and visual appeal, it's
often best to INCREASE the size of the unit. You'll notice the SNESp has
'flare-outs' on the sides of the unit below the controls. These do 2
things: They look cool, AND they provide a rest for your palms.
Therefore, the weight of the unit pivots at your fingers when you hold
it, and the flares rise UP into your palms and stop.
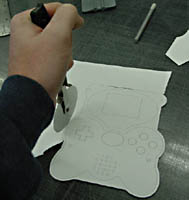
Once
I have a design that looks like it might work, I print it out actual
size. I then carefully cut it out, and have a pretty good mock-up that I
can compare parts to and test for ergonomics.
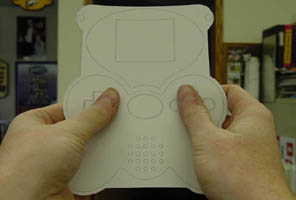
One
of my main design goals with the SNESp was to make it look cool. The
original SNES had a famously cheesy design, so I decided that I would
attempt to make my SNESp as stylish as possible. I decided to use lots
of brushed aluminum and rounded shapes. The main control pad of the
SNESp is the same size as an original SNES controller. And unlike the
VCSp and PSp, I changed the color scheme of the unit from the original.
I choose metallic blues and blacks with gold screws.
With
the unit & guts designed, the next step is clear: ROUTING THE CASE! But,
can I get into the shop?.... Getting into the Shop! (To
rout the case)
|
|||||