Game Gear Evolution

Includes but not limited to: SNES, Genesis, Sega CD, PlayStation 1, Nintendo 64, Dreamcast, Game Gear and I guess the Virtual Boy.

Moderator: Moderators

G-force
Moderator
Posts: 3609
Joined: Mon Apr 19, 2004 1:43 pm
Location: Sweet home Indiana
Contact:

Post by G-force »

lol, thanks. I think that was a compliment ;)

All I've done since my last update is remake the battery lids and add come controller ports.

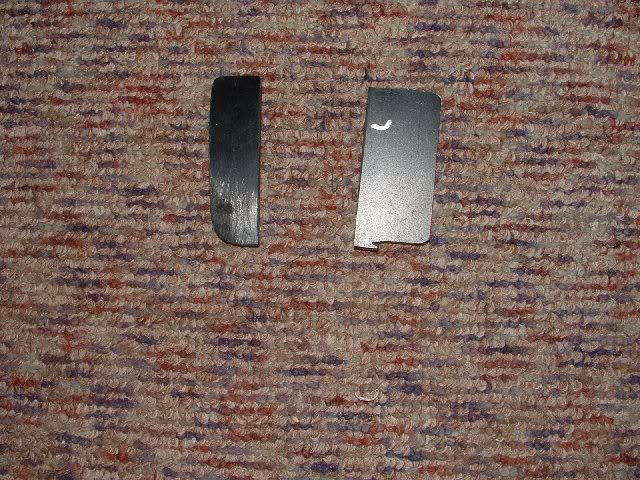
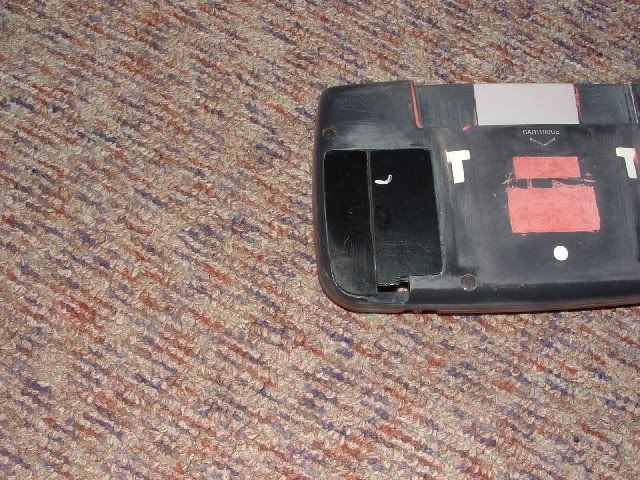
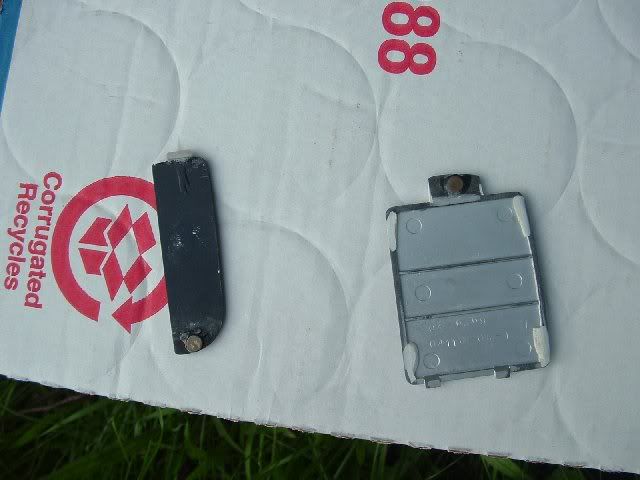
For the right hand side I only needed one lid, and I already had the lid for the other side. So I went ahead and made the 1 AA lid from scratch.

First I dremeled the previously glued plastic out.
http://img.photobucket.com/albums/v510/ ... emoved.jpg

Then dremeled and sanded new pieces from scrap plastic
http://img.photobucket.com/albums/v510/ ... pieces.jpg
http://img.photobucket.com/albums/v510/ ... _place.jpg

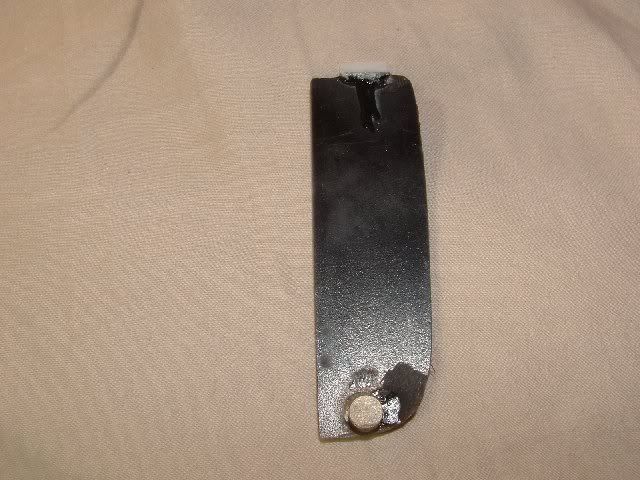
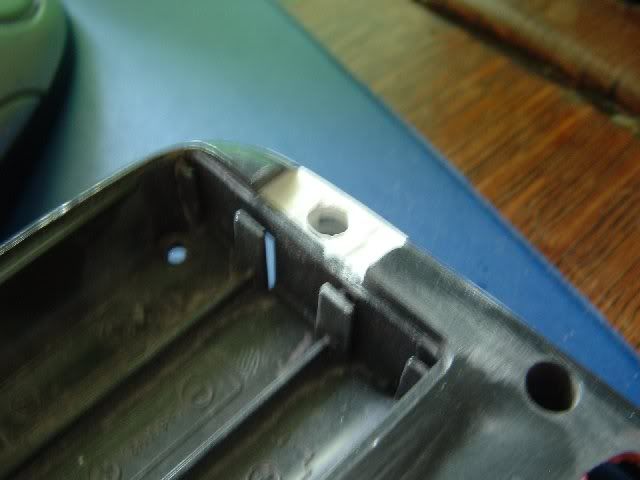
I glued the right side piece in place and superglued it in place. Then put bondo marine putty in the corner, then when hardened dremeld it flat. I decided to use some really powerful tiny magnets from radio shack (part # 64-1895) to hold the lids down. So I drilled a hole for the magnet to fit in. I also put spot putty on the edges of the superglued piece.
http://img.photobucket.com/albums/v510/ ... redone.jpg

The lid was kinda hard because it had to have a tab sticking out that would fit underneath the plastic of the case to hold it in place. So just glued a piece of plastic on and dremeled until it worked.
http://img.photobucket.com/albums/v510/ ... AA_lid.jpg

The lid was a little shorter than the rest of the case, so I put some marine putty on top of the lid and then sanded it to fit.

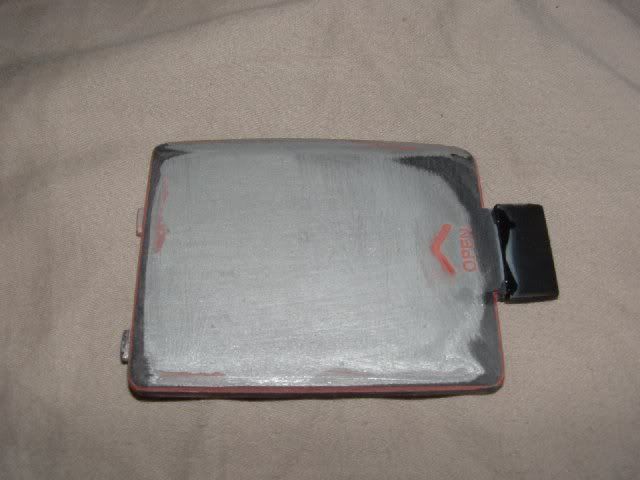
Then, just for the heck of it, I converted the 3 AA lid from a tab setup to magnets. Its really cool when the lid closes all by itself, you have to try it to get it. ;)

I cut off the tab from the lid and glued a piece of plastic on the end
http://img.photobucket.com/albums/v510/ ... AA_lid.jpg

I drilled a magnet hole like before
http://img.photobucket.com/albums/v510/ ... rilled.jpg

BTW, supergluing the magnets in the hole close enough to touch perfectly but not letting them get superglued together was tricky. Thankfully, gel superglue made it easier and I was able to just put it on the back of the magnet in the case, wait for it to dry, then take off the lid (that already had a magnet glued on) adn add extra glue to make it stay there. Though it seems it would be that easy, several times the magnets came out of the hole or got glued to each other, and it was just all around tricky.

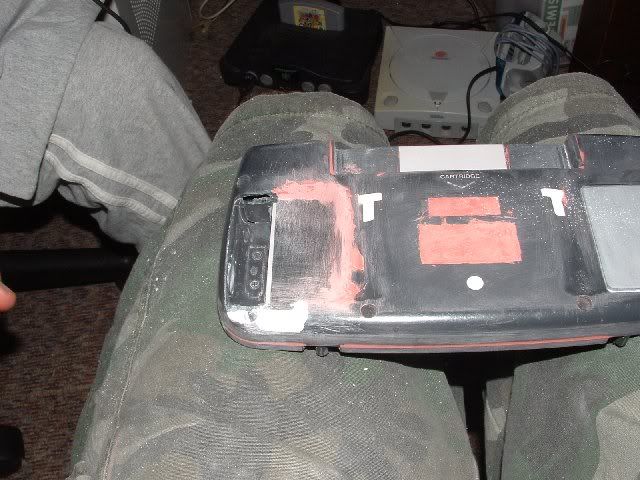
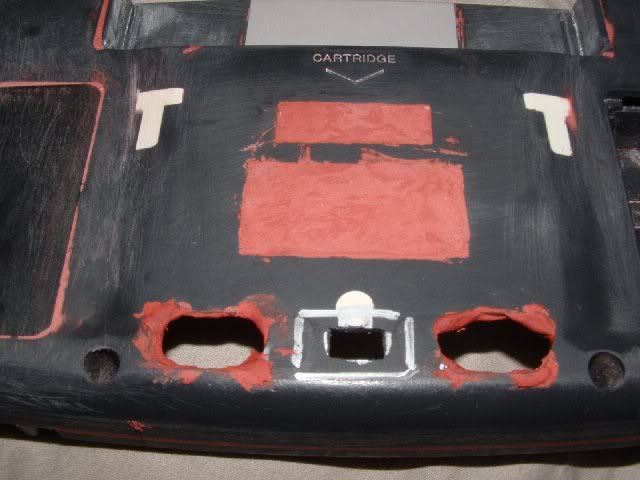
With that done, I moved onto the contorller ports. I could have just bought some sub-d connectors from radio shack, but I wanted them black now silver, and since I already had a Genesis (they ahve black connectors)and no real money to spend on parts, I stole them off my old Genesis portable.

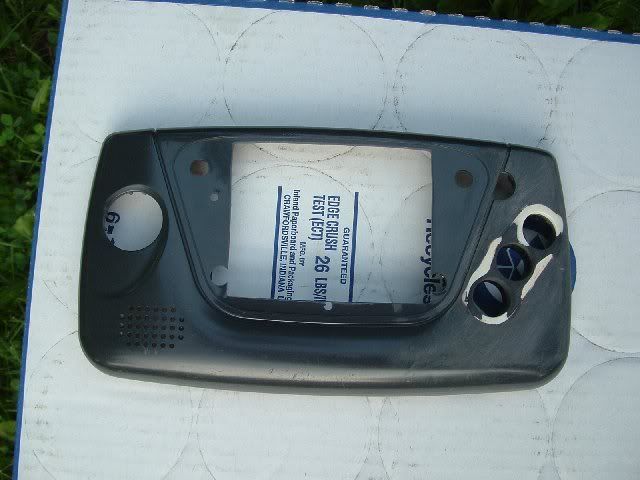
After desoldering them, I cut them in half so that a player 1 internal/external switch could fit inbetween them. Then I just dremeled the holes. They were a tiny bit off so I put some spot putty on.
http://img.photobucket.com/albums/v510/ ... ondoed.jpg
(BTW, even though the spot putty package says now to touch this stuff to your skin I blatantly ignored it because I have no rubber gloves and its too hard to apply with anything other than a finger. If I develop cancer I'll know why.)

The switch hole was just a hole then I sharpened it with a knife.

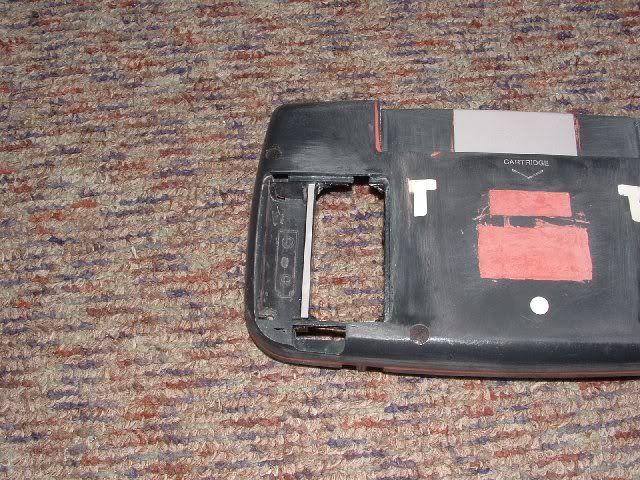
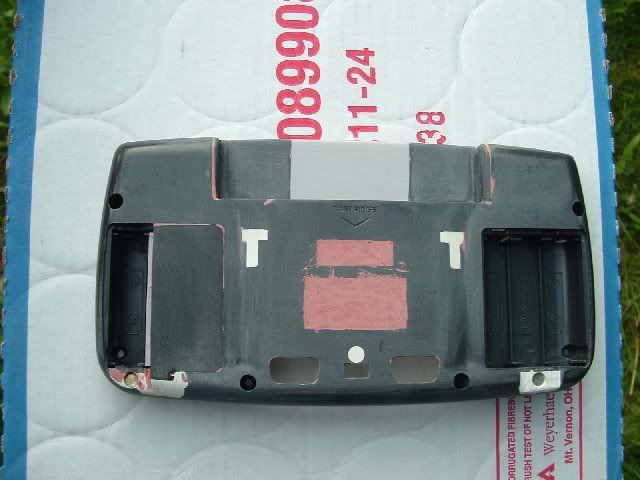
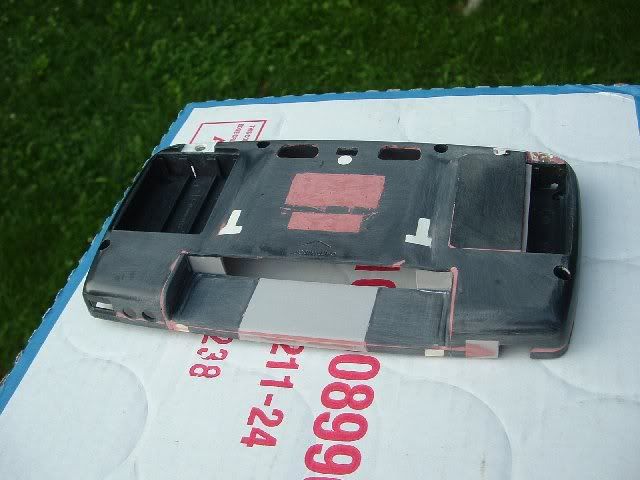
So all caught up now, this is what the back looks like currently
http://img.photobucket.com/albums/v510/ ... y_done.jpg
Still needs fine sanding though.

Right now I'm a bit stuck because I want to keep the TV part of the screen working. I was thinking I could have an antenna on a headphone jack plug into a headphone jack and switch over the TV from Av input to TV mode. But the AV plug/switch (the switch is built into the plug) is somewhat complex and I dont quite understand how it works yet. So if you have any idea on how to do that, post away.

Oh yeah, I also cant decode if I want a headphone jack or AV out. I can't ever remember using the headphones on any of my GameBoys or my DS. And av out seems to be defeating the purpose of the whole project, and I never used it on any of my previous portables. So I dunno.
Skyone
Moderator
Posts: 6390
Joined: Tue Nov 29, 2005 8:35 pm
Location: it is a mystery
Contact:

Post by Skyone »

Great job. Is the cart going to stick out like that though?
G-force
Moderator
Posts: 3609
Joined: Mon Apr 19, 2004 1:43 pm
Location: Sweet home Indiana
Contact:

Post by G-force »

Skyone wrote:Great job. Is the cart going to stick out like that though?
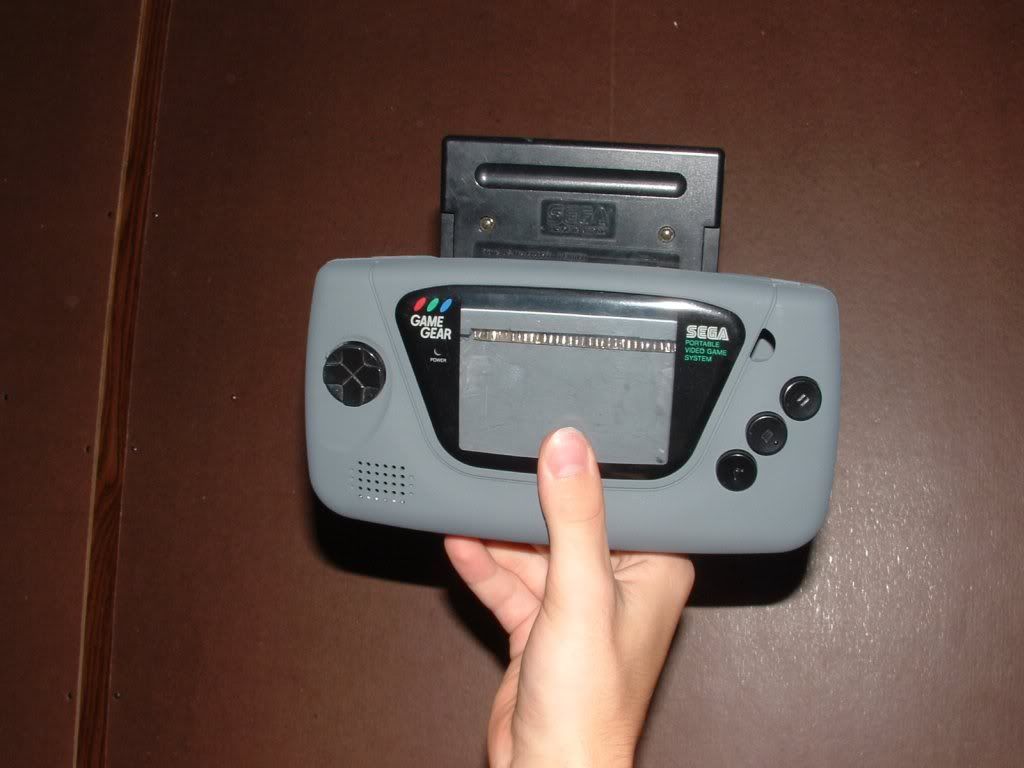
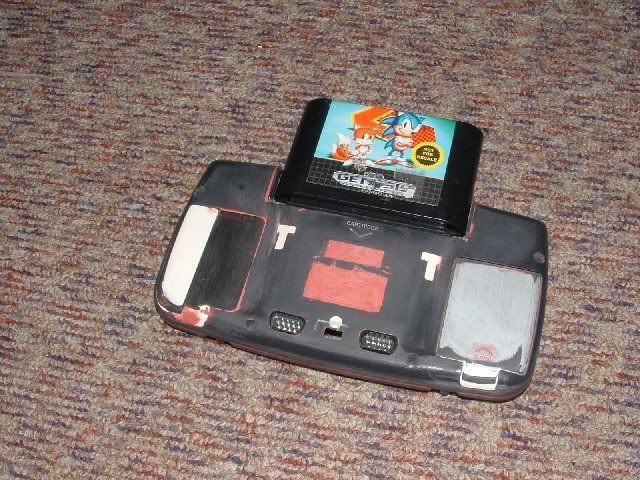
Yeah it does. Triton already told me how he disproved of it, lol. It couldn't be helped though, the LCD unit is fairly thick and forced me to keep the cartridge above the case a bit. But I don't mind it, so PFFFT! :P
It'll still be neater then the Nomad I think. Cheaper at least, it's only cost me $40 for everything thus far.
XPCportables
Posts: 1020
Joined: Mon Aug 08, 2005 3:27 pm
Location: The end of time...

Post by XPCportables »

hows about trying to slide the cart slot like 1/2" down into the case then put plastic over the opening
like so
Image
G-force
Moderator
Posts: 3609
Joined: Mon Apr 19, 2004 1:43 pm
Location: Sweet home Indiana
Contact:

Post by G-force »

I suppose I could do that, but it would stick out and add depth to the unit. And it's not really needed since the connector holds the cartridge firmly in place against the case. But if I have any trouble I'll just melt a piece of acrylic to fit over it and just screw it in place.
Hey just realized, it looks like the DS Lite and a GBA cart... :P

Skyone came up with an interesting idea of painting a gold ring (as in Sonic) on the case. I think that could look pretty neat having it go all around the sides of the case or something, so I'm gonna sketch it up and see how it looks. More ideas are welcome!
cowsgoquack101
Senior Member
Posts: 1981
Joined: Thu Aug 04, 2005 9:21 am
Steam ID: cowsgoquack101
Location: Cold, grey Indiana!

Post by cowsgoquack101 »

Fing A man, just awesome!
Metroid fan
Senior Member
Posts: 2158
Joined: Fri Apr 15, 2005 2:36 pm
Location: Somewhere in the universe
Contact:

Post by Metroid fan »

G-force wrote:I suppose I could do that, but it would stick out and add depth to the unit. And it's not really needed since the connector holds the cartridge firmly in place against the case. But if I have any trouble I'll just melt a piece of acrylic to fit over it and just screw it in place.
Hey just realized, it looks like the DS Lite and a GBA cart... :P

Skyone came up with an interesting idea of painting a gold ring (as in Sonic) on the case. I think that could look pretty neat having it go all around the sides of the case or something, so I'm gonna sketch it up and see how it looks. More ideas are welcome!
I love my ds lite :D It makes me so happy! And I love your GG!
CronoTriggerfan
Moderator
Posts: 4131
Joined: Fri Jan 27, 2006 3:07 pm
Location: University of Michigan - Ann Arbor
Contact:

Post by CronoTriggerfan »

G-force wrote:I suppose I could do that, but it would stick out and add depth to the unit. And it's not really needed since the connector holds the cartridge firmly in place against the case. But if I have any trouble I'll just melt a piece of acrylic to fit over it and just screw it in place.
Hey just realized, it looks like the DS Lite and a GBA cart... :P

Skyone came up with an interesting idea of painting a gold ring (as in Sonic) on the case. I think that could look pretty neat having it go all around the sides of the case or something, so I'm gonna sketch it up and see how it looks. More ideas are welcome!
I really think you should cover up the cart slot. It'd look sweeter, plus it'd only be thicker by about 1/16". And why whould you need to even screw the piece in? If I were you, I'd just sand, super glue, epoxy, bondo, sand again, then paint. That's a VERY strong hold, I used that method on my SNESp MKII.

Yah, having a gold ring on it would be pretty sweet. I think in addition, you should call it the "Nomad Advance" and then paint in the Nomad logo and then the ADVANCE that's on the GBA; pure irony at it's best :lol: !

It's looking great! If Triton's the king of frankenmods, I say we make you king of case mods! With me at a close second, naturally!

EDIT: Woah! I just saw that comment on the DS Lite.....BAD G-force! *CTFan's DS Lite sees post* Oh, it's okay! Don't let the bad man hurt your feelings. *Holds DS Lite close* Wanna play some Advance Wars? Would that make you feel better?

See what you did G? Now I gotta go playing Advance Wars with him. Well, I suppose that's not ENTIRELY bad :lol: !

CTFan
Image
G-force
Moderator
Posts: 3609
Joined: Mon Apr 19, 2004 1:43 pm
Location: Sweet home Indiana
Contact:

Post by G-force »

I feel awful, really.

Trust me guys! It doesn't need a cover! Maybe it was just the pic, but it works great as-is. And if I did it would stick out more like 1/4" plus the thickness of the plastic. Not cool. This way the cartridge magically floats in place ;)
And the screw in idea thing was for if I decided I wanted a cover after it had already painted.


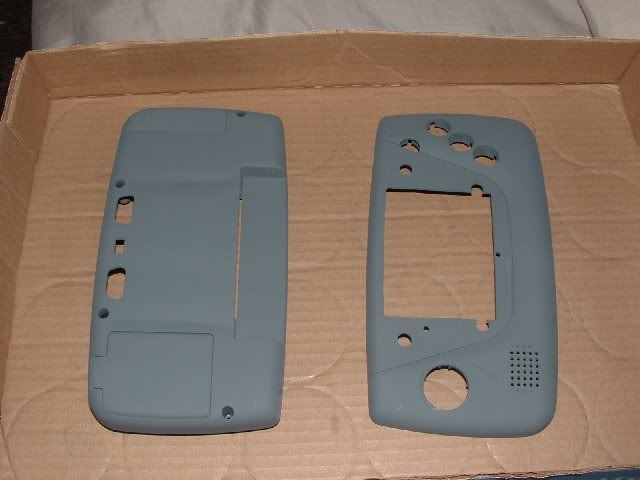
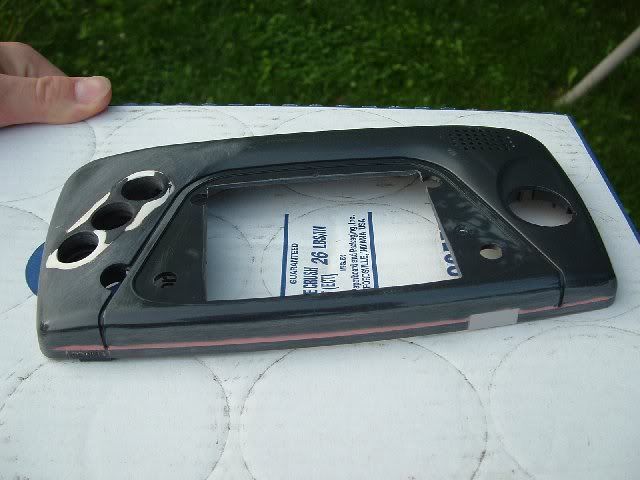
Okay, I think I'm all done with the major case glueing and all that (better be). So I got the fine grit (320) sanding done and then put the first primer coat on.

Here's what it all looked like before primer
Top half
http://img.photobucket.com/albums/v510/ ... _ready.jpg
http://img.photobucket.com/albums/v510/ ... primer.jpg

Back half
http://img.photobucket.com/albums/v510/ ... _ready.jpg
http://img.photobucket.com/albums/v510/ ... _angle.jpg

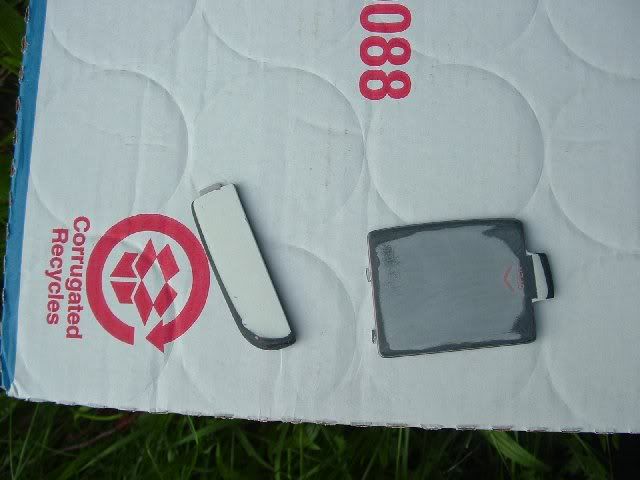
Lids
http://img.photobucket.com/albums/v510/ ... ds_top.jpg
http://img.photobucket.com/albums/v510/ ... bottom.jpg

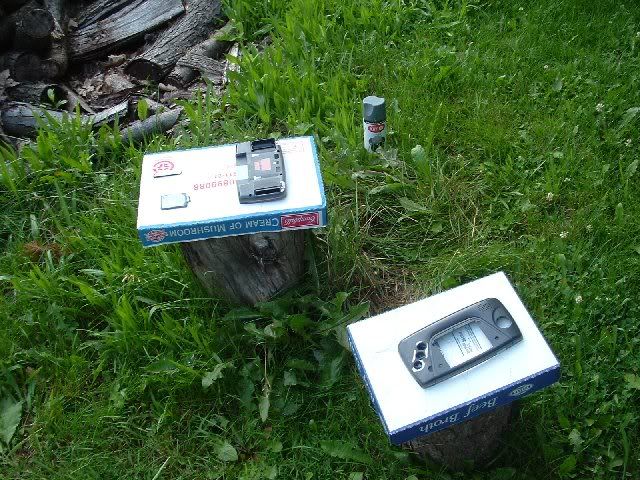
All the parts were thoroughly washed with water and a clean rag and then dried. Then came out the primer. I used Krylon all purpose primer (gray in appearance).

To keep bugs from getting in the paint or on the case as you would get just setting the painting boxes in the grass, I put them on top of some logs.
http://img.photobucket.com/albums/v510/ ... t_bugs.jpg

And now it actually looks like something! :D
Image

You can't tell from the pic, but there are a couple very small holes in the bondo I missed before primer, so I need to fix that. And you also can't tell from the pic but there is a faint outline anwhere bondo is, for some reason the sanding makes the bondo all ever-so-slightly lower than the case. So all I need to do is sand anywhere there's bondo and it will look flawless. Oh, and after another coat (or two) of primer I still have to wet sand the case before the main color (which I still have to buy, prolly satin black).

One step I forgot to mention previously: Since the screen is 4" the GG's 3'5" (or whatever it had) screen opening was too small, so It had to be dremeled and then sanded with a sanding block. Turns out the screen protector is larger than the old Game Gear screen so it will work on the 4" screen.

I suppose I need to get working on that radica wiring eh? My room gets pretty hot when soldering (ormaybe it jsut feels like it), so I've been putting it off.

EDIT: I just had to do a mock up, check it out! I'm liking this..
Image
Sparkfist
Forum Administrator
Posts: 6754
Joined: Tue Apr 20, 2004 7:12 am
Location: Michigan

Post by Sparkfist »

Looks nice, really nice case mod. Kind of odd that you went with such a light shade of gray. I would have thoug that it being a custom build of how the Nomad should have been you'd keep it with the charcoal gray or black.
vskid wrote:Nerd = likes school, does all their homework, dies if they don't get 100% on every assignment
Geek = likes technology, dies if the power goes out and his UPS dies too

I am a geek.
G-force
Moderator
Posts: 3609
Joined: Mon Apr 19, 2004 1:43 pm
Location: Sweet home Indiana
Contact:

Post by G-force »

Sparkfist wrote:Looks nice, really nice case mod. Kind of odd that you went with such a light shade of gray. I would have thoug that it being a custom build of how the Nomad should have been you'd keep it with the charcoal gray or black.
Heh, thats just the primer, color is still to come. And it's gonna be black.
bicostp
Moderator
Posts: 10491
Joined: Mon Mar 07, 2005 5:47 pm
Steam ID: bicostp
Location: Spamalot
Contact:

Post by bicostp »

You definitely have FrankenCase talent. 8)
Skyone
Moderator
Posts: 6390
Joined: Tue Nov 29, 2005 8:35 pm
Location: it is a mystery
Contact:

Post by Skyone »

I just can't wait for that gold leafing. ;)
cowsgoquack101
Senior Member
Posts: 1981
Joined: Thu Aug 04, 2005 9:21 am
Steam ID: cowsgoquack101
Location: Cold, grey Indiana!

Post by cowsgoquack101 »

Awesome G-force! Even primered it looks done. You got skillz!
geekbait111
Posts: 413
Joined: Tue Feb 14, 2006 9:15 am
Location: hiding your attic...waiting

Post by geekbait111 »

Nice Job! Great Franken-mod toO!
Heh, thats just the primer, color is still to come. And it's gonna be black.
YAY BLACK! genesis is weird gray :lol:.

can't wait for the final product, though it already looks like it :D
Post Reply