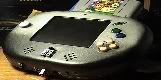
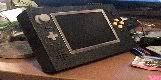
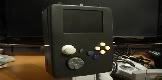
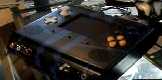
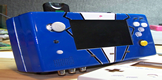
Tchay's Prestigious Gamecube Portable(awaiting resurrection)

Includes PS2, Xbox 1, GameCube (but not the Phantom Game Console)

Moderator: Moderators

Tchay
Posts: 643
Joined: Sun Apr 12, 2009 6:42 pm
Location: Hollywood

Tchay's Prestigious Gamecube Portable(awaiting resurrection)

Post by Tchay »

ON HOLD UNTIL I FINISH PROJECT P


The Prestigious

This is my prestigious Gamecube Portable worklog. In this worklog, I have set the bar high. Nothing will be without modification in this portable. This will be the smallest and most unique Gamecube portable ever constructed. In this worklog you will have the opportunity to see me transform from a noob to a portabilizer and learn how to do the same.


Small Motor (DD), proof of concept - may not matter, but its another slimming idea if need be.
Image

Note that I edited this first post to show more relevant information.
Last edited by Tchay on Tue Sep 25, 2012 3:52 pm, edited 21 times in total.
Image Image
samjc3
Posts: 1086
Joined: Sun Feb 15, 2009 8:05 pm
Steam ID: samjc3
Location: burning and pillaging!!

Re: Tchay's GC Worklog

Post by samjc3 »

Tchay wrote: If anyone knows of a way to remove these lil guys then let me know
use a screwdriver :P

why wont you melt a pen? its fun! (but i am a pyro)
AfroLH wrote:
HotDog-Cart wrote: Also, the codename stuff adds a little bit of sexyness, in my eyes.
Yeah well Alcohol adds a little bit of sexyness in my eyes, but I dont drink it all the time. :wink:
SpongeBuell wrote:As proof, I offer this picture of a monkey on my head.
thewise1
Portablizer Extraordinaire
Posts: 1413
Joined: Sun Jan 04, 2009 8:18 pm
Location: Sitting on my pile of authentic minnesota dirt

Re: Tchay's GC Worklog

Post by thewise1 »

The six pin screws are called torx screws. You can normally get them in a kit.

And I doubt that it will be possibly to get the gamecube and everything down to that specific size.
ImageImageImageImageImageImage
Mario
Posts: 1383
Joined: Mon Mar 05, 2007 7:20 pm
Location: Sunny California

Re: Tchay's GC Worklog

Post by Mario »

Like he said, optimistic! :) As for those screws, looks like you could just use a regular flathead.
Image
Valium
Posts: 1412
Joined: Wed Jun 06, 2007 12:08 pm
Location: Nova Scotia, I'm over from kurt

Re: Tchay's GC Worklog

Post by Valium »

Twist the screws with needle nose pliers.
Image
Tibia
Posts: 1319
Joined: Thu Feb 28, 2008 2:02 pm
PSN Username: Tibia1013
Steam ID: Mulder101361
Location: Istanbul, not Constantinople
Contact:

Re: Tchay's GC Worklog

Post by Tibia »

Your local hardware store should have those torx bits for something like a buck or two. I love torx. They don't strip like phillips.
This post brought to you by David Duchovny's glorious nipples.
Tchay
Posts: 643
Joined: Sun Apr 12, 2009 6:42 pm
Location: Hollywood

Re: Tchay's GC Worklog

Post by Tchay »

Thx guys, the needle-nose pliers did the trick (well for one of them that is).

Here, you can see the laser chips:
Image

Here is the shaft that has the laser go through to the lense. Now the million dollar question is: can the height of the shaft be reduced and still have the laser-to-lense reflection be working properly???? Now either someone knows the answer or I have to see for myself :wink:
Image

Here is a better view of the height of the shaft. Would shaving off a bit destroy the laser-lense ratio??? Probably...
Image

Thats all for now! More to come.
Image Image
kasar
Posts: 634
Joined: Tue May 15, 2007 2:36 pm
Location: 127.0.0.1
Contact:

Re: Tchay's GC Worklog

Post by kasar »

really nice man.

glad to see you finally started your own topic with toons of pics, I can see you have some great ideas for the DD, looking good,looking good ;)

sorry hear that about your gf :cry:
Tchay
Posts: 643
Joined: Sun Apr 12, 2009 6:42 pm
Location: Hollywood

Re: Tchay's GC Worklog

Post by Tchay »

Okay! So sorry about the slow progress (I am a noob after all, and don't you forget it :wink: )

I've got some BIG plans (well hopefully not :roll: ) for my GC portable. After ordering another gamecube only to find that ITS NOT A REV C UGGHHHH, I now have a total of 3 gamecubes to practice on and ruin :wink: my GC portable must be a rev C since that allows for more slimmability (not a word??).

I found a Rev C motherboard on ebay for $10 plus shipping = $16.00....If you know of a lower price out there, let me know thx!

Now that being said, can I get away with simply hooking up a Rev C motherboard to one of my 3 rev A gamecubes??? (Hopefully that question hasnt been answered yet on this forum...)

Techknott's old worklog inspired me to not give up on trimming the motherboard. Its possible to cut out a lot of the board, just very tedious to keep track of all the traces.

@Kasar - i appreciate that, but its all good. Theres always something to learn from a relationship :wink:
Image Image
Tchay
Posts: 643
Joined: Sun Apr 12, 2009 6:42 pm
Location: Hollywood

Re: Tchay's GC Worklog

Post by Tchay »

Update yay! Well its sorta a lame update, but being a noob and all, any update is a good one :wink: basically, all I've done is relocated the powerboard, but I got some nice pics for any other noobs out there who are scared of diagrams. Credits to Kasar for the easy directions!

4 wires (12v connected to 5v - credits to SS) and an extra ground wire for mucho power
Image

In case you're a fan of top to bottom
Image
Note that only 4 wires are needed. I have 2 black wires for ground to ensure a good discharge (right terminology? I hope.)
Last edited by Tchay on Thu Nov 05, 2009 9:23 pm, edited 1 time in total.
Image Image
kasar
Posts: 634
Joined: Tue May 15, 2007 2:36 pm
Location: 127.0.0.1
Contact:

Re: Tchay's GC Worklog

Post by kasar »

yay! , nice progress man ;)

btw, arent those wires a bit fat?

so, you finally decided to use the 4 wires reallocation mod, did you experimented problems with the DD after doing this mod?

just curius ^^

you are doing a nice progress, keep up the nice job mate.

edit: thanks for credits man ;)
Tchay
Posts: 643
Joined: Sun Apr 12, 2009 6:42 pm
Location: Hollywood

Re: Tchay's GC Worklog

Post by Tchay »

thx man. Yes, the wires are pretty fat....I'll have to find some sturdy thin wire somewhere. So far the best I will be able to do with the DD is the motor replacement (except this time im using a noticeably smaller motor to reduce the width of the DD, I glued on the cog and I still have to hook it up and test it :wink: )

I got a little carried away (again :lol: ) and I trimmed a little by the GBA player and digital port but I didnt break any traces and now the thing wont work, ugh. so I have to do some fixing...
Image Image
Tchay
Posts: 643
Joined: Sun Apr 12, 2009 6:42 pm
Location: Hollywood

Re: Tchay's GC Worklog

Post by Tchay »

Today marks the completion of 2% of my GCP (prototype) :lol: . I say prototype because this portable will lack certain features and be a "proof of concept" if you will. :wink: and considering that I still cant get the sound to work, its ganna have to be a prototype.

2% (2% for a noob is respectable right :roll: )
- slimmed DD, replacement motor (in the workings)
- ports removed
- powerboard relocation
- GC motherboard slimmed slightly
- controller board slimmed/modified (more to do)

To do:
- test out new motor for DD
- DD relocation (am I safe to use Techknott's diagrams, or was that just for PAL?????????)
- begin controller modifications/relocation
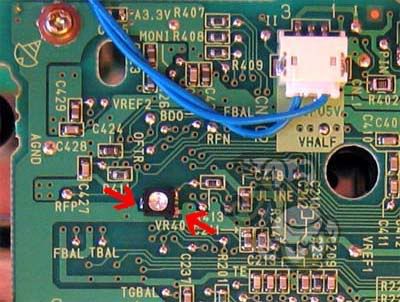
- **obtain variable resistor** i have a spare DD board, but WHERE IS THE VARIABLE RESISTOR???
- begin mem card A relocation, then solder a mem card to board
- begin modifying 2.5" game screen and relocating

plenty more after that, but this will keep me busy for a while :wink:

overall:
Image

controller board slimmed, battery relocated - this entire controller board isn't actually necessary, however. The only two things you would need from this board would be the circular battery and the resistor. You could then solder the wires from the controller straight to the spot on the MOBO that receives the controller cable.
Image

after I trimmed this area, the GC stopped working. But thankfully after I scratched along some traces and blew ALL over the board, it worked again (still w/out sound :evil: )
Image

this is the horrific soldering iron I have been using...ugh I need a new one...
Image

adios para ahora!

Kasar, why is it better to use tact switches for the controller????
Last edited by Tchay on Thu Nov 05, 2009 9:27 pm, edited 1 time in total.
Image Image
kasar
Posts: 634
Joined: Tue May 15, 2007 2:36 pm
Location: 127.0.0.1
Contact:

Re: Tchay's GC Worklog

Post by kasar »

Tchay wrote: - **obtain variable resistor** i have a spare DD board, but WHERE IS THE VARIABLE RESISTOR???
Image

Tchay wrote: adios para ahora!
you talk spanish? (just curius ^^, spanish here xD)
Tchay wrote: Kasar, why is it better to use tact switches for the controller????
well, I didnt used a lot of them really, I did the controller mod with all tact switches at first time.
but buttoms was not as responsive as desired, so I used two controllers at my second controller mod, one of them was intact to solder on it, and I cut the another one to get the D pad part, and the "A,B,X,Y" buttoms part.

I only used tact switches at start and Z buttoms.

if you are talking about my guide, it is an easy way to get all buttoms easly, but if you want better controls, I suggest cut a controller.
Tchay
Posts: 643
Joined: Sun Apr 12, 2009 6:42 pm
Location: Hollywood

Re: Tchay's GC Worklog

Post by Tchay »

si, un poco! Gracias para tu ayuda. Ahora necissito a freakin pinout for my 2.5" PS2 gamescreen. I emailed Sony and they wouldnt give me a schematic (guess they arent allowed???). :?
Image Image
Post Reply