one standoff is out. the second is becoming problematic...
the screw in the stand off will not come out because the standoff itself rotates with the screw. this didnt happen with the first one.. any ideas?
genesis 1 board with pic (big)
Moderator: Moderators
-
phantom92opera
- Posts: 260
- Joined: Tue Dec 26, 2006 11:07 pm

-
phantom92opera
- Posts: 260
- Joined: Tue Dec 26, 2006 11:07 pm
-
lovablechevy
- Portablizer Extraordinaire
- Posts: 1104
- Joined: Wed Nov 01, 2006 3:09 pm
- Location: busy with a project
- Contact:
woo hoo!!! i'm very excited for you!phantom92opera wrote:yay!
cart slot removed and have begun rewiring!!!
batteries - on the way
screen - will purchase today
control pad - rewired and will test for functioning later this week
system - capacitator removal (continue through the week)
charger and protection circuit - will order 2day
do you know what color you're gonna paint it...?
can't wait to see more progress!
they call me the Queen of Bondo, though maybe i should be called the Queen of Epoxy Putty
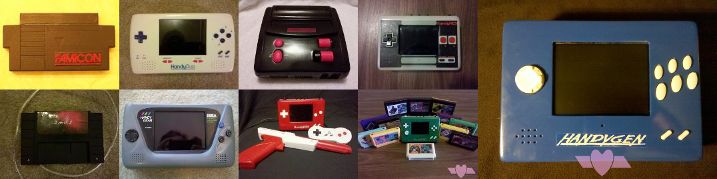
current project - code name: blue mushroom!
current project - code name: blue mushroom!
-
phantom92opera
- Posts: 260
- Joined: Tue Dec 26, 2006 11:07 pm
paint job is gonna be bangin. my original plan was a metallic military green but since im on a budget and ollies has $1.59 cans of paint, itll be a snakeskin pattern (using fishnets) ever heard of it... heres a good example.
http://forums.llamma.com/viewtopic.php? ... ht=fishnet
i have 2 shades of blue. or red and blue
i still have to get clear coat and sandpaper.
http://forums.llamma.com/viewtopic.php? ... ht=fishnet
i have 2 shades of blue. or red and blue
i still have to get clear coat and sandpaper.
-
mothatrucka
- Banned
- Posts: 588
- Joined: Sun May 04, 2008 12:21 pm


-
phantom92opera
- Posts: 260
- Joined: Tue Dec 26, 2006 11:07 pm
hey guys, before i purchase the smart charger for my li-poly's i emailed the company regarding the info listed. the charger charges and stops at 8.4 v not 7.4... after a full charge, wont that fry my psone screen??? should i attatch some kind of regulator to prevent screen "fryage"??
alright time for question 2.. if a quiz is quizical, whats a test?
haha alright really time for question 2.. im still having trouble with my soldering tips. they only last 1-2 uses and contintue to dull and get a well in the middle.. here are sum pics. i sand them down after each use but then eventually become 2 difficult to use...
and an update pic for all you watchers - 1/2 the cart slot wired up (row b) (with the exception of 3 wires which fell off after the pic) i give credit to all the others ive taken "cartslotrelocationizing" for granted from. it is rather monotonous but will be worth it
as far as paint.. i might go with a metalic silver and the blue i have.. then i will have a "dragon scale" effect.
thanks for coping with my made up words and come up with some names!!!
if i do the silver / blue paint i might do the "Sega Dragon" but that sounds cheesy (mmm cheesy)
phantom
alright time for question 2.. if a quiz is quizical, whats a test?
haha alright really time for question 2.. im still having trouble with my soldering tips. they only last 1-2 uses and contintue to dull and get a well in the middle.. here are sum pics. i sand them down after each use but then eventually become 2 difficult to use...
and an update pic for all you watchers - 1/2 the cart slot wired up (row b) (with the exception of 3 wires which fell off after the pic) i give credit to all the others ive taken "cartslotrelocationizing" for granted from. it is rather monotonous but will be worth it
as far as paint.. i might go with a metalic silver and the blue i have.. then i will have a "dragon scale" effect.
thanks for coping with my made up words and come up with some names!!!
if i do the silver / blue paint i might do the "Sega Dragon" but that sounds cheesy (mmm cheesy)
phantom
Last edited by phantom92opera on Thu Jul 03, 2008 2:57 pm, edited 1 time in total.
-
lovablechevy
- Portablizer Extraordinaire
- Posts: 1104
- Joined: Wed Nov 01, 2006 3:09 pm
- Location: busy with a project
- Contact:
nothing of mine has fried yet. those are the exact same things i'm using.phantom92opera wrote:hey guys, before i purchase the smart charger for my li-poly's i emailed the company regarding the info listed. the charger charges and stops at 8.4 v not 7.4... after a full charge, wont that fry my psone screen??? should i attatch some kind of regulator to prevent screen "fryage"??
thanks for coping with my made up words
phantom
they call me the Queen of Bondo, though maybe i should be called the Queen of Epoxy Putty
current project - code name: blue mushroom!
current project - code name: blue mushroom!
-
phantom92opera
- Posts: 260
- Joined: Tue Dec 26, 2006 11:07 pm
whoops left out the pics above... here they are
soldering tip (in pliers... that was HOT)


cart slot

ALSO!
does anyone know how much maH the genesis 1 board uses ( i took a lot of components off so it should use less than the standard number)
i belive the LED modded screen should use 700 but because im upgrading to a 7" screen i think it'll be around 800-900
my batteries r 5Ah though so they will provide at least 2-3 hours gameplay
soldering tip (in pliers... that was HOT)
cart slot
ALSO!
does anyone know how much maH the genesis 1 board uses ( i took a lot of components off so it should use less than the standard number)
i belive the LED modded screen should use 700 but because im upgrading to a 7" screen i think it'll be around 800-900
my batteries r 5Ah though so they will provide at least 2-3 hours gameplay
-
phantom92opera
- Posts: 260
- Joined: Tue Dec 26, 2006 11:07 pm
hey folks. disappointing news...
i finished rewiring the cart slot and low and behold .. no signal
ive triple checked wiring and will go over it again however this is the largest dead end yet.
the monotonous wiring has "gotten my goat" (avoiding profanity) and im pretty frustrated with the project. ive gotten no composite or rgb signal but after testing w/ a multimeter... voltages are in all the right places. im triple checking that the whole unit is grounded as i quickly wired it to the screen leaving only one spot on the board (near audio) grounded. i will reatempt to ground the original grounded dc jack spot by trace cutting since ive removed part of it in my "board shortening"
i will work on this next monday hopefully because i work all through then.
thanks for tuning in.
phantom
i finished rewiring the cart slot and low and behold .. no signal
ive triple checked wiring and will go over it again however this is the largest dead end yet.
the monotonous wiring has "gotten my goat" (avoiding profanity) and im pretty frustrated with the project. ive gotten no composite or rgb signal but after testing w/ a multimeter... voltages are in all the right places. im triple checking that the whole unit is grounded as i quickly wired it to the screen leaving only one spot on the board (near audio) grounded. i will reatempt to ground the original grounded dc jack spot by trace cutting since ive removed part of it in my "board shortening"
i will work on this next monday hopefully because i work all through then.
thanks for tuning in.
phantom
-
phantom92opera
- Posts: 260
- Joined: Tue Dec 26, 2006 11:07 pm
i really hate to bump but if anyone has any ideas.. please let me know..
i think i might have to reconsider this project as ive come so far but now have absolutely nothing... all pins on the board are getting proper connection via wire... either its the cart slot itself (not making contact with the cartridge) or i need a new mobo...
i think i might have to reconsider this project as ive come so far but now have absolutely nothing... all pins on the board are getting proper connection via wire... either its the cart slot itself (not making contact with the cartridge) or i need a new mobo...
-
phantom92opera
- Posts: 260
- Joined: Tue Dec 26, 2006 11:07 pm
ladies and gents this project is back in business
my 2 li-poly 3.7v cells (5Ah) arrived today from hong kong and so did my new genesis along with a shiny SJ3 for my noac project!
im waiting on my charger, prot circuit, and screen then all i have is minor soldering and assembly!
does anyone have a pinout from the board perspective for the a/v out jack (i have gamesx of the jack but i need to know the pin arrangement of the mobo. thanks!)
phantom!
engraving plastic
batteries
charger
protection circuit
7" screen (on way)
switching regulator (maybe)
rewire cart slot
build case
cut off some grounding strip and expansion port
my 2 li-poly 3.7v cells (5Ah) arrived today from hong kong and so did my new genesis along with a shiny SJ3 for my noac project!
im waiting on my charger, prot circuit, and screen then all i have is minor soldering and assembly!
does anyone have a pinout from the board perspective for the a/v out jack (i have gamesx of the jack but i need to know the pin arrangement of the mobo. thanks!)
phantom!
engraving plastic
batteries
charger
protection circuit
7" screen (on way)
switching regulator (maybe)
rewire cart slot
build case
cut off some grounding strip and expansion port
-
ShockSlayer
- Niblet 64
- Posts: 5059
- Joined: Thu Jun 29, 2006 12:47 pm
- Location: In my inbox.
Hmm, jumping in a little late on the progress, but, so far so good, from what I can see.
Anyways, one thing I would like to comment on:
That(paper, I guess?) model that you showed earlier, I think you will hate yourself if you put the controls so low, because from my recent portablizing adventures, I have learned that you will want your middle, ring, and pinky fingers of each hand supporting the bulk of the unit. I do not know your internals positioning, but you will probably want to have the controllers buttons in the middle to top half of the unit.
Just what I think, I have no experience whatsoever with sega's units.
SS
Anyways, one thing I would like to comment on:
That(paper, I guess?) model that you showed earlier, I think you will hate yourself if you put the controls so low, because from my recent portablizing adventures, I have learned that you will want your middle, ring, and pinky fingers of each hand supporting the bulk of the unit. I do not know your internals positioning, but you will probably want to have the controllers buttons in the middle to top half of the unit.
Just what I think, I have no experience whatsoever with sega's units.
SS
http://twitter.com/ShockSlayer" onclick="window.open(this.href);return false;
-
phantom92opera
- Posts: 260
- Joined: Tue Dec 26, 2006 11:07 pm
-
phantom92opera
- Posts: 260
- Joined: Tue Dec 26, 2006 11:07 pm
hiya guys,i know its been a bit but the gameglass 7" pstwoslim screen arrived today and im crackin this sucker open, its got a lot of nice features like a switch for 4:3 and 16:9 aspect ration and potentiometer volume and brightness controlls as opposed to the buttons. its also got 2 headphone jacks.
it however takes 8.5v to power it which worrys me slightly because my batteries are 7.4 together... more updates in the coming weeks!~
seeing that this was a 70 dollar screen and the rgb input is smd i think im gonna stick to composite even though its the crappiest resolution
phantom
it however takes 8.5v to power it which worrys me slightly because my batteries are 7.4 together... more updates in the coming weeks!~
seeing that this was a 70 dollar screen and the rgb input is smd i think im gonna stick to composite even though its the crappiest resolution
phantom
-
phantom92opera
- Posts: 260
- Joined: Tue Dec 26, 2006 11:07 pm
hey guys,
ive hit 2 bumps in the path to success when it comes to this project one slightly more significant than the other.. the screen requires a low amperage so it wont need LED modded however it requires 8.5v to run and therefore i will need new batteries.. fear not! the ones i purchased can go toward my noac or atari projects but it is still slightly upsetting... the other problem i have encountered is that the 7805 on the genesis 2 mobo has a whopping heatsink attatched with studs holding it in, seeing that i dont have a soldering gun,, this is more difficult to remove than all other parts on the board.... this project will be postponed until further notice
sadly
phantom
ive hit 2 bumps in the path to success when it comes to this project one slightly more significant than the other.. the screen requires a low amperage so it wont need LED modded however it requires 8.5v to run and therefore i will need new batteries.. fear not! the ones i purchased can go toward my noac or atari projects but it is still slightly upsetting... the other problem i have encountered is that the 7805 on the genesis 2 mobo has a whopping heatsink attatched with studs holding it in, seeing that i dont have a soldering gun,, this is more difficult to remove than all other parts on the board.... this project will be postponed until further notice
sadly
phantom