
nes/snes portable - finished page 14
Moderator: Moderators
-
phantom92opera
- Posts: 260
- Joined: Tue Dec 26, 2006 11:07 pm

-
lovablechevy
- Portablizer Extraordinaire
- Posts: 1104
- Joined: Wed Nov 01, 2006 3:09 pm
- Location: busy with a project
- Contact:
thanks! but my problem isn't with the board itself. it's the thickness of it all. i want the snes carts to go down inside the case, but i'm having problems getting enough space for it. the screen and snes boards fit fine by themselves with the batteries... it's just the stupid snes cart slot that is making it not fit.phantom92opera wrote:by how much is your board larger than the zn case?? im almost certain with the right cuts, you can narrow it down to size.. pm me some pics and dimentions. i'd be happy to help
they call me the Queen of Bondo, though maybe i should be called the Queen of Epoxy Putty
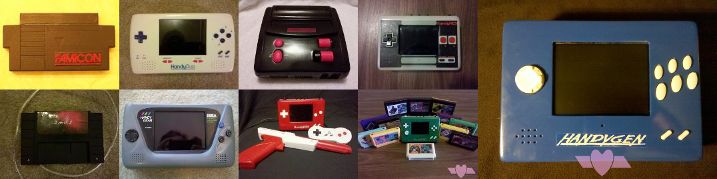
current project - code name: blue mushroom!
current project - code name: blue mushroom!
-
Life of Brian
- Moderator
- Posts: 2867
- Joined: Wed Aug 03, 2005 5:55 pm
- Location: Oklahoma
- Contact:

-
phantom92opera
- Posts: 260
- Joined: Tue Dec 26, 2006 11:07 pm
-
lovablechevy
- Portablizer Extraordinaire
- Posts: 1104
- Joined: Wed Nov 01, 2006 3:09 pm
- Location: busy with a project
- Contact:
there is no place to mount it. the back of the case is for the nes cart slot. it has to go inside. i'm not sure if it'll fit or not. i've not gotten that far. it it doesn't, i'll figure something out. but i'm not even working on it currently. i've moved on to something else.phantom92opera wrote:relocate it to a mounted position on l brackets?
they call me the Queen of Bondo, though maybe i should be called the Queen of Epoxy Putty
current project - code name: blue mushroom!
current project - code name: blue mushroom!
-
phantom92opera
- Posts: 260
- Joined: Tue Dec 26, 2006 11:07 pm
AHA! just use 1 cart slot! assign the pins to both ends and only the console turned on will read them?
if not possibly have it mounted parallel to the case.. thank god for mspaint
 this wont work if your r and l buttons are there though... although if positioned higher or lower... it may work
if not possibly have it mounted parallel to the case.. thank god for mspaint
 this wont work if your r and l buttons are there though... although if positioned higher or lower... it may work
Last edited by phantom92opera on Sun Jul 06, 2008 9:54 pm, edited 1 time in total.
-
lovablechevy
- Portablizer Extraordinaire
- Posts: 1104
- Joined: Wed Nov 01, 2006 3:09 pm
- Location: busy with a project
- Contact:
the nes and snes have completely different cart slots. 72 pins vs. 62 pins.phantom92opera wrote:AHA! just use 1 cart slot! assign the pins to both ends and only the console turned on will read them?
they call me the Queen of Bondo, though maybe i should be called the Queen of Epoxy Putty
current project - code name: blue mushroom!
current project - code name: blue mushroom!
-
phantom92opera
- Posts: 260
- Joined: Tue Dec 26, 2006 11:07 pm
-
lovablechevy
- Portablizer Extraordinaire
- Posts: 1104
- Joined: Wed Nov 01, 2006 3:09 pm
- Location: busy with a project
- Contact:
these ideas won't work. putting it on the side won't work for many reasons. one being that my l and r buttons are located there. and two being that that makes it extremely uneven looking.phantom92opera wrote:yes and the snes will fit into the nes.. right? just with 5 pins on each side extra.. merely get decals or draw guidelines where the borders of the snes cart should go to connect to the correct pins

the only space available is through the top.

the only other option i have is to scrap the back piece and start over and switch the nes and snes cart slots around. after all, and nes cart is thinner than an snes. but, i don't want to have to do that. too much work and hassle.
Last edited by lovablechevy on Wed Mar 18, 2009 10:17 am, edited 2 times in total.
they call me the Queen of Bondo, though maybe i should be called the Queen of Epoxy Putty
current project - code name: blue mushroom!
current project - code name: blue mushroom!
-
phantom92opera
- Posts: 260
- Joined: Tue Dec 26, 2006 11:07 pm

-
lovablechevy
- Portablizer Extraordinaire
- Posts: 1104
- Joined: Wed Nov 01, 2006 3:09 pm
- Location: busy with a project
- Contact:
it will be like this:

no other way will the handyduo be completed. the carts might stick out at different heights, but this is the design. i will accomplish this. trust me. i have a few tricks up my sleeve.
no other way will the handyduo be completed. the carts might stick out at different heights, but this is the design. i will accomplish this. trust me. i have a few tricks up my sleeve.
Last edited by lovablechevy on Wed Mar 18, 2009 10:15 am, edited 1 time in total.
they call me the Queen of Bondo, though maybe i should be called the Queen of Epoxy Putty
current project - code name: blue mushroom!
current project - code name: blue mushroom!
-
lovablechevy
- Portablizer Extraordinaire
- Posts: 1104
- Joined: Wed Nov 01, 2006 3:09 pm
- Location: busy with a project
- Contact:
i'm sorry to hear that, brian! what was it doin?Life of Brian wrote:I'm having mystery problems with my Retro Duo after I relocated the cartridge slot. I'm thinking about just buying a new one.
One of these days we'll see a finished Retro Duo portable...
i'm picking this back up. i believe i have solved my issue, but only time will tell. keep your eyes peeled for updates!
that's right, ppl! this project is back in full swing!
they call me the Queen of Bondo, though maybe i should be called the Queen of Epoxy Putty
current project - code name: blue mushroom!
current project - code name: blue mushroom!
-
schmellyfart
- Portablizer Extraordinaire
- Posts: 1151
- Joined: Sun Mar 05, 2006 8:29 pm
- Steam ID: schmellyfart
- Location: Gilbert, AZ
-
dragonball345
- Posts: 196
- Joined: Tue Nov 20, 2007 4:14 pm
-
lovablechevy
- Portablizer Extraordinaire
- Posts: 1104
- Joined: Wed Nov 01, 2006 3:09 pm
- Location: busy with a project
- Contact:
umm, thanks, but i got it figured out. and that would make the case not close properly.dragonball345 wrote:get some aluminum and make it like trim that will thicken the case only enough to be able to fit the cart in it will be both stylish and will give you the space you need. Bonus is if you really want you can paint it to be almost completely flush.
they call me the Queen of Bondo, though maybe i should be called the Queen of Epoxy Putty
current project - code name: blue mushroom!
current project - code name: blue mushroom!