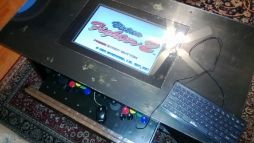
Progress report: SNES portable using the old 1990 SNES
Moderator: Moderators
Progress report: SNES portable using the old 1990 SNES
Last edited by b52down on Sat Oct 22, 2005 12:10 pm, edited 1 time in total.
Only the great ones remember.
-
Turbo Tax 1.0
- Portablizer Extraordinaire
- Posts: 4773
- Joined: Wed Mar 30, 2005 6:19 pm
- Location: Delaware, no sales tax
- Contact:
i like it 
o yeah you have the buttons mixed up other than that it is one good lookin portable
http://www.flickr.com/photos/50436952@N00/?saved=1
o yeah you have the buttons mixed up
http://www.flickr.com/photos/50436952@N00/?saved=1

-
shmagoogin77
- Portablizer
- Posts: 1469
- Joined: Sun Apr 17, 2005 6:10 pm
- Location: My desk
-
bioniclebert
- Posts: 1287
- Joined: Sat Jul 23, 2005 11:04 am
- Location: Buffalo.
- Contact:
-
Metroid fan
- Senior Member
- Posts: 2158
- Joined: Fri Apr 15, 2005 2:36 pm
- Location: Somewhere in the universe
- Contact:
Using the older board
The main differences between the mini board vs the original board:did you cut down the snes board??
cause i was making a snesp but then my snes mini got fried so im thinking of making one with the orig. snes
1. The original board has only one big capacitor--all of the other caps are aluminum surface mount. It is quite thin after removing all of the other junk--but it is slightly thicker, so I used 1" aluminum strip for the sides--which is rather difficult to bend.
2. The original board has an additional small circuit board (see photo) which is connected by a rather large connector. This is very hard to desolder--you must be very carefull in removing this. I used solder wick and a lot of flux to remove the solder--if this doesn't work, then try cutting off the plastic surounding the pins and remove the pins one-by-one (use the helping hands to hold the board). Instead of the ribbon cable that ben loves to use--I found that using the microthin kynar-coated wire reduces the amount of space the wires take up. If you should break any of the traces you can also use this thin wire to bypass any breaks. I used the "helping hands WITH the magnifying glass to do this."--I might post something which explains how to do this, so stay tuned.
3. The original board has a large, grounding "margin" going around the board--I could have shaved it down, but I didn't mind the unit being a little wider--since the psone screen was already quite wide.
4. The mini board controller port looks different than the original, that it is directly soldered to the motherboard--the original has a separate board that is connected by an adapter. This adapter has 11 pins--which connects to both controllers. You can figure out the pins if you just look at the controller board and follow the seven pins from the controller to the adapter.
5. The audio connections on the original board--you only need to know that pin 11--left audio, pin-12--right audio, pin-9--NTSC composite video out.
Hope this helps
Only the great ones remember.

-
electromaster64
- Posts: 265
- Joined: Mon May 31, 2004 7:09 pm
- Contact:

-
shmagoogin77
- Portablizer
- Posts: 1469
- Joined: Sun Apr 17, 2005 6:10 pm
- Location: My desk
They are the initials for my two sons--Ryan and Xander (X is still on the way).Why Does it have R and X on the sides? I assume they are speaker holes, but why the R and X? And where does the battery go?
The battery currently is an external NiCad because it won't fit between the space between the two speakers--I plan to put a Lion battery later so I won't have to carry a large battery pack.
The plastic is PVC sheet I bought online it is twice the thickness of the plastic ben uses--thus stronger, so if you want to use this type of plastic--you need to "bore out" the sections where the buttons go with a dremel--because the plastic is so thick. The front plate is glued to the 1 inch aluminum strip with epoxy. The back plate is screwed in with the nylon spacers super-glued to the aluminum frame.May I ask how you made the casing?
Probably engraving plastic, but that's just my guess.
The aluminum frame was shaped using a 6" vice--the curved top part was carefully pounded into shape with a hammer and the anvil side of the vice.
Only the great ones remember.