2 or 3 years ago I had nearly completed a SNES portable based off of a SNES mini, and a PSOne screen. Unfortunately, I never finished it. Electronically, everything worked, but I'm not really the building type, so I never really managed to build a case.
Time went on, I bought a PSP, hacked it to run SNES9xTYL and all was good. Realizing that I hadn't planned anything out with the SNES, I gave up on the project, sold off what I could, and threw out the rest. Unfortunately, emulation is just not the same. Starfox never ran right with sound, and Super Metroid needed a frameskip. SNES emulation on the PSP is ugly, and it seems that my sound drivers on my laptop hate ZSNES, and worst of all I've continually recalled the SNESp project with the feeling that I was too close to just quit.
I decided to give the project a second go (however a lot less gung-ho stupid,) after my mother picked up a few things from work cheap. A pocket TV, and a Digital Picture frame. (My mother works at Goodwill in the donation center. Big plus.
I knew it was a longshot, and probably too power hungry to use, but it was free, so what the heck? I tore open the picture frame. Much to my horror, I found something worse then Nintendo screws. Really, really, really tiny hex screws. So small, everything I had wouldn't fit, and the melted pen trick just couldn't mold to it. I had to do it the old fashioned way. Snapped all of the screw posts with pliers. Predictably, the screen was useless for this. (If anyone wants to play with the guts, it supposedly can be hacked to run Linux and I think it still works. PM me if you're interested.)
It seems though, luck was on my side, as my mother found a portable DVD player a few days later (Which once more they intended to throw away.) It was some massive beast intended to be placed in the backseat of a minivan to keep the kids happy for a few hours. The DVD player doesn't even have it's own battery supply, it has to be plugged into the car lighter plug. The best part however is that the screen is a removable monitor module, with it's own separate power and RCA video inputs. Essentially an Audiovox VBPEX56.
My father however, wanted me to figure out what was wrong with the portable DVD player first before he'd let me tear the screen apart willy nilly. Of course, the DVD player with it's slot loading DVD drive was shot, because some kid put two DVD's in at the same time. King Solomons Mines over top of 50 First Dates. It's my belief, that some kid wanted to watch a PG 13 movie his parents didn't want him to see and made it appear he was watching good wholesome TV by sticking the two on top of each other.
Fortunately in this case, the DVD player was broken beyond repair (The thin metal cages got bent up trying to eject the discs.) Meaning I could tear apart the screen. As an added bonus, I got an Adam Sandler flick I hadn't seen. (Yes, I know, they're all essentially the same, but I still find it funny for some reason)
----------------------------------------------------------------------
Now for some pictures (Finally, right?)
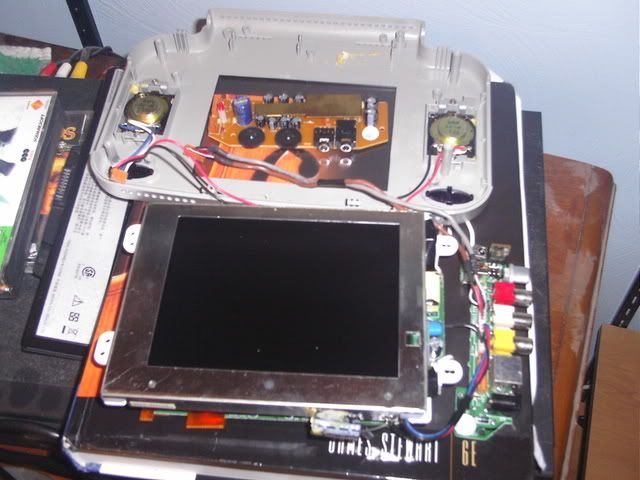
This is the basic innards of the Audiovox screen. It's a bit thick, but I'm not too concerned. The picture is good, but not as great as a PSOne screen. Good enough for an SNES. Perhaps the greatest thing about this board is the simplicity of modding it. This LCD may be even easier to mod then the PSOne screen, at least the LED lighting mod. The designers didn't even try to attach the screen to the lightbox. It sits there by the pressure of the screen against the case on a few pins.

Sorry for the darkness, but the flash made it too bright to see anything. You can clearly see inside the lightbox, and the tube. This thing should be fairly easy to insert a few LED's into, 4 or 6 I'm not sure yet as it's a rather deep light box.
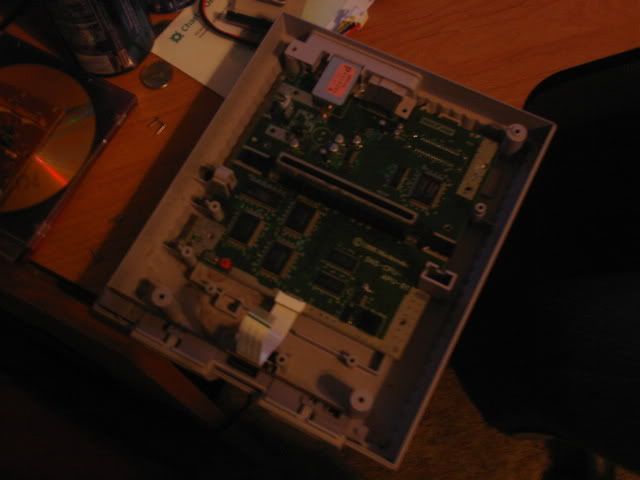
This ones dark just because I forgot to put the flash on. Sorry about that, though you should be able to see the SNES. It's only been disassembled right now. I had always thought there had been nothing special about this original SNES all those years it had sat on my shelf, but evidently from reading a few new things, that this is a rather rare board here in the US with only one audio chip. Hopefully that means it's also a bit better on power. I'd buy a new SNES mini, but those things are expensive and hard to find offline, and I'm broke. So I'll just make do with what I've got. IF this SNES dies for some reason, I've got a bunch of others from yard sales lying around to replace it.
I intend to only do minor modifications to anything and everything in this project. I only plan on moving a few capacitors, and removing the RF box and reset switch on the SNES. The only modification to the LCD will be the LED mod, and that's mostly because I can do it fairly easily with the way they built this LCD. I don't intend to remove much as I really, really suck at desoldering. I'm not bad at soldering, but I can't desolder for crap. That little bulb thing doesn't seem to pick up much when I use it.
For the case, I plan on frankenmodding the bottom half of the original SNES case for my needs. Once I've flipped the SNES board over, and sunk it down a bit, there should be plenty of space over top of it for the LCD and controller boards. I'll just buy a sheet of engraving plastic or something for the front of it, as I don't want it much thicker then the bottom half of the SNES.
I don't intend to spend a lot on this project this time either. So far, for the SNES, LCD, controller, AA batteries, and ribbon cable, my cost has been $0. I know that won't continue, as I need white LED's, a sheet of plastic for the front of the case, and some battery mounts. (Though I'm hoping I can yank them from a Gamegear.
Thanks to;
Ben for the awesome book, website, and starting this awesome hobby.
Life of Brian for his ZN-40 SNES topic. It really made me think more about how to do this case, and helped reinspire me to try to finish a portable once and for all.
And to all of you who actually took the time to read through all this and even more so to those who comment with ideas, thoughts, suggestions, praise, and criticism.
