Ok, after updating the system to Pocket PC 2002, it no longer runs the emulators properly and there weren't newer updated versions released/solve issues; with some emulators it is impossible to exit and others produce wierd effects. This isn't really important as apart from GB games the PDA was struggling to play much anyway, and the fact it won't allow for pressing a button with a direction button at the same time means your selection of games are very very limited anyway, in fact, reduced to games like Pacman, card games and similar. The only game playable on MAME on the PDA is Galaxian, strangely; although sound is bad - not worth the effort.
The only games which play well on this PDA are the MS game pack; Pacman, Ms Pacman and Dig Dug. That is it. Whoopie. Exciting. (note the sarcasm).
Bottom line is the Ipaq 3600 is a very good PDA (contacts, calendar, to-do list, MS Word, etc), well thought out and easy to use; but sucks at games big time. Mind you, the Ipaq is a PDA not a games system after all. If you want a cheap PDA, you would get a quality bargain with one of these (assuming the battery is fine, or you do a mod like mine). I would guess that the Ipaq 3600 series is as good a PDA as any newer version, just don't expect to play games on it.
I spent several hours researching and lost of testing to get to this conclusion...
Bacteria - Ipaq 3600 PDA resurrected, improved! *DONE*
Moderator: Moderators
-
bacteria
- Portablizer Extraordinaire
- Posts: 3984
- Joined: Fri Apr 20, 2007 12:14 am
- Location: Hampshire, UK
- Contact:
Time for the case outside!
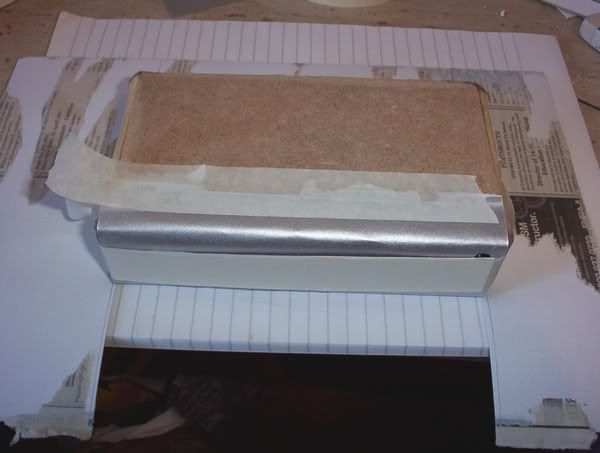
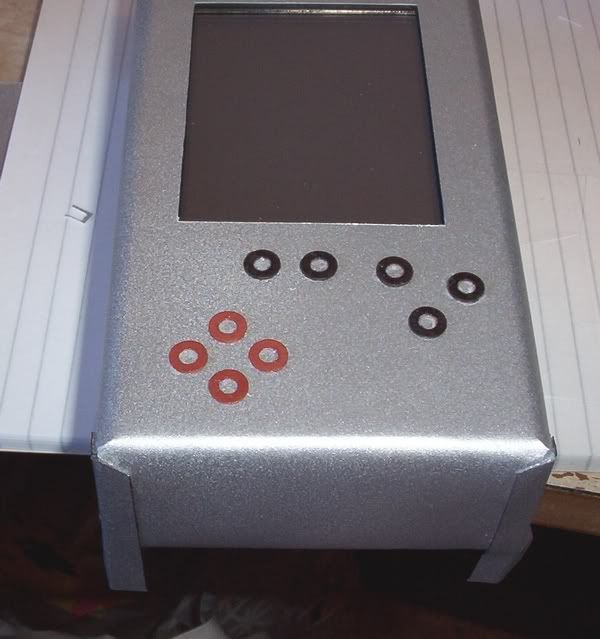
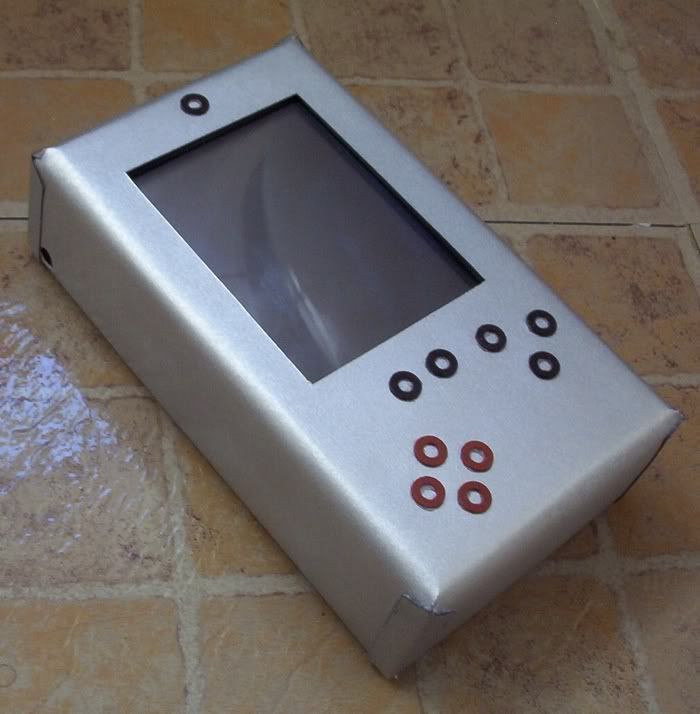
Firstly I filled in the small gaps on the front of the case between the screen outside and the perspex the screen fitted through, I then proceeded to lightly glue the back of the reverse spray painted PVC sheet. Some of the glue streaked the PVC. No use. I stuck it in position anyway on the case, a bit bumpy, too hard to get it perfectly smooth.
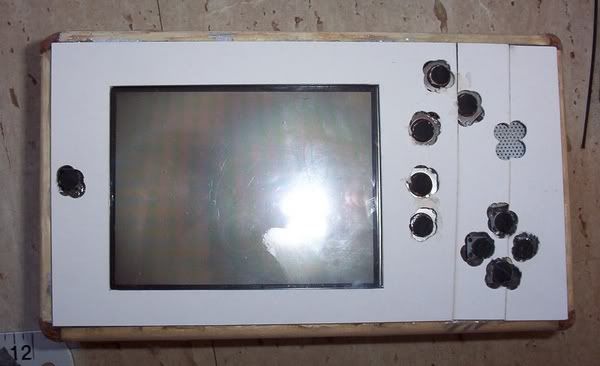
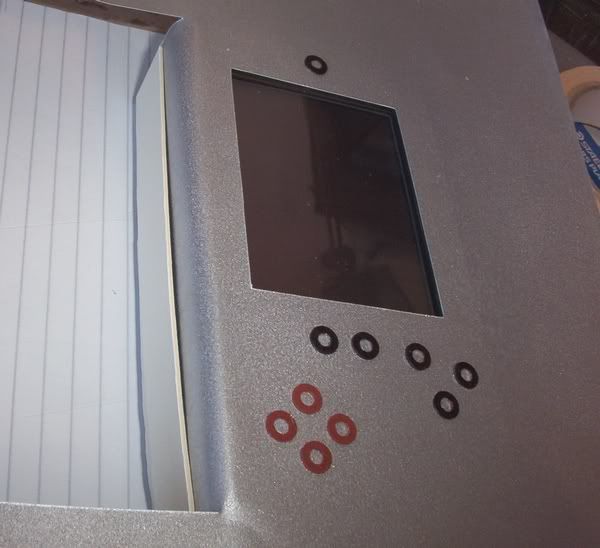
In the pic, you can make out that I stuck small circles (from a hole-punch) on top of the tact switches to make the buttons in effect the same height as the mounting board surround. This means, when I press the washers on the PDA, they press down a bit and press the card circles down and make contact with the tact switches. All work, tested them.
Different idea therefore, I cut out a piece of mounting card and used a hole-punch to make holes big enough to completely expose the tact switch button (hence the card is in 3 bits). I decided, as the speaker was on the loud side, that I would make holes in the mounting board where the speaker is (crudely) and just cover it and not bother with showing speaker hole - not needed.
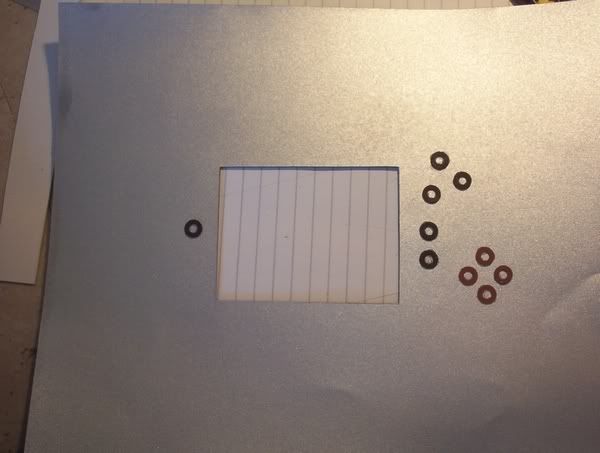
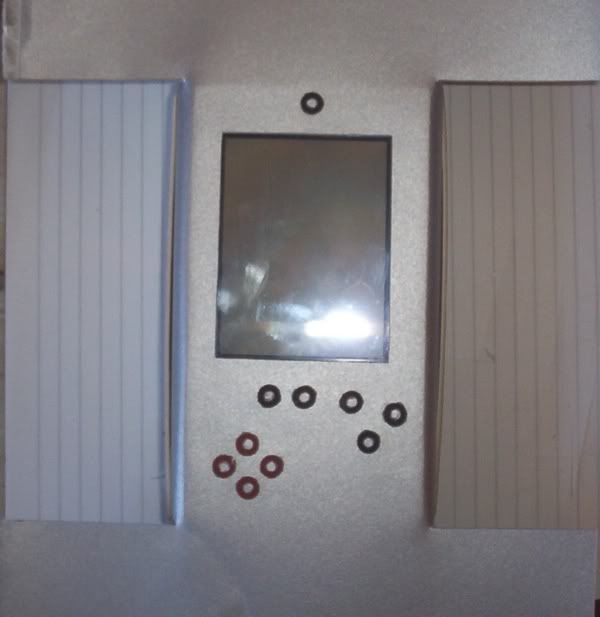
I stuck the card to another sheet of prepared PVC with double sided sticky tape, pressed it down - rats, looks like it afterwards - not good enough. Fortunately when I did the spray painting before, I also did a couple of sheets of 160gsm thick paper/thin card too; so I stuck the mounting board to it with fresh double sided sticky tape, put a little glue on the washers I used before (for the tact switch buttons), raised the thin card to the light, put the washers in the correct spaces (you can see the spaces when thin card is raised to the light). Window cut out too for the screen.
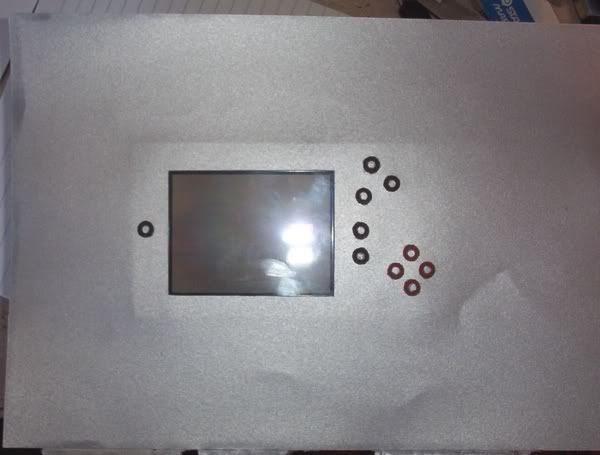
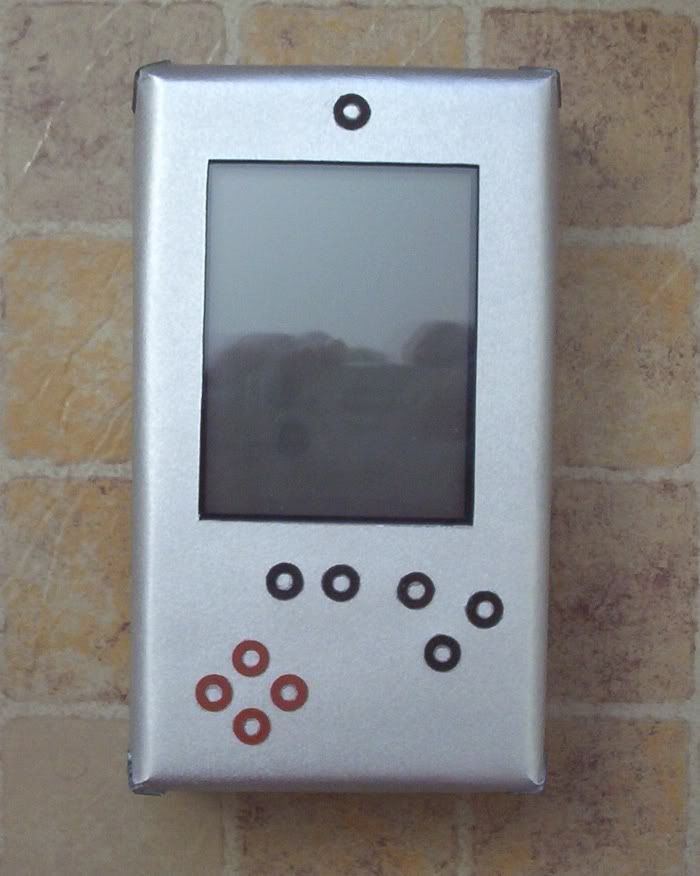
I then stuck it to the PDA using UHU general purpose glue, then I put some foam on top and weighted it with some heavy books for a few minutes so it dried in place.
Turned PDA over, made some marks on the thin card for cutting
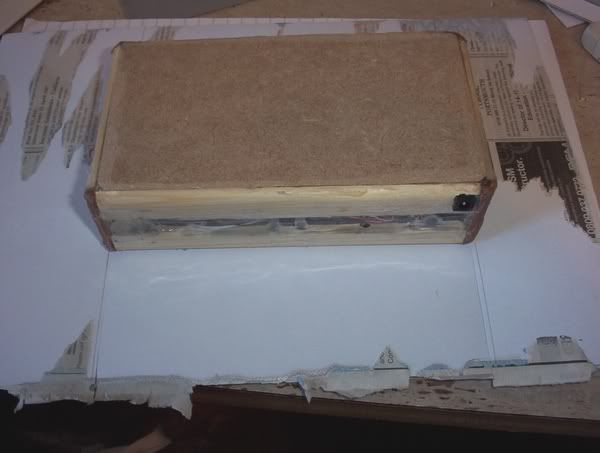
Added lots of UHU glue to the thin card and pressed it in place over the side of the PDA, the middle strip is just some mounting board I used to keep the mid section in place. I used paper tape to secure the side in place while it dries ok.
View when turned over:
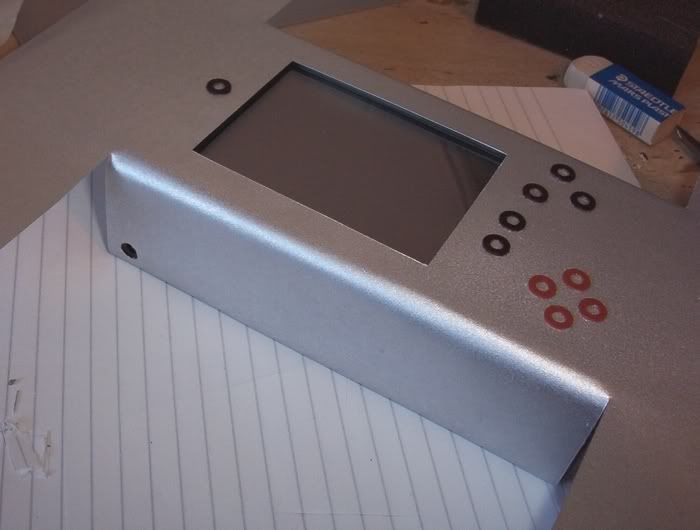
I am sure you see what I mean now by a nice looking case - and perfectly smooth, in-spite of what is under it!
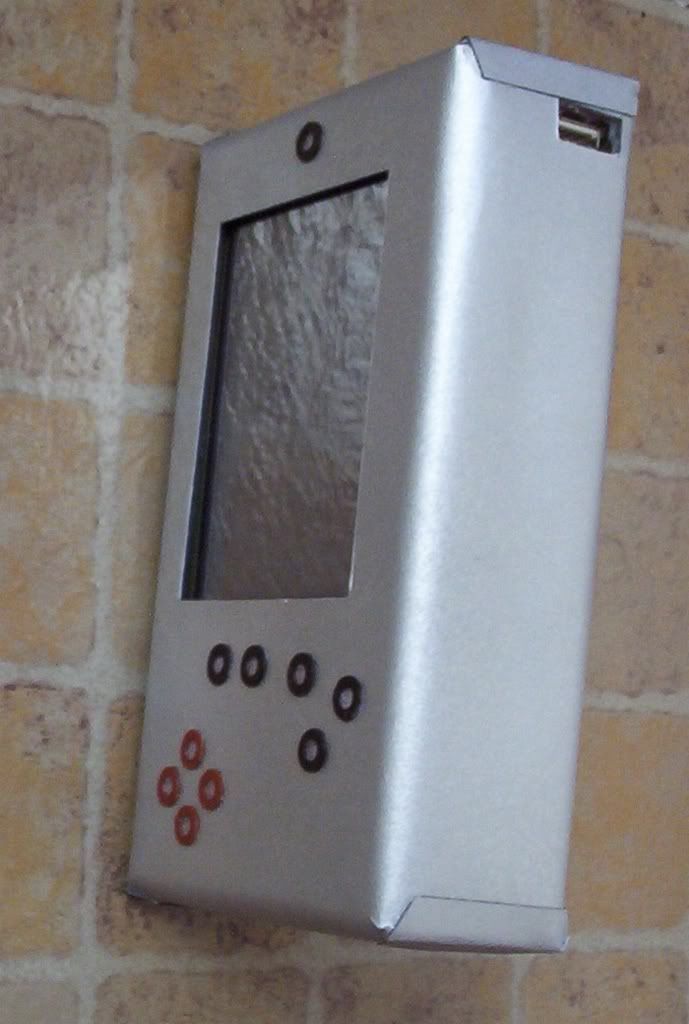
Two sides done:
Side strips removed - Two more sides to go, and the base (then I have to worry about the corners - the tricky bit!
I should have this case, and project completed today hopefully, at this rate.
Firstly I filled in the small gaps on the front of the case between the screen outside and the perspex the screen fitted through, I then proceeded to lightly glue the back of the reverse spray painted PVC sheet. Some of the glue streaked the PVC. No use. I stuck it in position anyway on the case, a bit bumpy, too hard to get it perfectly smooth.
In the pic, you can make out that I stuck small circles (from a hole-punch) on top of the tact switches to make the buttons in effect the same height as the mounting board surround. This means, when I press the washers on the PDA, they press down a bit and press the card circles down and make contact with the tact switches. All work, tested them.
Different idea therefore, I cut out a piece of mounting card and used a hole-punch to make holes big enough to completely expose the tact switch button (hence the card is in 3 bits). I decided, as the speaker was on the loud side, that I would make holes in the mounting board where the speaker is (crudely) and just cover it and not bother with showing speaker hole - not needed.
I stuck the card to another sheet of prepared PVC with double sided sticky tape, pressed it down - rats, looks like it afterwards - not good enough. Fortunately when I did the spray painting before, I also did a couple of sheets of 160gsm thick paper/thin card too; so I stuck the mounting board to it with fresh double sided sticky tape, put a little glue on the washers I used before (for the tact switch buttons), raised the thin card to the light, put the washers in the correct spaces (you can see the spaces when thin card is raised to the light). Window cut out too for the screen.
I then stuck it to the PDA using UHU general purpose glue, then I put some foam on top and weighted it with some heavy books for a few minutes so it dried in place.
Turned PDA over, made some marks on the thin card for cutting
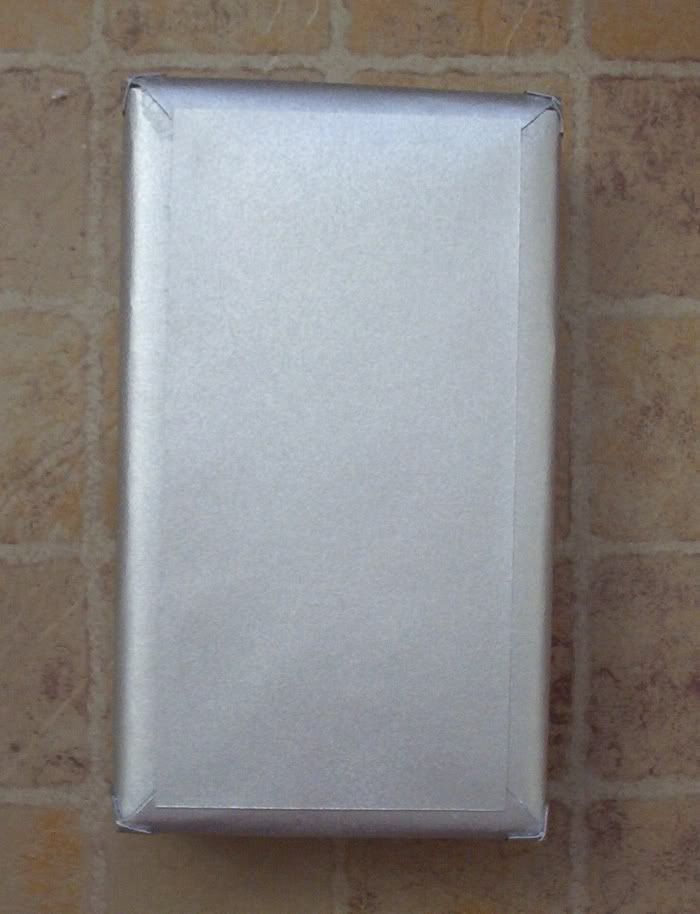
Added lots of UHU glue to the thin card and pressed it in place over the side of the PDA, the middle strip is just some mounting board I used to keep the mid section in place. I used paper tape to secure the side in place while it dries ok.
View when turned over:
I am sure you see what I mean now by a nice looking case - and perfectly smooth, in-spite of what is under it!
Two sides done:
Side strips removed -
I should have this case, and project completed today hopefully, at this rate.
Last edited by bacteria on Fri Nov 23, 2007 8:02 am, edited 1 time in total.

-
bacteria
- Portablizer Extraordinaire
- Posts: 3984
- Joined: Fri Apr 20, 2007 12:14 am
- Location: Hampshire, UK
- Contact:
Ok, this is how I intend to do the corners:
Needs a bit more work, however all four sides are on now in place.
When I finish, I will have to give all the silver surfaces a couple of coats of varnish, otherwise the surface will mark too easily, also varnish will give the surface resistance to scuffing and tearing by normal wear and tear, as well as preserving the paint.

-
bacteria
- Portablizer Extraordinaire
- Posts: 3984
- Joined: Fri Apr 20, 2007 12:14 am
- Location: Hampshire, UK
- Contact:
Dimensions: 163 x 89 x 43mm.Kyo wrote:could you provide dimensions, or take a photograph with a match next to it?
Yup, will do. I have just put the final coat of varnish on and am leaving it to dry. Once dry, I will turn the PDA on over the weekend, when I get a chance, and post some more pics. As mentioned before, only three games run on the PDA properly, it is a PDA not a games machine (due to slow processor, Pocket PC 2002 and the quirky button problem of the Ipaq not allowing multiple button presses).ghosstt wrote:can you post some pics with the screen on? maybe some games running?
I will also post a pic to compare it to the original. Now it is varnished, the PDA looks like it has a brushed aluminum finish, much like the original (which is why I did it in silver).
-
illustriouschin
- Posts: 119
- Joined: Fri Feb 09, 2007 12:42 am

-
bacteria
- Portablizer Extraordinaire
- Posts: 3984
- Joined: Fri Apr 20, 2007 12:14 am
- Location: Hampshire, UK
- Contact:
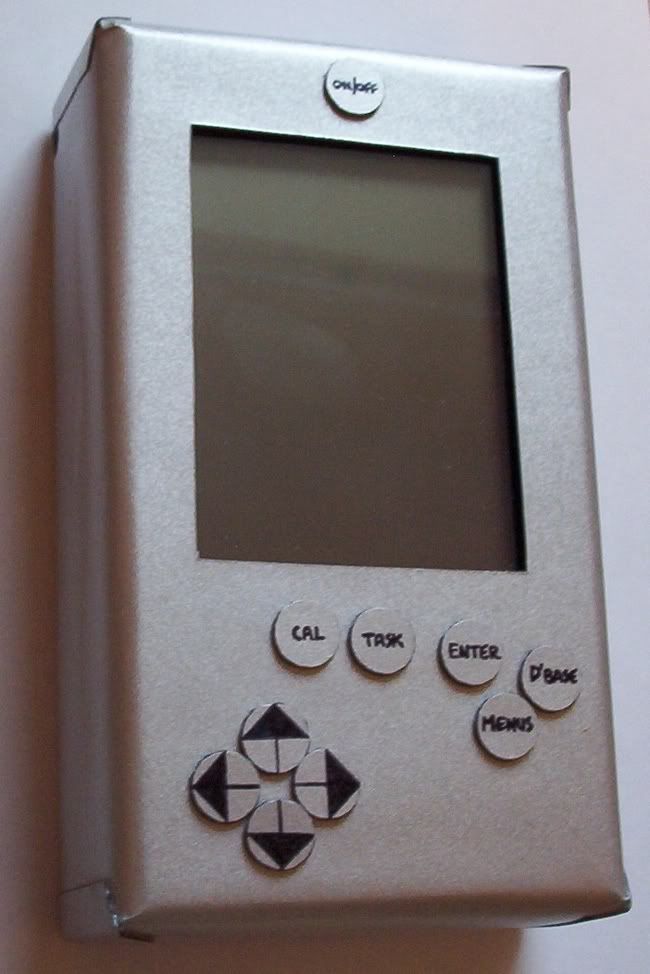
Update: I had to cut off the button areas (circles) to get to the tact switches, the buttons needed to press down a bit more than I had wanted to make contact , so I will make the buttons on the top of the case a little bigger and more responsive now - ie light touch instead of heavier one.
I had to open my case up from the underside as I (stupidly) didn't wrap electrical tape around a couple of wires, the common wires for the buttons and for the direction buttons, these buttons didn't work as the wires touched the metal on the case screen and caused a short! I realised what the problem was so could correct it easily - after all, everything was working perfectly before I put the cover over the case - it had to be that. I popped a piece of paper between the wires and the metal base to stop the contact, and all is fine again! This means, as well as the buttons, I will need to redo the underside now. I managed to lift off the overlapping underneath side without damaging it, which is a nice bonus. I will post pics when done (v2)
I am taking advantage of the need to change the buttons to have a logo of the button's function on top, to make it look professional. You will see what I mean when it is done.
I downgraded the firmware on the ROM from version 2.14 (Pocket PC 2002) back to 1.77 (Pocket PC 2000) as I had fortunately made a copy of the old ROM before I upgraded it - reason is that 2002 doesn't allow my old emulators for the Ipaq to work properly, and although the version 2002 looks a bit better than 2000, it is only cosmetic from what I see; so I am running the old version again; then I can play games on it too. Retro!
-
bacteria
- Portablizer Extraordinaire
- Posts: 3984
- Joined: Fri Apr 20, 2007 12:14 am
- Location: Hampshire, UK
- Contact:
First job to change the buttons is to cut out the old ones carefully, to expose the tact switches underneath.
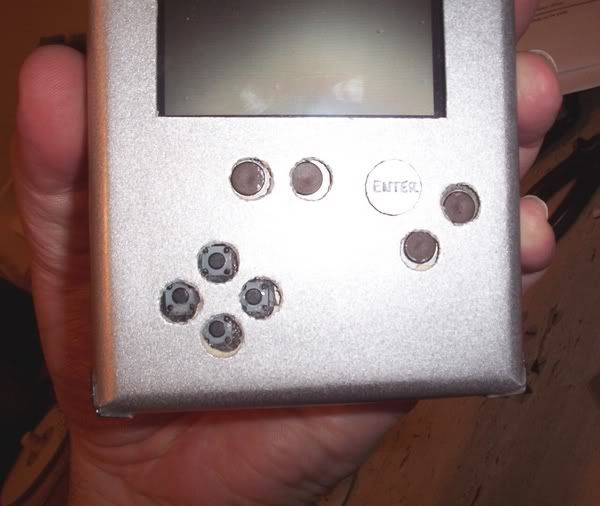
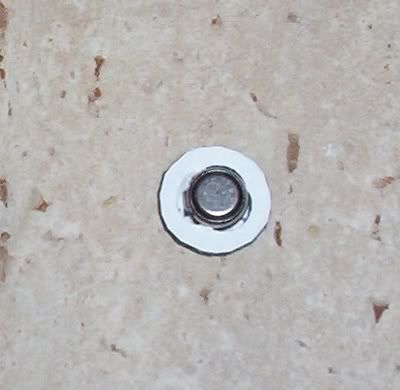
(pic above shows one of the buttons I made below in place).
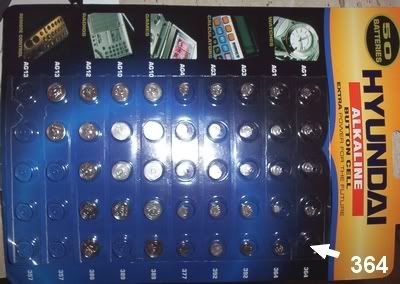
I cut out some circles using a 386 watch battery (see below - between the size of an AAA and AA battery base), then used a CD writer pen to mark the wording on them.
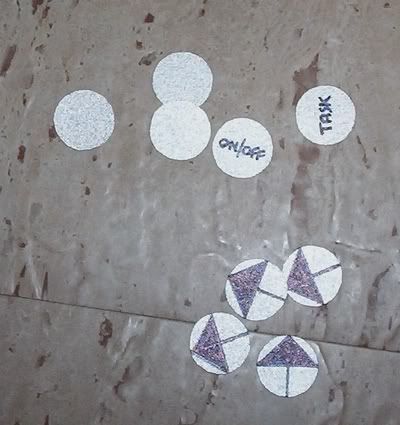
The easiest way to cut a near perfect circle is to use a tiny spot of BluTac under the battery and vertically cut tiny pieces away at a time with scissors.
I then used a hole punch to cut out a hole in 1mm stick foam pads, and made the hole slightly bigger, again with the hole punch; then the hole is big enough to contain one of the tiny batteries (364 ones as on pic) which presses on the tact switch button and makes contact.
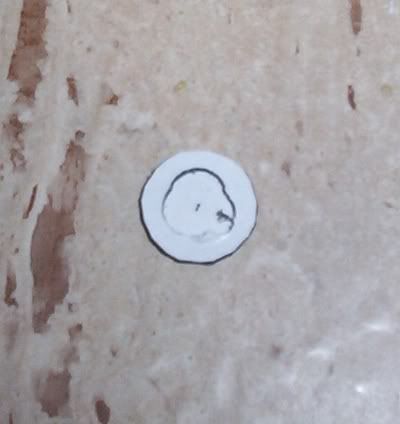
It doesn't matter that these watch batteries still conduct current, there is nothing conductive with mounting board and plastic, so no issue, however, these watch batteries fit nicely and being of metal will not compress with use. Ideal!
The buttons on the PDA are very responsive now, press the button and the foam pad compresses and presses the watch battery onto the tact switch button. Works nicely. I might use this for tact button switches for future projects...
Pics:

Pics will follow later, of PDA with some things viewing; need to put some varnish on the button tops and let them dry first before using.
(pic above shows one of the buttons I made below in place).
I cut out some circles using a 386 watch battery (see below - between the size of an AAA and AA battery base), then used a CD writer pen to mark the wording on them.
The easiest way to cut a near perfect circle is to use a tiny spot of BluTac under the battery and vertically cut tiny pieces away at a time with scissors.
I then used a hole punch to cut out a hole in 1mm stick foam pads, and made the hole slightly bigger, again with the hole punch; then the hole is big enough to contain one of the tiny batteries (364 ones as on pic) which presses on the tact switch button and makes contact.
It doesn't matter that these watch batteries still conduct current, there is nothing conductive with mounting board and plastic, so no issue, however, these watch batteries fit nicely and being of metal will not compress with use. Ideal!
The buttons on the PDA are very responsive now, press the button and the foam pad compresses and presses the watch battery onto the tact switch button. Works nicely. I might use this for tact button switches for future projects...
Pics:
Pics will follow later, of PDA with some things viewing; need to put some varnish on the button tops and let them dry first before using.
-
illustriouschin
- Posts: 119
- Joined: Fri Feb 09, 2007 12:42 am
Haha, you're an ass.illustriouschin wrote:a few years from now you are going to look at all those innovative design decisions and think, "oh man what was i thinking, dang did a pretty sloppy job too" but hey at least you cut straight lines around the screen so that part looks ok.
I think it looks great. However, I do not understand how the buttons are held in place and do not fall out.
-
bacteria
- Portablizer Extraordinaire
- Posts: 3984
- Joined: Fri Apr 20, 2007 12:14 am
- Location: Hampshire, UK
- Contact:
First part - I agree.Skyone wrote:Haha, you're an ass.illustriouschin wrote:a few years from now you are going to look at all those innovative design decisions and think, "oh man what was i thinking, dang did a pretty sloppy job too" but hey at least you cut straight lines around the screen so that part looks ok.
I think it looks great. However, I do not understand how the buttons are held in place and do not fall out.
Second part - 1mm sticky foam pad as per illustration, centre cut out to accomodate the watch battery (right size, no other reason), on one side the foam pad sticks to the button top, the other side sticks directly to the case. This secures it in place firmly and provides enough freedom for the button to be pressed and activate the tact switch underneath.
I will take some photos of the system running in the next day or two and hopefully a wobbly crude mini video too of a game being played. What I can say is the buttons now are very responsive, as responsive as just pressing a tact switch in fact. The sound is excellent and does not suffer at all from having no speaker holes in the case.
I will use this idea with the buttons for future projects, it is very effective and saves having to mount controller buttons.
-
bacteria
- Portablizer Extraordinaire
- Posts: 3984
- Joined: Fri Apr 20, 2007 12:14 am
- Location: Hampshire, UK
- Contact:
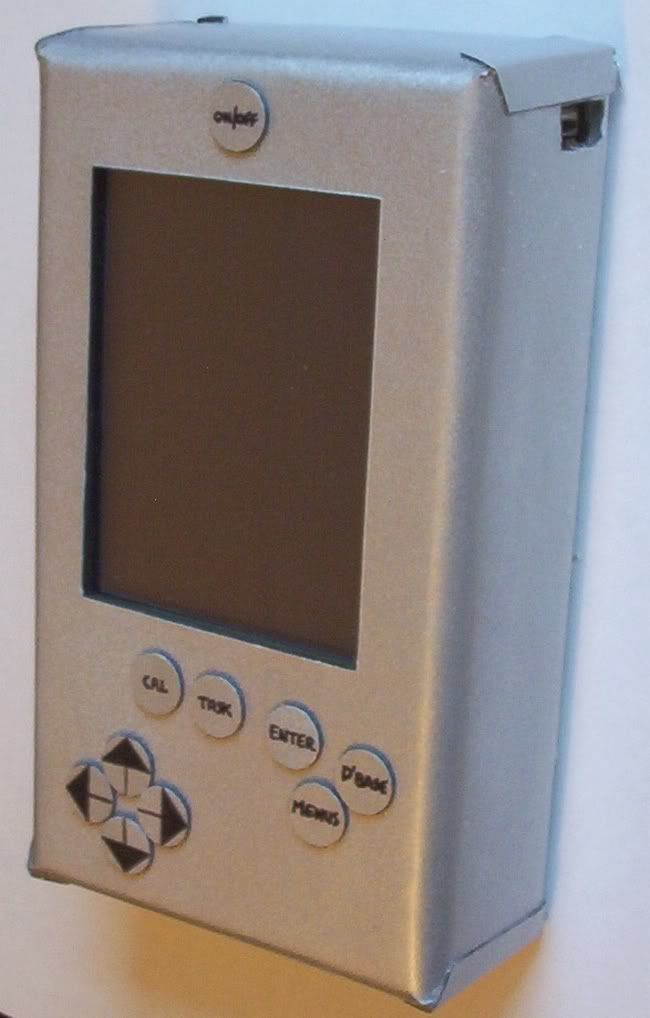
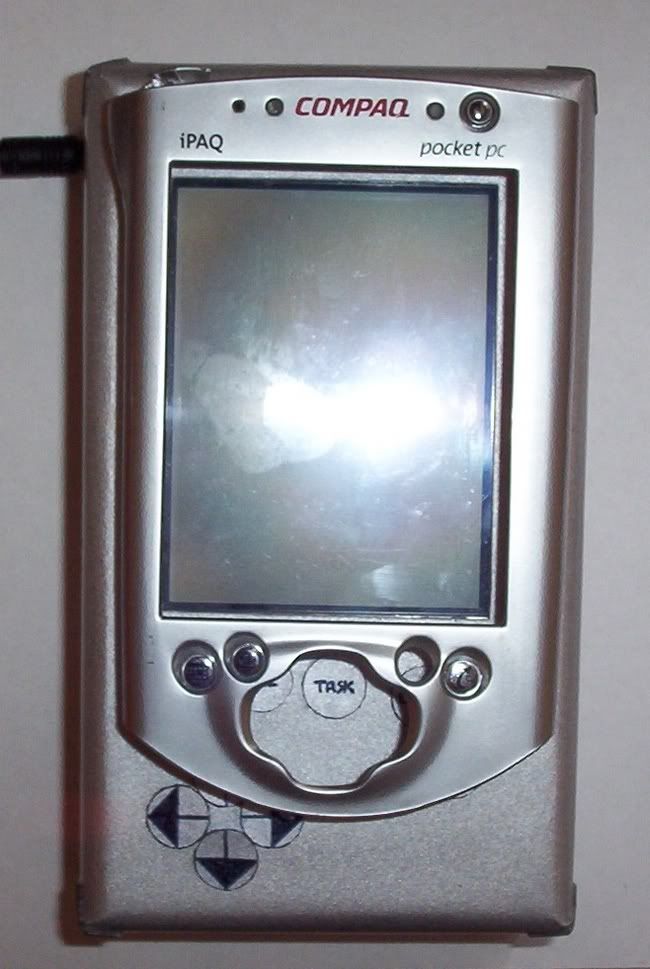
Pic of original Ipaq case front, on top of my project PDA; gives some idea of size. As you see, it isn't much wider at the top, left or right sides, only a bit longer at the bottom. It is of course thicker; the original PDA is 1/3rd the thickness of this system, personally I found the original PDA a bit too slim anyway.
Two vids for you:
Oh yeah - BigBoy Advance, Nintendo 64 Advance, this PDA mod - three mods to date - does that qualify me for "Portablizer Extrodinaire" by any chance please?
Two vids for you:
Oh yeah - BigBoy Advance, Nintendo 64 Advance, this PDA mod - three mods to date - does that qualify me for "Portablizer Extrodinaire" by any chance please?