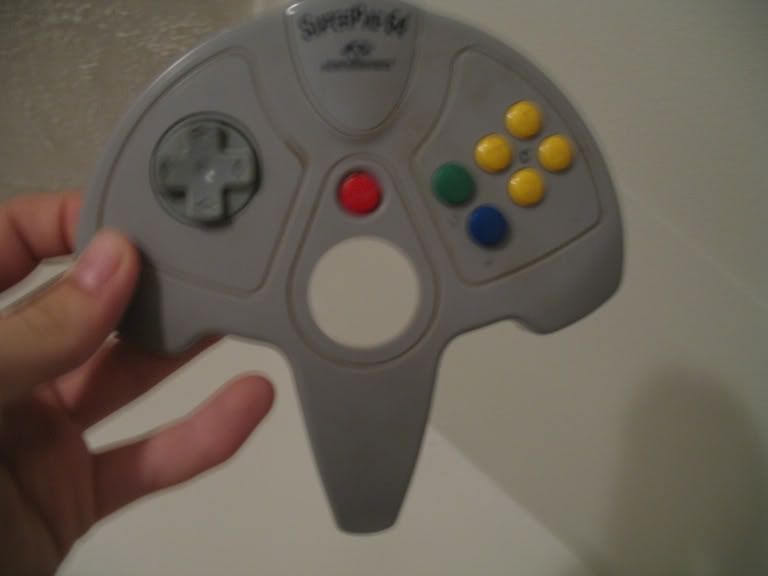
Okay. so i am getting into this n64 portable thing. and i ripped apart a Superpad n64 controller and i was like. what do i do now? what should i do?
oh. and is that free TI DC-DC converter thing still legit?
heres a funny problem i had:
Ok so i messing with mobo and i put in my expansion pak, but i had it backwards and i turned on the console and it didn't work so i was like "wtf happened?" so i took the power coord(i haven't migrated to batteries yet, lol) and ripped it apart and nothing was burned out or anything. so i put it back together and then pluged it back into the n64 and it worked(well, after i turned the expansion pak around).
Controller Question + Others
Moderator: Moderators
Controller Question + Others
Last edited by DrRobot on Tue Dec 19, 2006 8:32 pm, edited 1 time in total.
-
Triton
- Moderator
- Posts: 7398
- Joined: Mon May 24, 2004 12:33 pm
- 360 GamerTag: triton199
- Steam ID: triton199
- Location: Iowa
- Contact:
i hope/assume you mean superpad? as to the not working thing you probably just flipped the breaker in the powersupply.Superjoy n64 controller
Visit us at Portablesofdoom.org
oops, yea its superpad.Triton wrote:i hope/assume you mean superpad? as to the not working thing you probably just flipped the breaker in the powersupply.Superjoy n64 controller
yea so about the controller. i don't know if i should cut parts of the board off then rewire them? or, i remember reading something about putting wires on the gold pads that the buttons are on?
-
Thegamer3000
- Posts: 160
- Joined: Sun Dec 10, 2006 12:00 pm
I'm currently working on a portable, so I'm not exactly sure if you can go by what I say because I don't have much experience... Yet 
If you want to save space, you can figure out were the buttons go to on the controllers IC and chop off the D pad, and the C, A, and B, Buttons. Then you have to reconnect the Ground, power, etc. I didn't do this method.

If you follow the lines going to each button you'll find a gold tab. Solder a wire to the tabs, for each button. Then when you rebuild the controller connect the other end of the button to a ground on the controller somewhere. Everybody tells me this works.
Note: I have not seen the inside of a Superpad controller.
If you want to save space, you can figure out were the buttons go to on the controllers IC and chop off the D pad, and the C, A, and B, Buttons. Then you have to reconnect the Ground, power, etc. I didn't do this method.
If you follow the lines going to each button you'll find a gold tab. Solder a wire to the tabs, for each button. Then when you rebuild the controller connect the other end of the button to a ground on the controller somewhere. Everybody tells me this works.
Note: I have not seen the inside of a Superpad controller.
Use your talents for God's Glory!
______________________________
Progress on Handheld Sega Genesis 90%
Progress on Handheld NES to sell 40%
______________________________
Progress on Handheld Sega Genesis 90%
Progress on Handheld NES to sell 40%
the inside of a super pad it less complicated than a regular pad(less wires n'd such). but, the joystick part is alittle larger than that of a regular one.Thegamer3000 wrote:I'm currently working on a portable, so I'm not exactly sure if you can go by what I say because I don't have much experience... Yet
If you want to save space, you can figure out were the buttons go to on the controllers IC and chop off the D pad, and the C, A, and B, Buttons. Then you have to reconnect the Ground, power, etc. I didn't do this method.
If you follow the lines going to each button you'll find a gold tab. Solder a wire to the tabs, for each button. Then when you rebuild the controller connect the other end of the button to a ground on the controller somewhere. Everybody tells me this works.
Note: I have not seen the inside of a Superpad controller.
oh let me take some pics of the super pad.
ooops sorry about the 2x post.
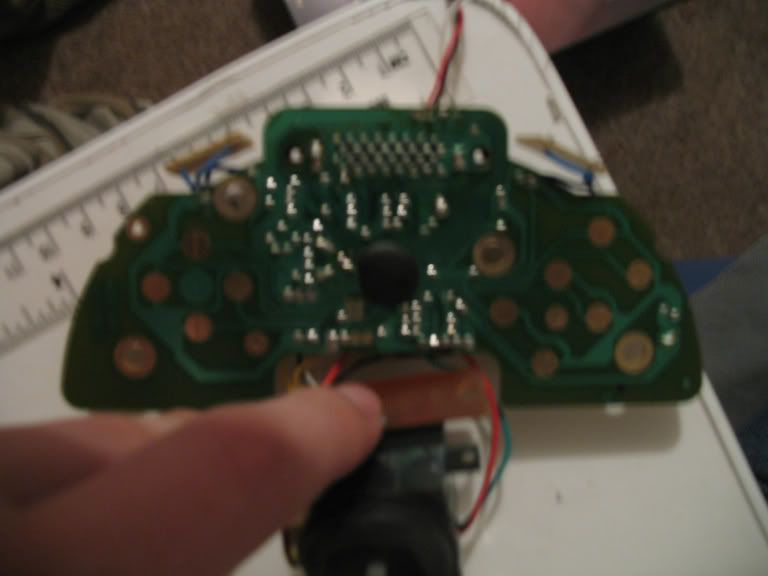
here are the pics:
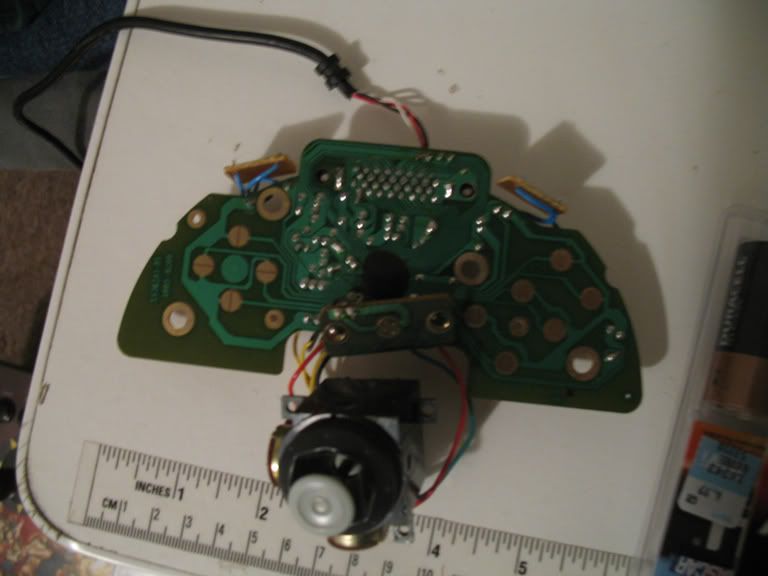
another crappy image of the board:
http://i4.photobucket.com/albums/y134/M ... era017.jpg
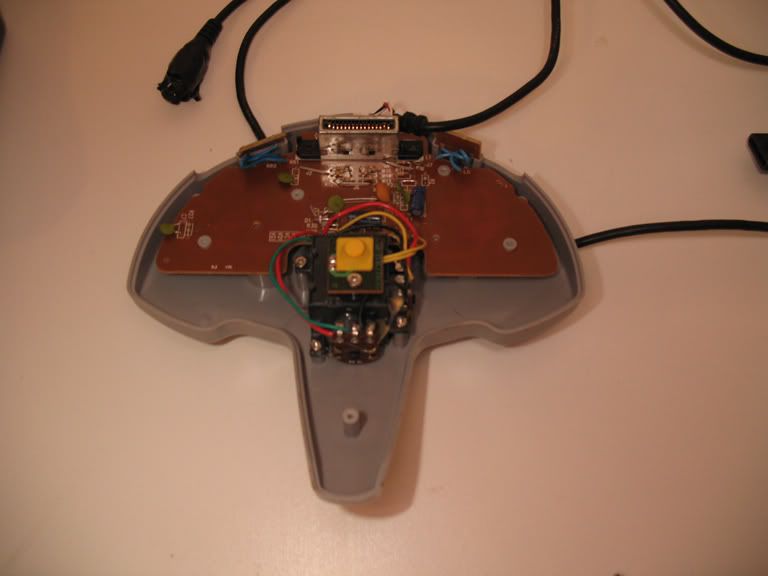
this is the front of the case:
http://i4.photobucket.com/albums/y134/M ... era019.jpg
here are the pics:
another crappy image of the board:
http://i4.photobucket.com/albums/y134/M ... era017.jpg
this is the front of the case:
http://i4.photobucket.com/albums/y134/M ... era019.jpg
-
Thegamer3000
- Posts: 160
- Joined: Sun Dec 10, 2006 12:00 pm
ok cool.Thegamer3000 wrote:Just follow the line from each button, to where it is soldered on the board... I think?Oh and don't forget to figure out which end is the ground!
now should i get a desoldering iron or something to desolder the mem card slot? or is than easy way with a regular soldering iron?
-
Thegamer3000
- Posts: 160
- Joined: Sun Dec 10, 2006 12:00 pm
I just left mine. But I'm not going to make it so that you can plug a mem, or a rumble pack in whenever you want. It's going to be permanetly a Memory card inside. Now if you want to desolder it you need a desoldering iron. they're about $10 at radioshack.
Use your talents for God's Glory!
______________________________
Progress on Handheld Sega Genesis 90%
Progress on Handheld NES to sell 40%
______________________________
Progress on Handheld Sega Genesis 90%
Progress on Handheld NES to sell 40%
hmmm.Rellizate wrote:Or just get a solder sucker. They are easier to use, better quality. And you don't have to wait for them to heat up.
well i picked up a solder sucker and a Desoldering Bulb. and between the two. i seem to like the Desoldering Bulb. its small too. i think i'll go and buy a desolding iron to see how that turns out.