
All stories have a beginning, and this one is no different. I was pretty young back during the original Atari days, I never actually owned a 2600 myself until I was 19. So I was always playing other people’s. Naturally I have made up for my lack of owning an Atari as a kid in spades, but there was another system along the way as well…
Anyone familiar with videogames surely remembers 1988. That was the year the Nintendo Entertainment System really took off. EVERYBODY got a NES that year, myself included. It was THE thing. So, as a young teenager the NES was the system that captured all of my game playing time. (though I still played with my trusty Atari 800 computer)
It is a little known fact that one of my earliest portable-gaming experiments happened in the spring of 1993. I was in high school and our choir was taking a trip to Washington DC. I had the notion that it would be ‘really cool’ to bring a NES and a Genesis with me for the long boring bus trip. My solution was to electric-tape a Genesis on top of a NES to make the world’s first multi-platform portable gaming device. The thing ran off a 9 volt battery, which would run the NES for about an hour and the Genesis for about 30 minutes. Coupled with a primitive yet color pocket television (also electric-taped in place) it was a gamer’s dream come true. I could play Road Rash and Battletoads to my hearts content, 45 minutes at a time.
Obviously that was a long time ago and I know a few more things about portability now. I still love what the NES was, and is. It had graphics advanced enough to make much deeper games that the 2600 or Intellivision could allow, yet it did not dwell on graphics over gameplay. It was the first truly musical game system. Music ran all the time during games, which is something that made systems like the 7800 or XE Game System seem even more primitive than they already were. It cemented the idea of a platformer, we’d seen the likes of it before but the NES took it to the next level.
I don’t want to sound like I’m bagging on Atari and the older systems. I simply want to state how much I admire the leaps, the evolutions, in gaming that the NES brought to the world. While Atari was repackaging Missile Command for the billionth time, Nintendo gave us Zelda, Mario and River City Ransom. Also, I am not deliberately trying to sound contradictive on my feelings about Nintendo. Please note that I am talking about the 1980’s when I praise them 🙂
So anyway! After I had built the first Atari VCSp I naturally thought about other systems to make portable. The NES instantly sprung to mind. However, there was a problem…

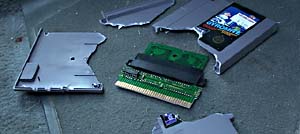
From smallest to biggest: Neo Geo pocket, Atari Lynx, Nintendo Gameboy, NEC Turbo-Grafx 16, Atari 2600, Sega Genesis, Sega Master System, Nintendo Entertainment System, Neo Geo MVS Arcade cartridge
The Nintendo has just about the largest cartridges of any system on Earth! In fact, according to the above reference photo, only the Neo Geo MVS has bigger carts! I’m sure this was part of [Nintendo’s] strategy to make their system NOT look like a videogame system back in 1985 but still… These things are enormous, and they’ve got tons of empty space in ’em!
Therein laid my problem – I cannot make a NES cartridge smaller. As with most portables, the size of the media is the defining factor in the unit’s size. Considering the fact that the unit also needs the game system’s guts, batteries and a screen, I could see how the NESp would be anything but enormous. So I let the idea pass me by… Years passed… And things that should not have been forgotten… were lost…
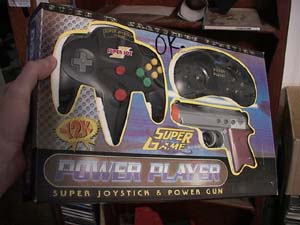
BUT THEN… as fate would have it… I found… THE SUPER JOY FUN STICK PLAYER MECH GAME PLAYER GAME!
I had heard of the infamous “NES on a Chip” before, I had seen Kevin Horton’s Portendo (a NES built into a Sega Nomad case) and he had used a “NES on a Chip”. But I didn’t have an actual real-world run-in with the Fabled Chip until earlier this year…
It was June 7th, 2003 and I was at the Midwest Classic game show in Milwaukee, talking to Bohus Blahut about stuff. He showed me the (also fabled) “Atari Joystick with a Bunch of Games Inside Thing”, which I quickly deduced was an Atari 2600 EMULATOR (the non-flickering of Asteroids gave it away). He then showed me something else. The Super Joy Fun Stick Player Mech Game Player Game (as I like to call it)! I had seen this pirate stuff before, where they cram an old game systems into a controller shape, but I didn’t know much about them. The unit had a Famicom cartridge port on the back of it, meaning you could plug in Japanese Nintendo games if you wanted (it came with a hack-ola “76-in-One” cart). Someone else then informed me that if you had an adapter, you could play American NES games on it.
AH HA! I thought. This thing must have the fabled “NES on a Chip” in it. Not only that, but the NOAC (that stands for NES on a Chip in case you were wondering) was already pre-wired to the necessary crap to make it work!

To paraphrase William Shatner; “If someone could… create…. an adapter… to play NES games on this pirate Famicom device… they could… theoretically… make a Portable Nintendo… that would be really really small… and use really really low amounts of power… but… could it… be done… theoretically?”
Not wanting to let ole’ Bill Shatner down, I decided to buy a Super Joy Fun Stick Player Mech Game Player Game from Bohus at the show.
“How much?” I asked.
“That depends, are you gonna do something COOL with it?” he inquired back.
“Ha ha ha ha!” I chortled forth.
“Very well, then. I shall sell it to you for the low, low price of [omitted due to shaky economy]” he retorted.
“Well met! It is a done deal!” I spoketh as I finished the deal.
The Super Joy Fun Stick Player Mech Game Player Game was mine. Once back to my friend’s house, I promptly ripped it apart…
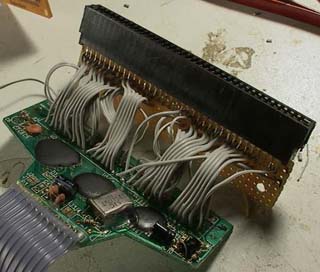
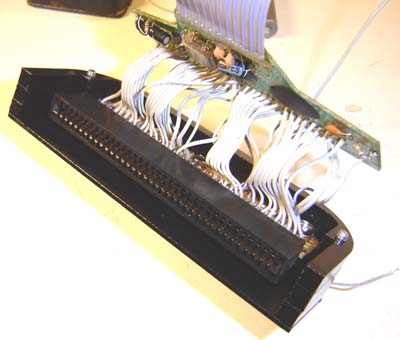
Sure enough, the Super Joy Fun Stick Player Mech Game Player Game had a “NES on a Chip” in it. Later on I tested it and found it only drew 50mA of power to run. That’s pretty low, a hacked-up Atari 2600 is usually 250-300mA. The next step was to change its 60-pin Japanese Famicom connector to the 72 pin American NES, so I could use domestic cartridges. To keep the portable unit small I couldn’t simply use an adapter (such as you need with the Game Axe) because it would add length to the cartridge area. Therefore, I elected to build my own adapter using a 72 pin card edge connector and wiring it directly to the board of the pirate NES.
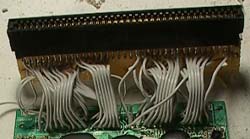
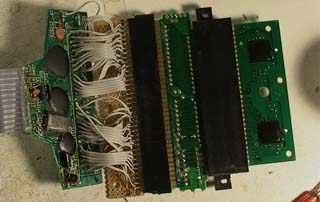
At the top, the 72 pin American NES cartridge slot, at the bottom, the Famicom board. Note the empty connections in the middle…
My research taught me the differences between a Famicom and a NES cartridge slot. The NES has all the same pinouts as the Famicom plus about 14 extras. 4 of those are used for the NES to access the “Lockout” chip on the game cartridge. (the Famicom did not need a Lockout chip to run) The other 10 or so allow the cartridge direct access to the Mystery Expansion Port on the bottom of the NES.
A potential add-on?
Nintendo must have given up the ghost with their expansion port, for if you look at later model NES carts, the pins that go to that port aren’t even on the cartridges!
Once I had the adapter wired, I tried it out. Of course it didn’t work, so I had to find a way to test my connections. I needed a Famicom game that went through an adapter, then into my adapter, then into the Famicom clone board. Not wanting to spend much on an authentic fake adapter import, I turned to the next best thing!
Smashed-open Gyromite cartridges! Yes, it’s true. Inside some of the VERY oldest NES cartridges is the Famicom ROM PCB of the game, which goes into a Famicom-to-NES converter, and then the standard NES connector. I don’t know if Nintendo was trying to use excess Famicom inventory when they made their jump to the States, but it’s a great way to find adapters now!
(Look for specially UN-marked cartridges of old games like Gyromite, Stack-Um, Hogan’s Alley or Excitebike. Compare the weight of the cart with another NES cart laying on the shelf, say, Deadly Towers. If the old NES cart feels heavier / off-balance, there’s a good chance it contains an adapter! Smash it open and enjoy!)
To the best of my knowledge, the World’s First “Famicom-to-NES-to-Famicom adapter” (Patent Pending)
Using my new super-adapter I realized I had two wires switched around. Ahem. I fixed it and VIOLA! The thing ran! I was running regular old plain jane NES carts on this whacked-out import fake Famicom thing! The problem was so simple, I could justify the 2 bucks I spent on the Gyromite cartridge. Now only if the ROBOT had a use…
But there was trouble in paradise. Even though the unit itself was working, I could not get the controller to work. My plan was to use the guts of a standard NES pad in my portable. Even though I had found the correct pins to connect a NES pad to the Famicom, it wasn’t working! I tried variation after variation, beer after beer, but it just wouldn’t take the gamepad signals!
The original Super Joy Fun Stick Player Mech Game Player Game had its own built-in joypad (complete with backwards A & B buttons). I wondered if a regular NES pad would even work at all with this thing. Heartbroken and in despair (well not that bad but it makes for good prose) I once again let the project rest while I worked on other things…
It looked hopeless… No matter what I tried, I could not get the stupid pirate Famicom to work with a NES joypad. I wondered if it could be the fakey Famicom itself… It did have all these resistors going to the pins for the joypad. What is that all about? It seemed odd, especially since the resistors looked like they had been soldered on by an anemic dyslexic diaherra-stricken color-blind monkey…
As the pile of smashed useless destroyed-by-me Atari 2600 Juniors would attest, I am not one to worry about ruining game systems in the name of progress! My new plan was to attain yet another Super Joy Fun Stick Player Mech Game Player Game and try to figure out what I did wrong…
Dateline: August 9th – Las Vegas. I was at the 2003 Classic Gaming Expo, wandering around looking at stuff. Then, at a table, I saw it! A Super Joy Fun Stick Player Mech Game Player Game! I rushed over and bought it. Since I had a screwdriver with me I didn’t even wait to get back to the hotel. I plopped down on the couch where they were playing Warlords and ripped the thing open! Again, I found a “NES on a Chip” inside and it was pretty much the same as my other pirate Famicom, with one exception. There were 2 extra glop-tops on the board. This thing must have BUILT-IN crappy games! Wow!
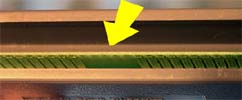
Once back in Wisconsin I proceeded to connect my 72 pin adapater thing to this new pirate Famicom board. However, it did not work right away with regular NES cartridges. I then discovered that if you connected +5 volts to pin 31 on the Famicom side it would disable the crappy built-in games (darn) and allow a catridge to run.
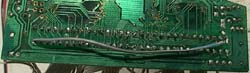
Kill crappy built-in games – just add this wire!
I also hooked up a NES joypad and lo and behold, on the first try, it worked. The first Super Joy Fun Stick Player Mech Game Player Game was a casualty of progress, but it did not die in vain. It perished so that I might learn how to connect this unit properly. And for that it will be remembered…
The completed “Super Joy Fun Stick Player Mech Game Player Game”, adapted to play American NES carts.
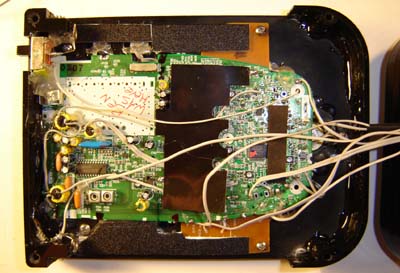
What you see above is a completely working NES clone. All it requires is +5 volts power, a screen and a controller.

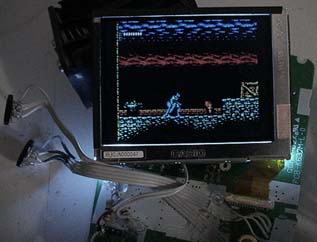
The Casio EV-560 screen (adapted with white LED’s and with the TV tuner part removed) the NESp guts, speaker and the controller shown all running off 4 AA batteries at a 280 mA draw. The TV normally takes 4 AA batteries and runs at a 500 mA draw. Using 2 white LED’s instead of the cathode tube saves a few hundred milliamps. I then ran the NESp guts right off the TV’s regulator giving a +5 volt current. Seeing as how the TV was originally supposed to run for about 3 hours off 4 AA’s at 500 mA, I estimate the NESp will run for at least that long, hopefully a little longer, with 4 AA’s. That to me, is pretty awesome.
Well now! The guts are all working, so you know what’s next? That’s right – the CASE!
The NESp built with the NOAC had the potential to be very small – my goal was to make it only slightly taller than a cartridge and the same size wide. The NES controller is the same width as a cartridge as well, so I figured using that would be the perfect width for the unit: 4.25″
Lofty, yes, but possible. The only thing holding me back was where to put the 4 AA batteries… I knew they’d have to go to the sides of the screen, but how to hold them there and be able to remove them? Rechargeables, like my electric shaver?
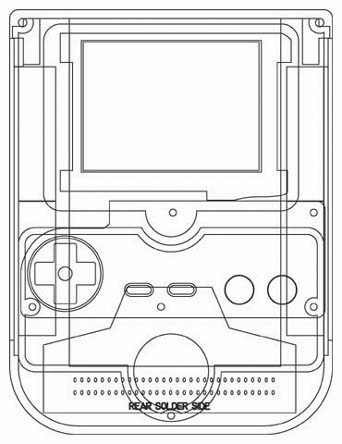
Months and months passed, and I came back to looking at the dusty Super Joy NES parts laying in their box. “It is time” I said, in my best Arnold voice. I took the parts and redesigned a case for them in a matter of hours. As another milestone, this is the first portable game unit that I have designed using Adobe Illustrator. The batteries? They’ll insert on the sides of the unit and have little doors! Ha! Nobody would see THAT coming!
I also had a hankering to cut the case for this thing using a laser engraver – which is like a CNC router except, well, it uses a laser. But… where would I find one of these things?
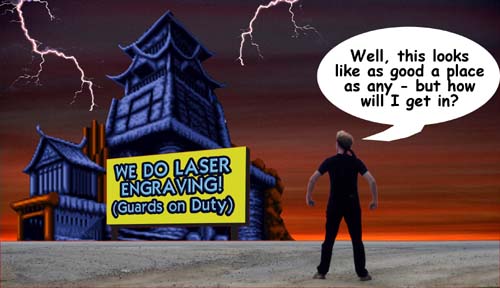

CLICK HERE to experience the original “Interactive Web Mission” thing for this story. OR simply continue reading below…
Once I got to the laser engraver, I cut the parts out of mostly engraving plastic and .25″ acrylic, as seen below!
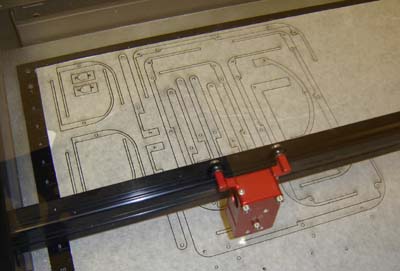
Well, in that shot it’s actually cutting a different portable but you get the idea. I then stacked the acrylic pieces to make case portions .75″ high. Superglue and expoy hold them together. Well, that and love.
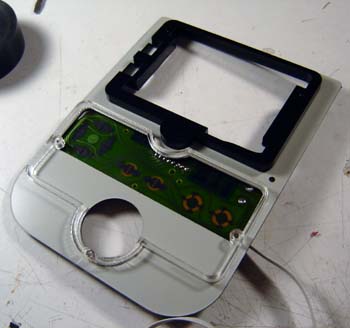
Here’s the cartridge connector and NOAC inserted in the rear portion of the case…
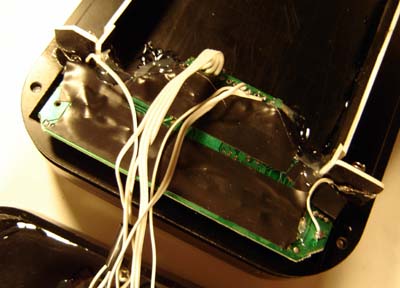
And here’s the front half of the case. If you look closely in the upper left, you can see where the battery terminal goes directly to the power switch. I had to move and rewire some of the biggest capacitors off the front of the TV board and move them to the back so the TV board would lay flat enough for the NOAC to fit. Oh well, it was worth it!
I used an original NES controller circuit board behind the buttons because I wanted the classic “mushy” feel to them, rather than the precise clicks of a tact switch.
The NOAC is securely taped and hot-glued to the rear portion of the casing and battery holders were hand-cut and super glued into place, as seen below.
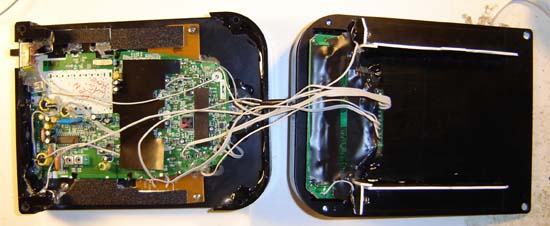
Here’s the unit open with both halves. There’s actually only about 8 wires going between them – +5 volts, ground, audio, video, latch, data, clock and a battery terminal link. You can practically count them in the photo.
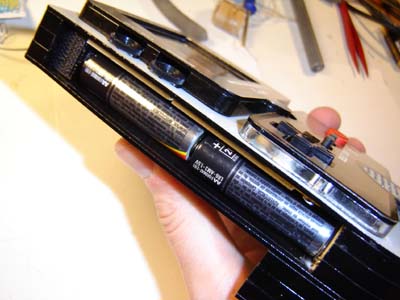
On the sides of the unit are plastic bits that you pry open to find the batteries, as shown above. I knew the batteries would fit, so I just left space for them in my designs. Then, once I actually assembled the unit I hand-cut spacers to hole them in (seen just above the batteries on the screen side) I’ve found it’s a lot easier to cut certain things by hand while assembling the unit than try to design every little widget you might need on the computer.
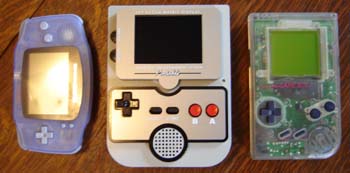
Here is a size comparison photo. Yes, it’s still bigger than the other units but come on – it takes a whole NES cartridge!
And there it is – the complete story of how I built my NOAC portable Nintendo 8-bit! The Super Joy Fun Stick Player Mech Game Player Game has risen from the ashes of its cheap rip-off Nintendo 64 controller shell and emerged with new life!
Nice Project !!! i Buy some nes clones in brazil with the same chip inside