
|
The Atari 800 XE Laptop: Round 2 |
“Making Of” Story
For many years an Atari 800 laptop was my “dream portable”. Then after I built it I had no more worlds to conquer, so to speak. Well, I do, my custom pinball machine, but I digress. Anyway, earlier this year I had a request to build another Atari 800 laptop so I decided to have another whack at it. With less woodgrain this time, and hopefully some new features. I also wanted to redo the keyboard design.
As with the previous laptop I began with an Atari XEGS, the GS meaning “Game System”, or “Gone Soon” considering how they sold. Still, it’s the last model Atari 800 class computer and thus has the smallest motherboard. Why exactly Atari thought a 1979 era computer, disgusted as a game system, could compete with the NES or the Master System is beyond me. Yes, I know the NES/Master System weren’t exactly technological wonders but they easily beat the 800 for graphics, I’m sad to say.
f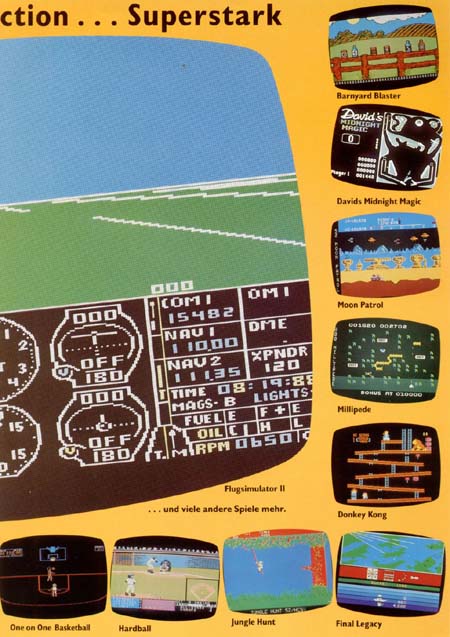
An ad I found online. Atari attempts to sell 1982-style game and systems in 1987 and fails. Who knows, maybe Nintendo will have better luck.
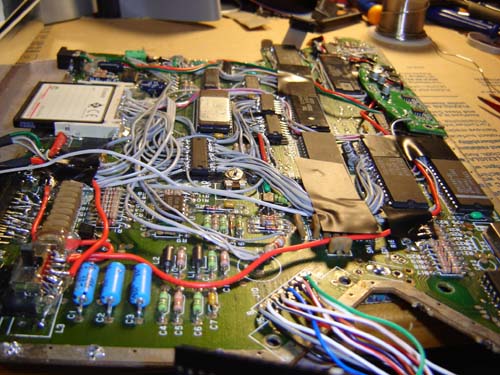
Using Mr. Atari’s MyIDE interface yet again (since it’s awesome) I wired up the motherboard. Oh yes I guess I should explain what the MyIDE is. It’s a custom OS ROM and some support circuitry that allows you to attach an IDE hard drive to an Atari computer and use it as a large, fast disk drive. CompactFlash works too since it’s pin compatible with IDE. Check out his site! (opens in new window)
Notice below how I kept things much flatter than before – it kind of pained me with the last laptop that in 2005 I was working with a lot of soldering I did in 2003, when I started the project. That’s the one good thing about getting older, you only get better at [most] things.
“My soldering skills have doubled since last we met!”
Since then I have also learned more about CompactFlash cards, specifically that the wire up just like an IDE hard drive. Thus, an “IDE to CompactFlash” adapter is pointless. So I wired everything directly to a CompactFlash slot, as shown below. Coincidently, this slot came off the TV I used for the last Atari laptop.
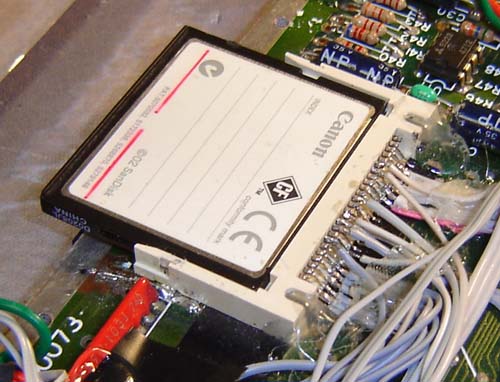
By using just the slot and not an adapter I made a much thinner card assembly. Don’t drink too much caffeine when attempting soldering like this.
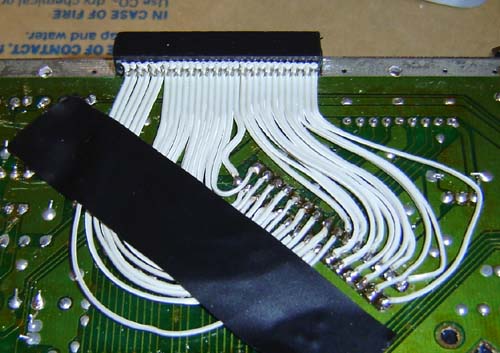
This time I stuck in a cartridge slot, though it was kind of a pain to do and made me realize why I didn’t the first time. I used, well, most of an IDE cable and wired it on the bottom of the motherboard. This is on the opposite side of the CompactFlash. The thinner the better.
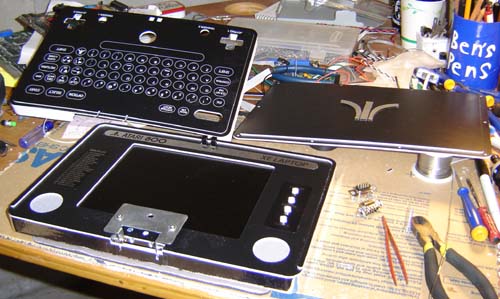
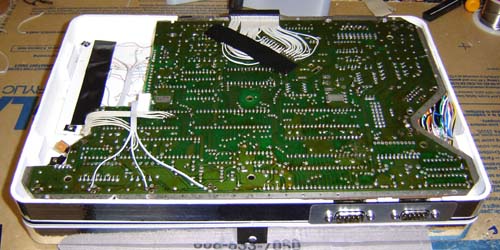
With the base electronics out of the way I started on the case. While this looks similar to the original laptop it’s actually an all-new design. The thickness remains the same, one and a half inches.
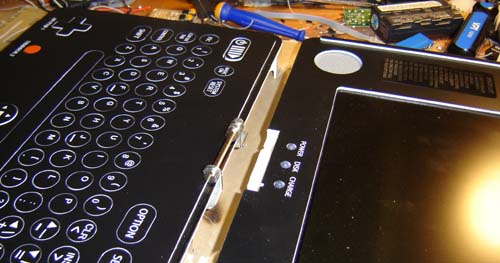
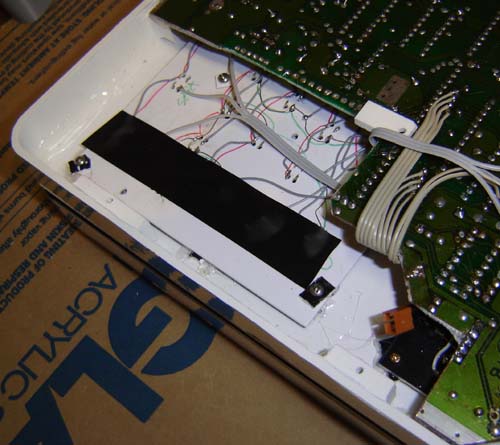
Here’s the inside of the new style keyboard. The keys are all flat on the surface but unlike a membrane keyboard they actually push in and have a “click”. Each key is a round piece with 2 layers, with a square hole in the second layer. This hole allows the small tact switch to fit inside and make the keyboard, yes here comes the word again, thinner.
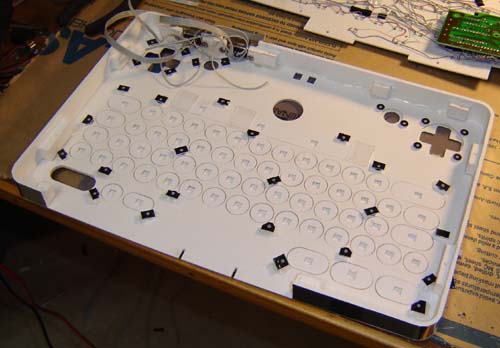
Here’s a close-up of the keys in the finished unit. They were laser engraved in a raster fashion, allowing fine detail. The built-in flat joypads were done in a similar manner, but a little more raised over the surface than the keys.
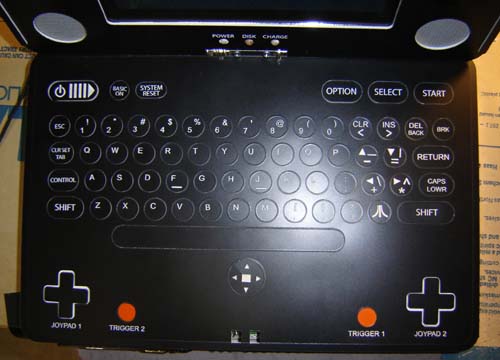
Here’s the hand wired back of the keyboard matrix. I did this faster than the first version, but it’s still tricky. This is a good example of why my mods have a bit of cost to them. I also made the “auto cursor” disc again – you can press this in a direction to move the cursor around the screen. Typically in old computers, like the Atari, you had to press control+arrow keys to do this.
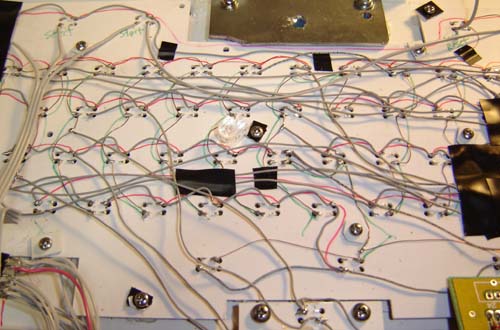
Again, not as annoying to wire as it might look, but not exactly a picnic at a beer factory either.
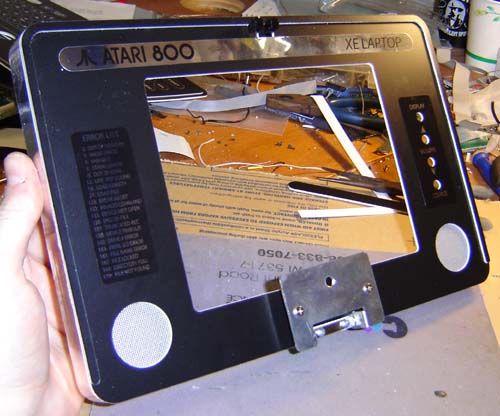
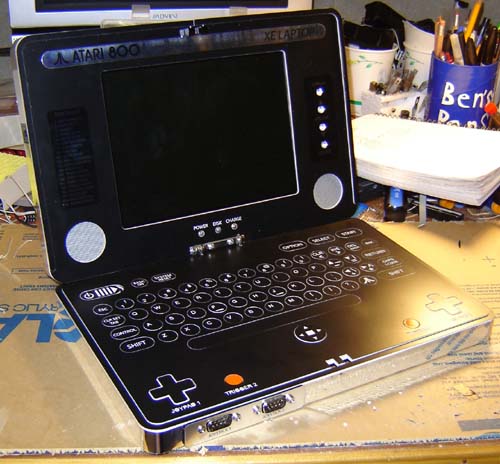
Another large portion was the screen frame. It includes all shiny chrome and black graphics and the famous built-in “error list” Not that anything would EVER go wrong with an Atari! It also includes the screen control buttons and some silver mesh for the speakers. An Atari 800 is in mono but that doesn’t mean I can’t through in 2 speakers and pipe the same thing to both. Besides, it looks more symmetrical this way.
Here’s all the main case parts laid out and ready for stuffing, much like a turkey.
This unit uses the same type of screen as the original laptop, though Radio Shack stopped selling them and I had to find one off eBay. This time I used the hinge from the screen for the resulting laptop itself, though I wish I would have used 2 hinges instead of one.
The next step is to start putting the electronics inside this case…
First we shove in the screen. It’s an 8″ TFT active matrix one that originally had a TV tuner, CompactFlash picture viewer (how useful) and some other crap. I compacted it down to just a PCB and the glass for use in this project. There’s a lot of ribbon cable between the main board and the glass so I could position things with relative ease.
Next I installed the speakers from the TV along with the screen controls (the 4 main buttons at least) and shockingly enough – a headphone jack. It’s the thing on the left with all the wires. For some reason that won’t be understood until the end of time I rarely put headphone jacks in my projects. Figured I should shake things up a bit with this one.
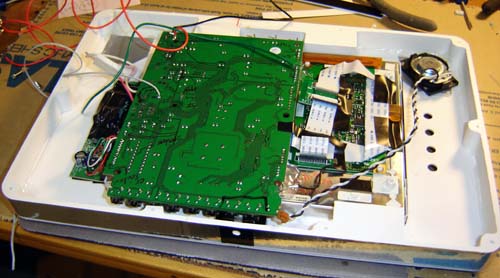
Below you see the motherboard of the Atari XEGS and how it attaches to the main laptop. The power and audio/video connections go through some heat shrink tubing. There’s also a port to plug in for attaching the joysticks and a final plug to connect the keyboard (upper left, the green thing)
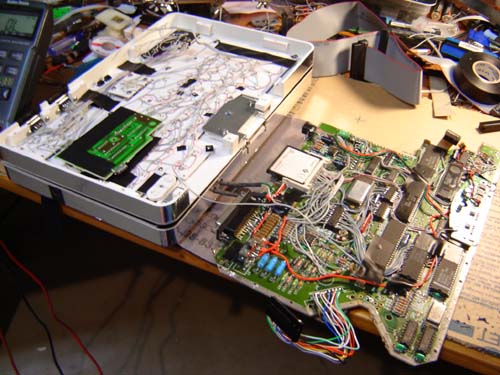
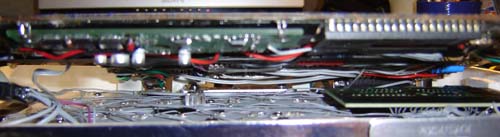
Here’s a view under the motherboard as it’s plopped into the main case. Quite a maze of wires.
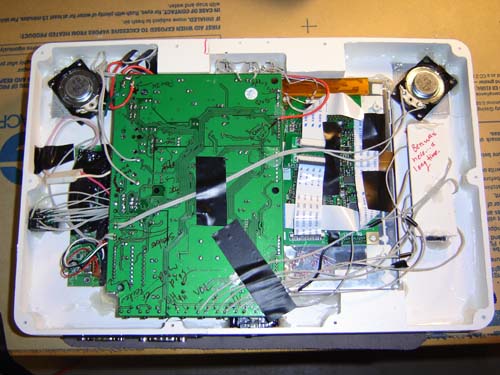
The motherboard laid flat, along with the joystick ports.
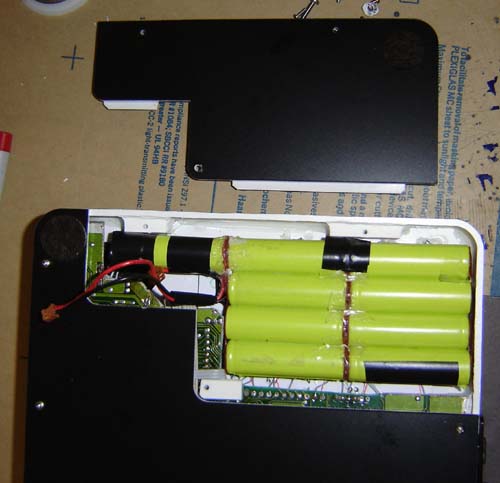
Higher view of previous. Note the gap on the left, this is where the battery pack goes.
Closer view of this opening. You can see the wires on the right snaking around the board, these are for the joystick controls.
Here’s the battery pack shown in the unit, along with the door to cover it. These Ni-MH rechargeables were from the original TV. Felt pads were added so you can slide this thing across your new marble countertops with confidence.
And now here’s some more photos of the finished unit:
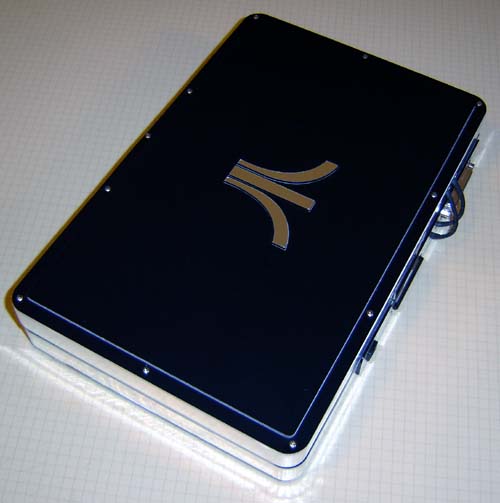
I made a raised brushed aluminum Atari logo for the top of the unit. Looks pretty slick!
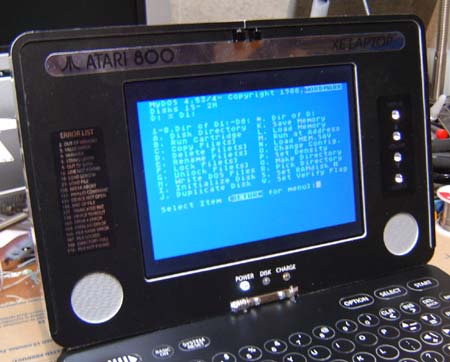
Good old DOS. Man this thing is hard to photograph with all the black surfaces and silver chrome. I feel for people shooting the PS3.
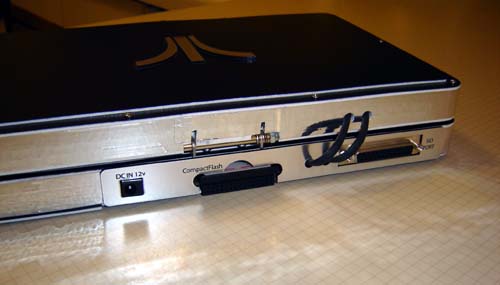
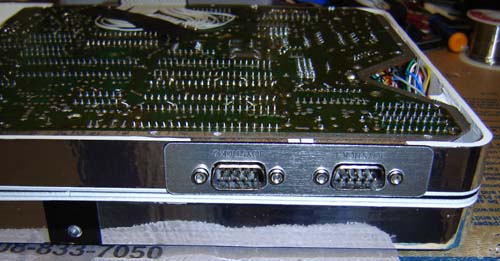
The back of the unit. We see the wires between the halves, the CompactFlash slot, power slot and the DB25 used as an thin SIO port.
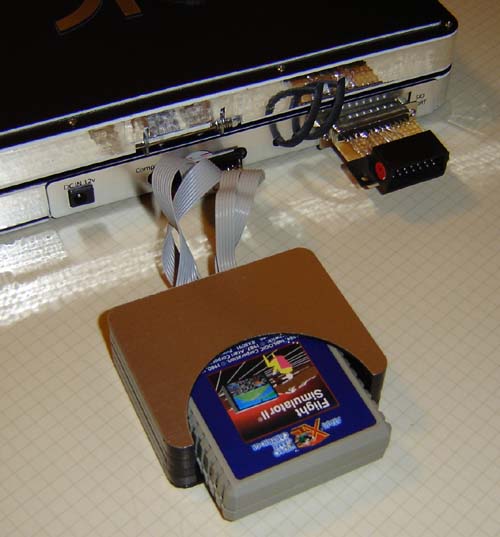
The cartridge breakout box plugs in below the CompactFlash slot. Also shown is the SIO adapter attached, so you can use the SIO2PC cable or a real disk drive if you have one of the 3 working ones left.
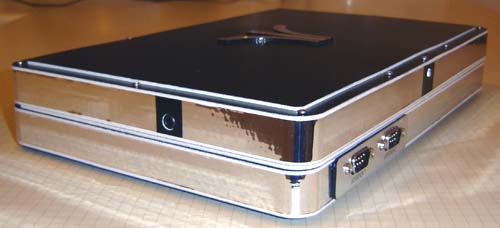
End view of the unit.
The unit sitting on my crappy workbench. I need to get a few more projects crossed off the list so I can clean up the darn thing.
There you have it, stories and pics from my latest computer laptop project. I guess now I should branch out and try some other systems after giving the old ‘800 a couple whacks. What can I say, I’m biased for it! Still, I think it’s time to move on. But… to what? Stay tuned!
3 thoughts on “Atari 800 Laptop 2”