
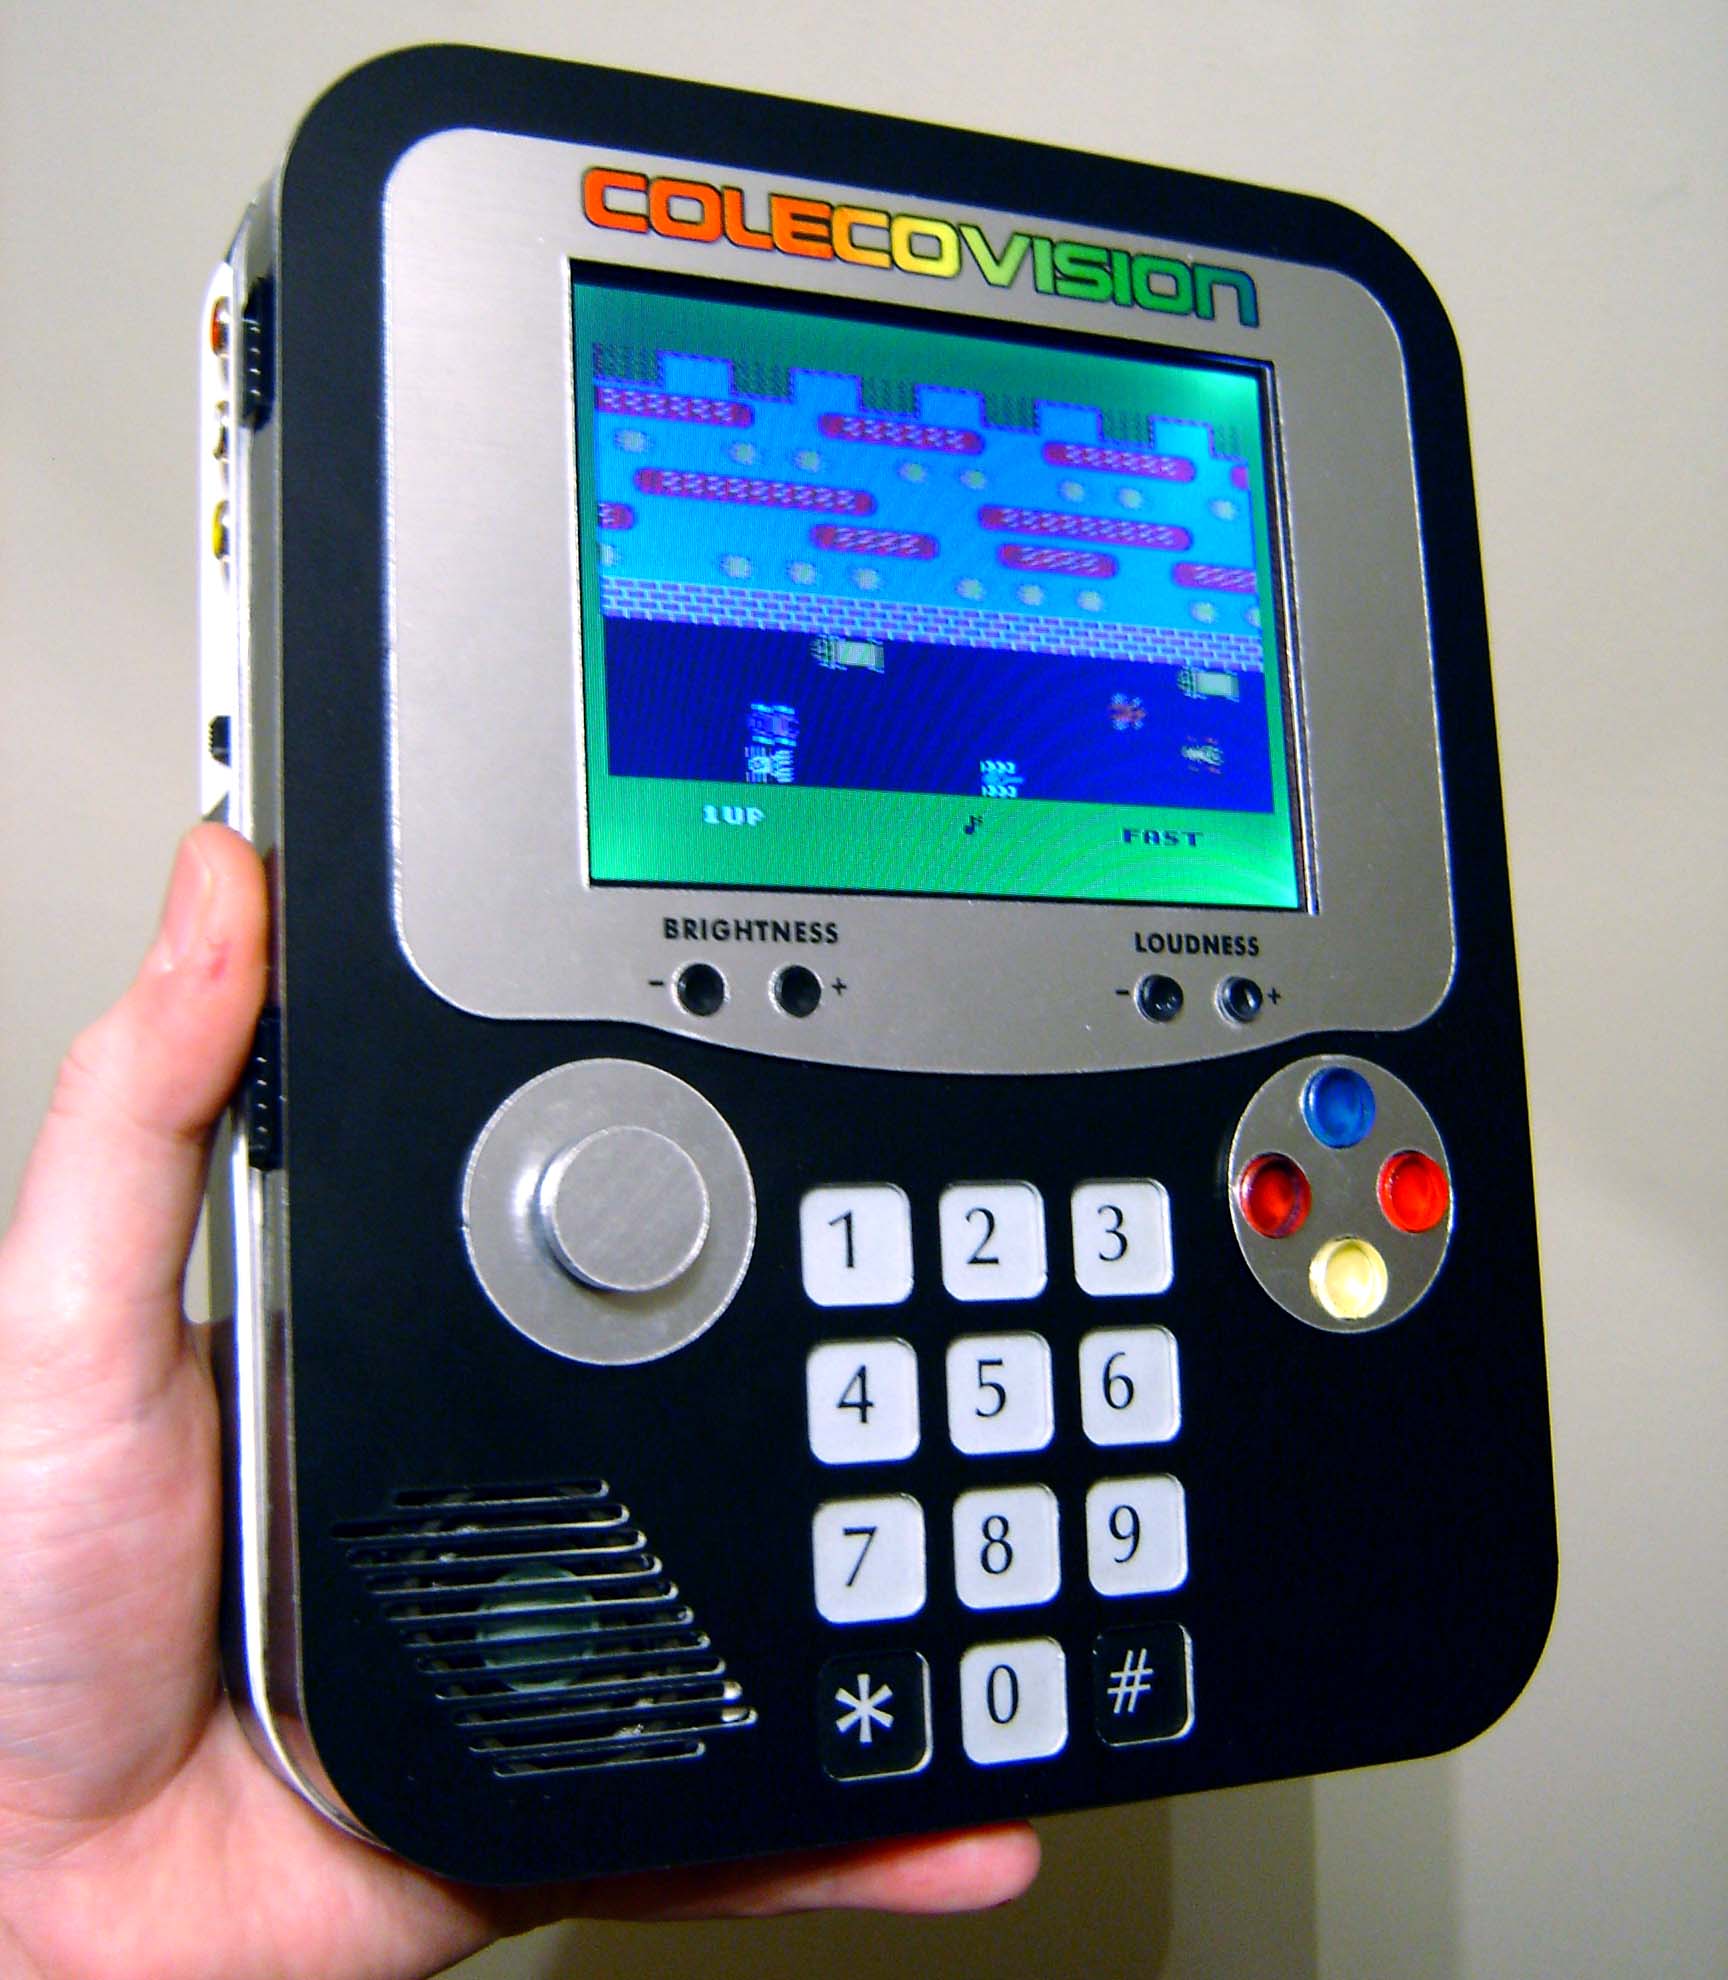
Ah yes, have to love those retro titles, eh? To be honest I’m not sure how much “groove” the Colecovision really had (or the Stella for that matter) but I guess it doesn’t really matter. It’s back and it’s portable!
This was a custom job I did by request, the second of the year (First being the Neo Geo Portable) I don’t usually go for suggestions, but if they’re reasonable (unlike, say, an XBox 360 that runs off a potato) I sometimes consider them. And if your car’s timing belt takes a dump on the way to McDonalds (unlike humans, who usually take a dump AFTER McDonald’s) extra “side job” cash is always appreciated. Well, that and I figured I should do something with a different classic game system for a change, instead of my zillionth version of an Atari portable.
Making it Run Off Batteries
OK so the unit itself. The first thing I’d like to mention about the Colecovision is that it has the strangest power inputs of any old system I’ve ripped apart thus far. There’s a +5, a +12 and the kicker, a -5! What is this, a PC? My un-expert opinion is because everything in the Coleco is “off the shelf”, rather than custom like say the Atari’s TIA, they had to use whatever the IC’s required. Actually the only things the +12 and -5 seem to go to are the video RAM circuits, or something near the video processor.
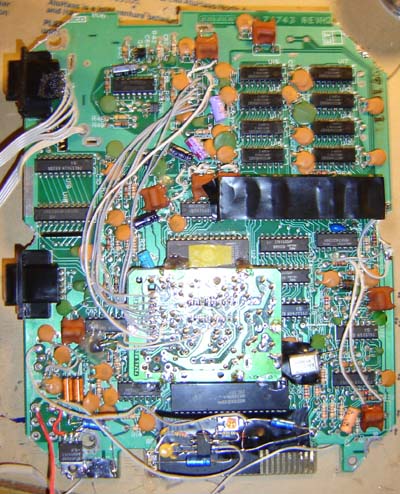
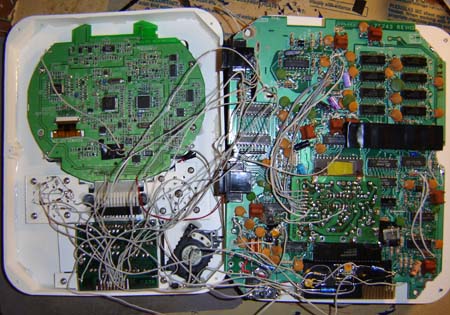
The hacked-up Colecovision motherboard
But no big deal, I just used a LDO (low drop-out) regulator for the garden variety +5, a step up switching regulator package (from Dimension Engineering) for the +12 and a voltage inverter off Digi-Key for the -5. For anyone who still thinks I’m some sort of electronics expert, know that I didn’t get the -5 working until the 3rd integrated circuit regulator I tried! Oh the shame!
Along the way I had to flatten the board as I call it. This is when I rewire capacitors and other pesky tall components sideways so the overall motherboard is thinner. Of course there was the nonsense of the heatsink on the video processor so this board could only go so much thinner regardless. As with another portable I’m working on I bent all the aluminum tines flat, that helped a lot. Also note the shiny thing in the middle – that’s the original RF modulator, but I modified it to simply give off composite video, which is then slightly amplified by a transistor. I then put the video signal through a potentiometer before it reaches the screen as it was a little too powerful for the PS1 screen. The signal going to the external A/V jacks is left unhindered.
Since the Coleco’s main PCB wasn’t exactly small I knew the resulting portable itself wouldn’t be small. (Brilliant, eh?) So I figured I may as well go with a nice big juicy 5″ PS1 screen. You know, those screens are quite awesome. They’re cheap as dirt on eBay, accept RGB, S-Video and composite and can even be modded to use white LED’s and save power. (See my book) I highly recommend them.
Designing the case was the usual affair – I used Adobe Illustrator and then cut everything with CNC machines. It’s getting quite old hat – I could probably do it in my sleep (I certainly know I can do it after a bunch of beers) As usual the design theme was to make it look like the original system, with the same colors, fonts, etc. With the parts cut I began assembling!
BONUS! Anyone need a pristine vector version of the Colecovision logo? I had to redraw it from scratch to make the decals for this unit (since I could not find a pristine vector version) As any graphic artist can tell you, the experience gained from making workable logos off countless crappy scanned business cards make this sort of conversion an everyday thing. To get some good Coleco logos, click below:
Suitable for framing!
Taking Control of the Situation
(AKA a header for the sake of headers)
I hated the original Colecovision controller. Granted, it wasn’t as bad as the “Intellivision Disc of Despair” but it certainly didn’t make me do cartwheels of joy. The original “stunted stick” was too small for your hands (like an Atari) but too big for your thumbs (like a Nintendo) Perhaps it was designed by Hobbits – who knows?
So here’s my big chance to change the world, one thumbstick at a time. I simply made my unit have a miniature version of the Coleco stick (brushed aluminum and all) that worked with a human’s thumb! Astounding! In the photo you can also see the number pad (note – the final product used a different numberpad) and the 4 triggers.
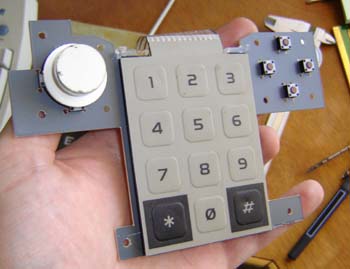
Sure the Atari only had 1 measly action button, but every other “competing” system, including the 5200, had a whole keypad! Kinda overkill, wasn’t it?
Yes, a whopping 4 triggers. Coleco enthusiasts are no doubt familiar with the “Super Action Controller” which looked something like a boxing glove mixed with a Flash Gordon spaceship control yoke. It also had a spinner wheel which allowed you to… honestly I can’t remember. Make your onscreen dude run or something? But my client wanted all that in the portable, so I went along with it. I guess he’ll have all the bases covered!
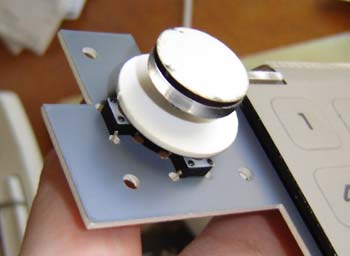
A close-up of the control stick. Note the familiar tact switches. This allows tight and accurate controls, allowing your frog to make it across the highway and water safely.
Installing the Guts into the Case
With the controls all wired up I moved onto the screen and stuffing all these parts into the front half of the case. The insides look like this:
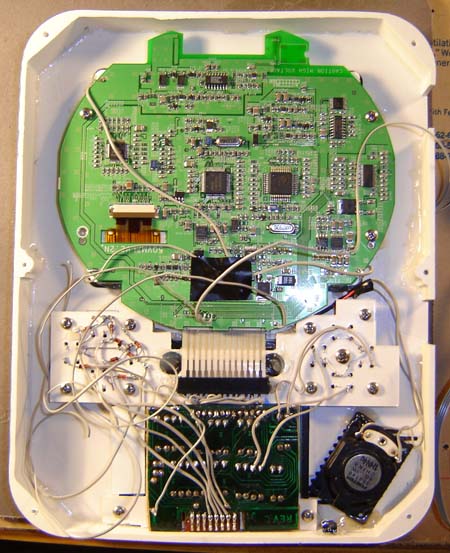
The Colecovision uses some sort of diode matrix to decode the keypad, spinner wheel, joystick and buttons all onto a 9 pin controller connector. I really didn’t care how it worked, just that it WOULD work, so I simply replicated the diode patterns and used whatever original joystick guts I had. Of note – the main controller guts are from a Super Action Controller while the keypad is from a standard controller. Of course the keypad isn’t mapped the same so I had to figure that mess out – what fun.
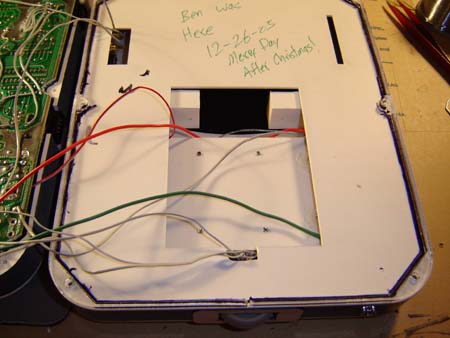
Here’s the rear half of the unit. Yes I know it doesn’t look like much. Under that plate are the power switches, A/V jacks, power ports as well as the +12 volt step-up regulator (it didn’t fit in the front of the unit) The gap in the middle is where the cartridge slot will connect.
Here’s the front half connected to the motherboard, with the rear half underneath that. As you can see it’s a total mess. But this is on the inside of course, the important thing is that it looks good on the outside.
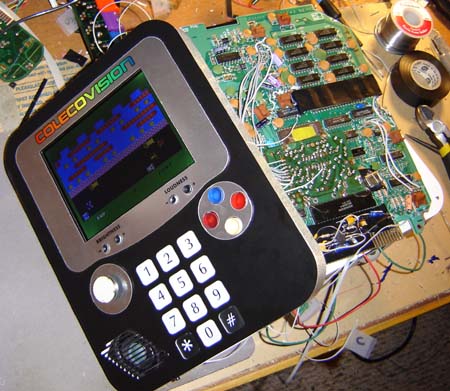
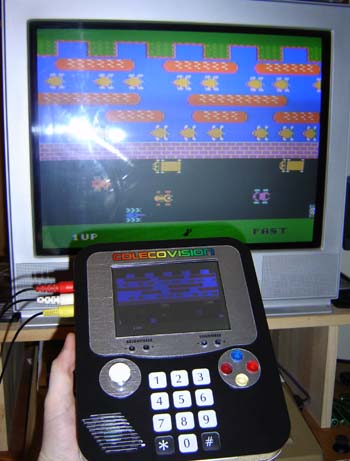
The first test, with everything helter-skelter. Best to check all the controller connections now rather than after it’s all buttoned up! As with the Atari Frogger makes the best test cartridge. It has sound immediately upon boot-up and you can easily test up, down, left and right controls. Plus it’s a fun game.
Glamour Shots
That’s pretty much all there is to say about the construction. This was a little tricky to do, but at least I’ve branched out with my classic gaming systems. Here’s some more photos of the finished unit to take a look at…
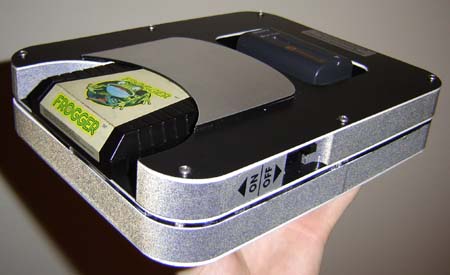
Cartridge view from end. I used some leftover reflective black vinyl on this, same as the edges of the Atari 800 Laptop. Normally appears dark. Some cartridges for the Coleco are strangely shaped so I had to have a wide area around the top so they could fit. A bonus is that even a walrus wearing mittens could probably grasp the cartridge with ease.
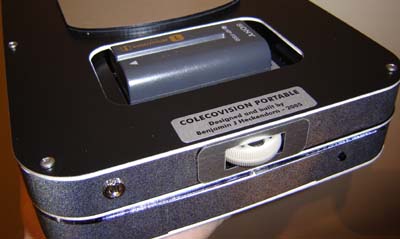
Spinner wheel and Sony Infolithium battery. There’s also an auxiliary power input (lower left) that I made to use a Sony PS1 screen wall power supply. It’s the same voltage as the battery, +7.5 Very faintly to the right you can see the small “Reset” switch you can hit should Donkey Kong give you a hard time.
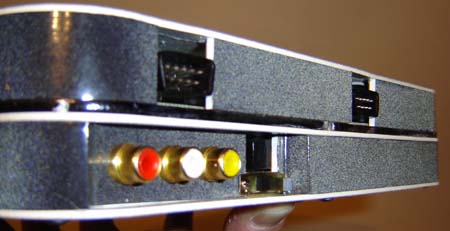
Left side of unit, with A/V output jacks, PS1 screen on/off switch and controller ports. The ports are in their original positions on the motherboard. Why re-invent the wheel if it already rolls?
If you wish to play using two screens you can, or the unit’s screen can be switched off to limit the overt redundancy of this situation. Note the speaker holes in my standard “1950’s Toaster” slit design.
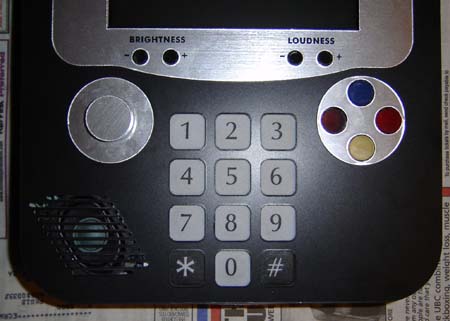
Detail of the control area. There’s a slit at the bottom so you can slide in an overlay, though it’s probably a tight fit. This unit looks a little monochromatic, as it’s just brushed aluminum and black, but hey – it looks like a Colecovision!
Click photo for high resolution version. Not suitable for dial-up, unless you’re really patient!
And there you have it! As stated above, this is a one-of-a-kind unit built by request, so it’s not for sale (as it’s already been sold) and due to its complexity I won’t be making any more. I know there’s some talk on the Atari Age forums about a mass-produced Colecovision – for that to be feasible we’d need some sort of “Coleco On A Chip” Using the original hardware, while obviously possible, isn’t the easiest method in this case.
Until next time, then… Be sure to keep the classic gaming spirit alive! (But don’t forget plenty of great new games are out there as well 😉
One thought on “Colecovision Portable”