|
|
|||||
I got sick of my old NES being a flaky POS so I decided to hack it a bit using some new tricks I learned. This stuff is pretty simple (several levels below brain surgery) so if you know which end of the soldering iron to hold (hint: the end that doesn't hurt) these shouldn't be a problem. Also included is a super-duper overdone NES-Famicom cartridge pinout comparer. Enjoy! Faux Stereo Sound
From Your Old NES!
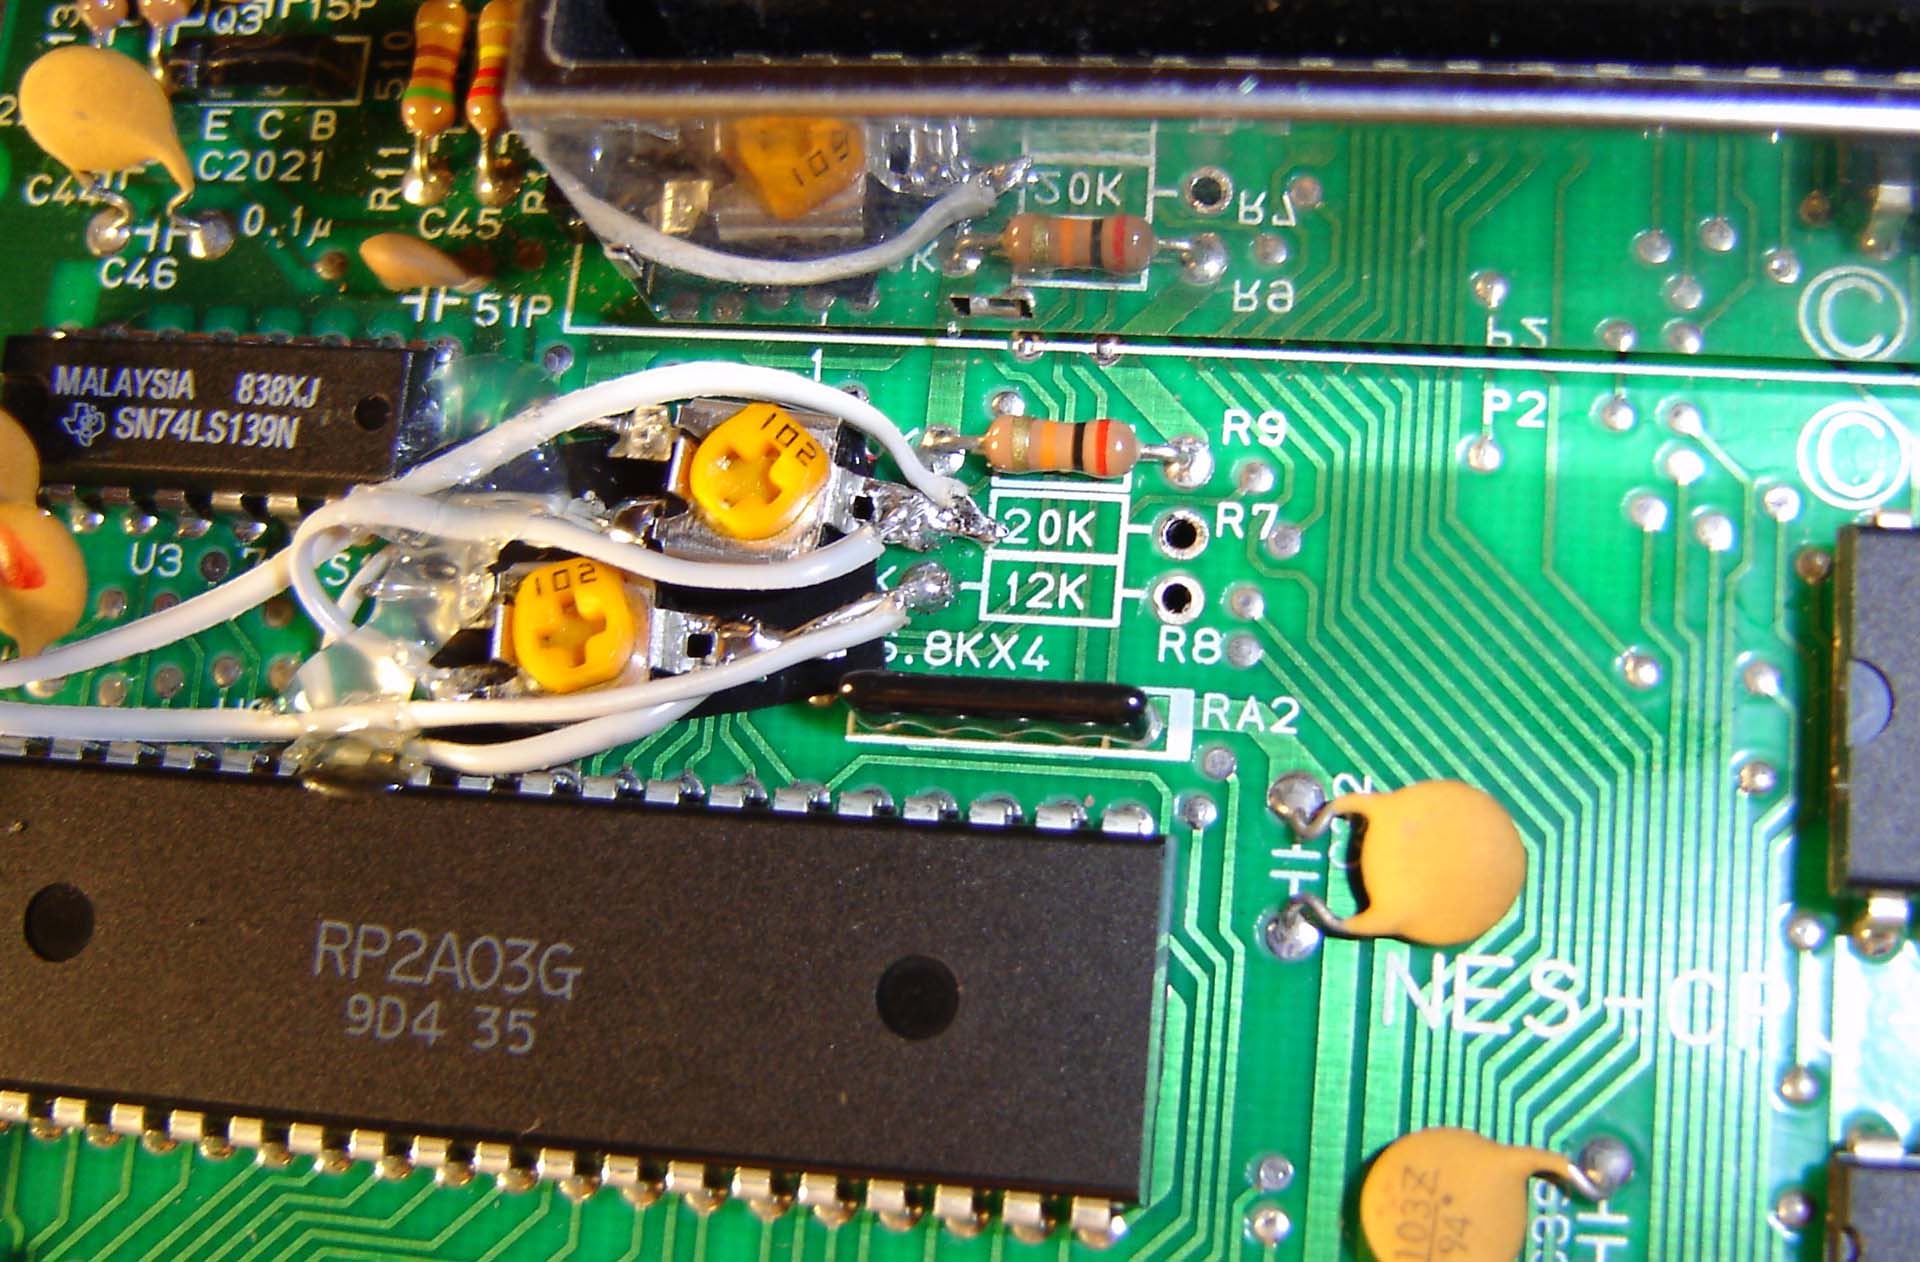
1) On the bottom side of the NES motherboard (the parts side), locate resistors R7 and R8 as shown (shown missing I mean) in the above photo. This is right below the useless expansion port. 2) Remove the resistors and save them for a rainy day. (Or throw them away like I did) 3) The signals from the CPU go to the left side pins of the resistors. So simply connect a wire to each as shown, and the other ends of these wires to the center plugs of two RCA jacks. 4) Connect both RCA jack grounds to the main system ground of the NES motherboard (any metal around the edges) 5) Bam! You've got fake stereo. The Nintendo has 5 sound channels, including one for PCM. 2 of these will go to one speaker, the other 2 plus PCM, to the other. 6) The separation is quite distinct, so you may want to use resistors between the connections to allow a bit of "mixing" between the channels. I used two 1k ohm potentiometers as seen above - this way I could listen to the music of a game while adjusting the pots to the levels I liked best. The original NES circuit uses the system's hex inverter to amplify the signal, or do something with it, I'm not quite sure. It goes through it, I know that! This method is a bit quieter but a lot simpler - honestly I think I only had to turn the TV up about 5-10 notches above the normal level for watching TV so no big deal. Disable your NES's
Lockout Chip and Make Tengen Smile! Apparently one of the big reasons a NES cartridge doesn't always load is because the lockout chip inside the NES and the one in the cartridge must "talk" to each other before the system is allowed to boot. Corroded (that is, not blown on) cartridge connectors can prohibit this data transmission from taking place. If the screen flashes on boot that's the problem. The solution? Kill the lockout chip! Now you can't outright remove it (I tried - the NES won't do squat if it's gone) but if you pull up Pin 4 (as shown below) and connect it to Ground (instead of +5 volts as it is normally) the lockout chip will be kicked in the junk and fail to stop any Color Dreams or pirate cartridge you stick in it. Though considering the quality of most Color Dreams games you may actually thank the chip for existing in the first place.
I actually smashed the original lockout chip as I tried to remove it. Luckily I had a worthless Super Mario Bros. cartridge laying around and I simply pulled a lockout chip from that. I then was able to use this "lockout chipless" cartridge in my NES to test it - yup, it worked! While some of the cartridges in my collection are still dirty, those that are clean boot right up. The effects may be negligible, but anything to help the NES boot up and not "flash gray" is worth it. Note: The NES won't work with the lockout chip removed as it's connected to the RESET lines of both the CPU and GPU, as well as the RESET button itself. Rather than spend time trying to figure out exactly how it worked, or how to make the system work without it, I just did this. My perfectionism has its limits, typically reached when it's 9 PM and I feel like having a beer. Die Zero Insertion
Force Cartridge Slot! DIE DIE DIE!
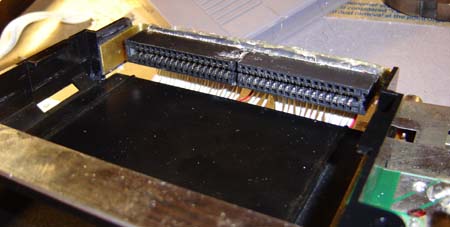
Yes, the NES was trying as hard as possible to look unlike any normal game system back in the day, it was part of their sales strategy especially after the Great Gaming Crash of '84. But this cartridge slot just didn't cut the mustard after about 2-3 years of play, and for those of use still playing NES after a couple decades that's a big deal. What's really crummy about the thing is the cartridge moves but IT DOESN'T. Thus, it gets all bent and smashed up, therefore not making contact after a while. I decided to just chuck the ZIP slot altogether and be done with it. In its place I used two hacked up floppy drive cable connectors, kind of like what I used on my NES Micro.
The big difference here is that the cartridge connectors are attached to the tilting cartridge holder itself - that means the connecter rotates down when the cartridge does! Amazing! Why Nintendo didn't think of this is beyond me - I'd say expense but that hefty molded and pin-filled ZIF connector couldn't have been exactly cheap either. I guess in one way it's a complement to them - people literally played the systems until they wore out. One way around this would have been to permanently glue in a great game like Contra and just go with that - but of course make sure you blow on it first. Note: For a way to improve/fix your original ZIF connector, and do other NES hacks, see my book! The Most Accurate
NES-Famicom Cartridge Pinout Chart Or Your Money Back!* Ben's NES-Famicom Cartridge Chart! You can use this to make a Famicon-NES adapter (for use with a pirate "NES" game machine, etc), hack your NES or cartridges, whatever, I don't really care. Just use it, go nuts. Email it to all your friends, even those who don't like the NES. It also includes how to disable all the crappy ROM's on the pirate NES "Super Joy" systems. Plus it's a slick graphic version of the chart - TXT files are SO 1970's. Well, that's about it for my "Super" Nintendo hacks. I had this idea to make some wireless controllers and a "Save State" circuit, but that's probably more work than it's worth, at least for now. Enjoy these for now! Back to www.benheck.com Homepage
|
|||||
|
Thanks to Nes.Dev and all their awesome documents that allowed me to improve my NES, and share the information with you! |
|||||