|
|
|||||
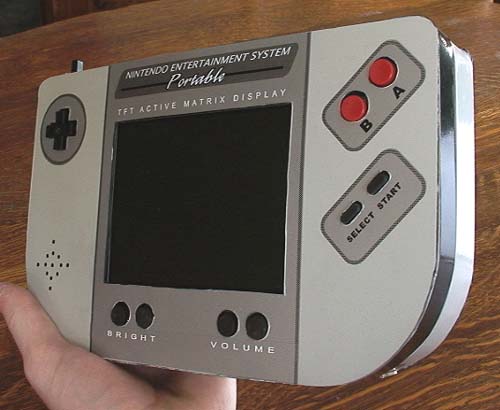
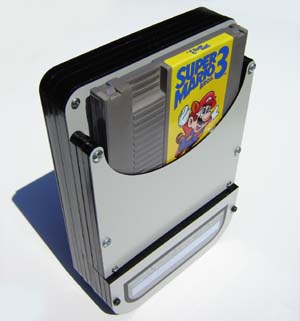
As I write and build portables I've been putting them on this "Project 42" page. So, think of it as a preview of what you can do with the power of my book, which should be out in late January 2005! (More details forthcoming, you know, ordering links and the like) #1 - Nintendo Entertainment System Portable Built by Hand Here's a large photo to look at, complete with obligatory internet compression artifacts.
As I've mentioned before, the NES has big cartridges. But I didn't want to make a system where the cartridge sticks above the unit... (cough cough, the Game Axe) Of course, having the cartridge slide down the back made the unit bigger. So I thought, big cartridge - big screen! And so it was. The NES Portable contains an entire original NES motherboard, sans the RF modulator box. Some features:
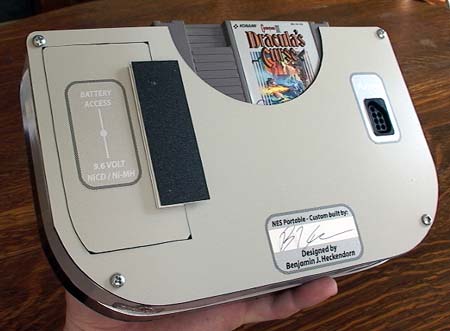
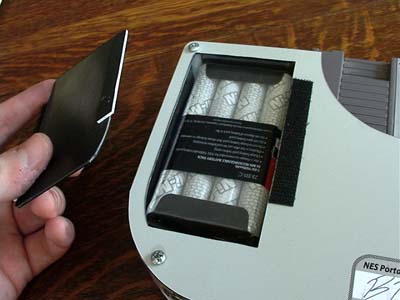
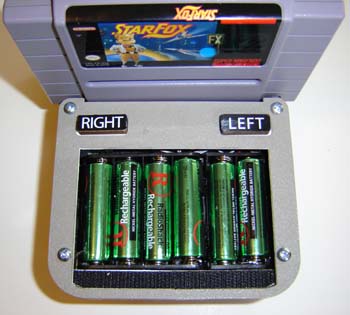
The cartridge slides down the back and sticks up a bit so you can still grab it. The NES carts are nuh-nuh... notoriously finicky so it had to be in a place where your hands wouldn't bump it while playing. Yes, it even has a battery door... which even opens! The batteries plug into the unit and can be removed for recharging.
This gives you 11.5 volts at full charge, which is kind of more than you need, but oh well. Like I said - they're cheap batteries. These are the 1600mAH Ni-MH, the older style Ni-CD's are only about 1000mAH. The NESp consumes about 700mAH of electric juice. There is also an AUX POWER IN jack to use a wall adapter. For a short video of this thing running, check out the Downloads page. That's all for now, but in the immortal words of Bachman-Turner Overdrive, you ain't seen nothing yet!
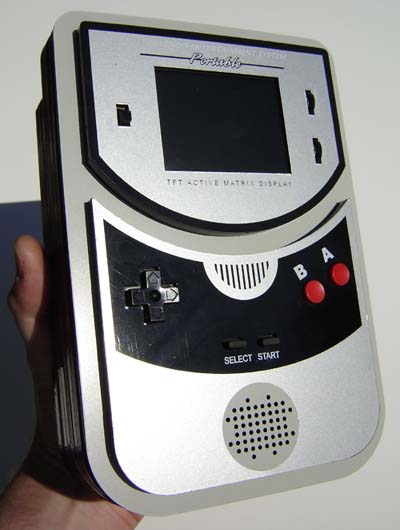
#2 - Nintendo Entertainment System Portable Built by CNC Machinery Here is my NES portable built using a CNC Laser Engraver!
It contains most of an original NES board, battery and 3" TFT color screen. The ON/OFF and volume/brightness controls are mounted horizontally on the front of the unit, which is a first for me. It even has *gasp!* a headphone jack!
Here's the unit from the rear. The cartridge slides down the back. This required the cartridge slot to be rewired at a 45 degree angle. Hey, it's only 72 wires - no biggie!
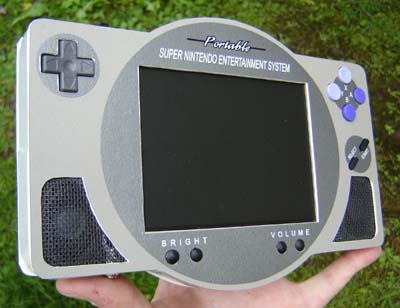
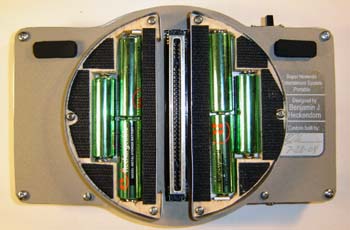
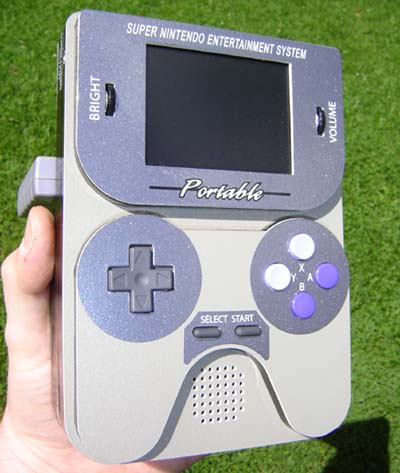
It also has a different kind of battery pack - a nice juicy 2000mAH 7.2 volt rechargeable, held in place by a removable battery cover. The battery alone is about 50% of the unit's weight. This is the Ni-CD version of the battery, the Ni-MH costs $10 more but provides 3000mAH! This gives the unit a hefty run-time. You can also plug an AC-DC adapter into the same jack to run off wall power. #3 - Super Nintendo Entertainment System Portable Built by Hand This is probably one of my most complex portables yet, the hand-built SNESp! (Or Ben Heckendorn's SNESp 2 if you wish) It's also the first stereo sound portable I've ever built. Which is kind of lame considering I built a portable of a stereo system almost 3 years ago (the PSOne). Oh well. Better late than never. It really does sound nice, it sucks you into the game in a way a 5" screen never could by itself! I would call it "immersive" albiet at the risk of sounding like a brochure for the Virtual Boy... PS: Just because I made this in stereo, please do not email suggesting I make a 5.1 speaker Dolby Digital XBox Portable - thanks! Well... actually, maybe I could... Yeah, wireless headphones you clip onto the back of your head (or suction cup if you're Yul Brynner)... and then... eh, nah! Let's stick to this SNES for now...
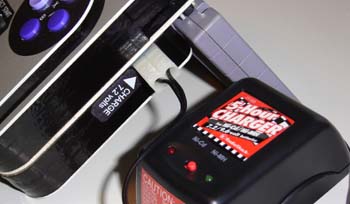
Here it is from behind, with charging plug inserted.
This is a hand-built unit, however it was a lot more complex to assemble than the hand-built NES above. Probable because it's got more curves and shapes. It was also rather difficult getting everything to fit in the thin space provided - the front portion of the unit contains everything except the batteries. Here's a top down view. The main portion of the unit is 3/4" thick, the rear battery portion is 1/2". Everything in the unit is centered to the cartridge and the screen. I used some neat some shiny metal for the sides of the battery compartments. That way - if you happen to get stranded on a desert island - you can play Contra 3 until the batteries go dead, then use the metal to signal an airplane to drop you more batteries!
Here's the unit with the Velcro-attached battery covers off. There's 3 AA's on either side, this unit is all about symmetry! Green Radio Shack Ni-MH rechargeables shown. You can see both shoulder buttons in this shot. I haven't labeled them yet, honestly, do I NEED to? One button is on the left, the other's on the right. It'd be like putting "CAUTION: HOT!" on a cup of coffee... Oh wait.
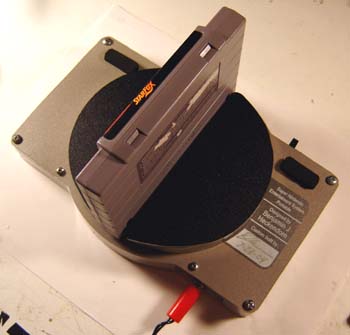
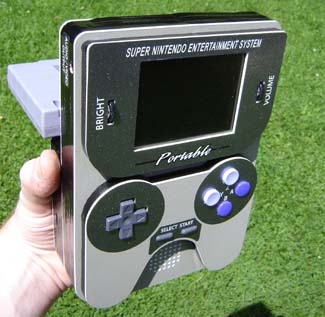
Well, that's all I have to say about this portable. Now, if you'll excuse me, I'm off for a rip-roaring game of Starfox. #4 - Super Nintendo Entertainment System Portable Built by CNC Machines Here's my latest device as of August 12th, 2004 - the CNC-built SNES portable!
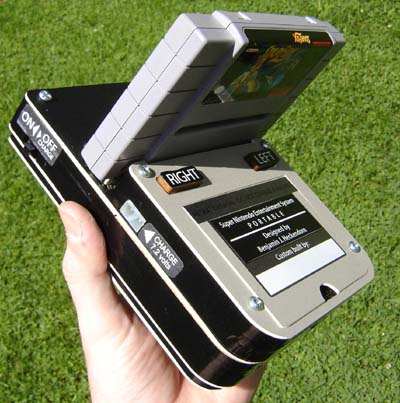
It's pretty much like my NOAC NESp, but a 1/2" taller and the cartridge sticks out the back.
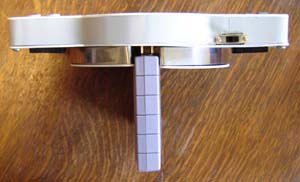
And yet another view! Unlike the previous hand-built SNES portable, I decided to label the right and left buttons, you know, just in case!
It takes 6 AA's, just like the hand-built SNES portable. Ni-MH rechargeables preferred. Here they are with the battery cover off. Reminds me of the Turbo Express...
But that's not all! No special plugs needed for charging, just get a cheap $8 RC car charger at Radio Shack, break off the tab and shove it in! It also has a DC AUX input power jack for a normal wall adapter.
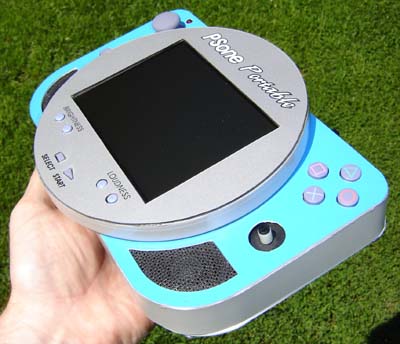
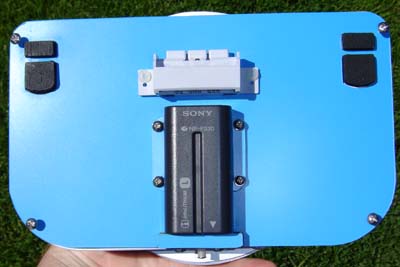
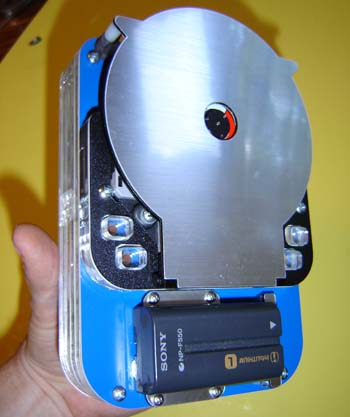
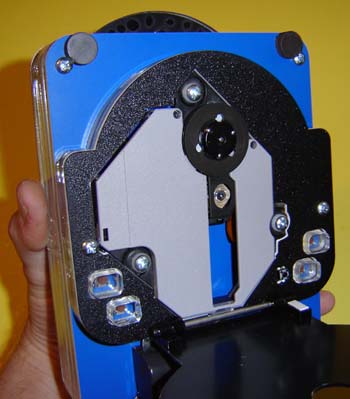
#6 - Hand-built Playstation 1 Portable On August 29th (2004) I finished my latest portable: a new PSone portable! Here's a different view than on the main page:
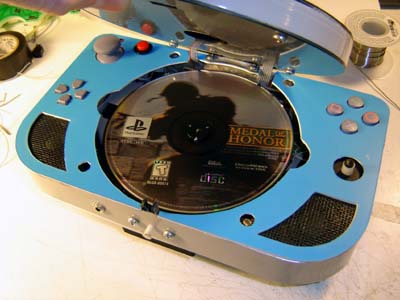
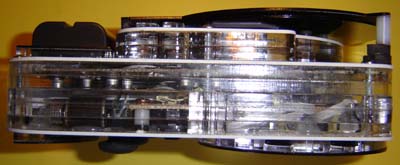
The main body of this unit measures 8.75" x 5" x 1". I worked really hard to keep the length under 9", I don't know why. (Kind of like how stuff costs $9.99 instead of $10, I suppose) In order to have the right analog stick where it is (vertically level with the D-PAD) I had to make a custom stick for it as the knob thing was too big and would have hit the screen. So now it's a mini-joystick with a rubber boot. Another thing that's plagued me for years are the words "Brightness" and "Volume" See, Brightness has more letters, so when you center it over a button/dial it looks different than the word "Volume" I solved this problem once and for all with this unit by labeling the "Volume" buttons "LOUDNESS" instead. I mean, it's still an accurate description of the button, is it not? It's still not as many letters as "BRIGHTNESS" but it's closer. The screen portion measure 6" x 6" x 1/2" and has a release button which lets you lift it to reveal the disc. (It's not spring loaded) There's 4 hours around the disc bay which recieve the screws holding the screen together. The lower-right screw hole has a microswitch that detects if the CD lid is closed or not. Very useful stuff! You can also see the teeth and LID OPEN pushbutton in this picture. This is probably the most difficult-to-build case I've ever done, and it was done by hand as well, making it all the tougher.
Here's the rear of the unit. I finally went back to Sony Infolithiums for this thing, mostly because the screen and the PSone both run off the same voltage as the battery. Made sense to me! The battery clips on so you can use a physically larger one if you wish (this thing does use lots of power, but there's also a DC-INPUT jack that uses the standard PSone screen wall adapter) The memory card and Player 2 port are also on the back.
I haven't put many decals on this thing yet, I guess I felt it didn't need them. I might add one to the back that says "BEN DID THIS" or some such nonsense. The shoulder buttons are likewise unlabeled, but I'm sure people realize what they are.
#6 - CNC-built Playstation 1 Portable Here's the latest PSone Portable called.... the PSone Portable! (I'm skipping the PSP moniker for obvious reasons) It's 5" x 7" x 1.75" and weighs... um... I'm not sure exactly how much, I guess about as much as a PSone, TV screen and battery.
With an acrylic case you can see right through this thing! I used a laser engraver to cut the parts, and it "fire polishes" the edges of the cut acrylic as it goes, sort of like a free built-in feature. The result is cool - I even made transparent shoulder buttons! Why? Because I can!
And now, the Top 3 kinds of emails I get on a regular basis: #3:
You should make a portable Dreamcast! So, sigh, I finally caved in and put a lid on this one. Complete with magnetic (cough cough easy) latches. I used brushed aluminum engraving plastic for that whole "retro-futuristic" look. However, as a result, this unit loses its pizza-cutting/table sawing/wild animal hypnotizing properties. What a price to pay for safety.
Here's a final "money shot" of the unit, with a lot of the guts visible and then of course the pesky flash bulb flare. Can't win 'em all I guess...
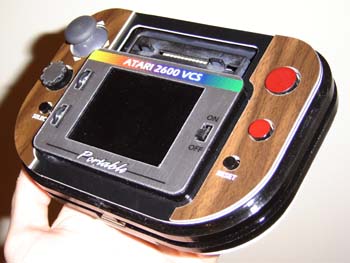
#7 - Hand-built Atari 2600 Portable I've made more portables Ataris than you can shake a stick at but I've never built a case for one by hand. But now all that has changed!
This is a fairly simply portable Atari 2600. It doesn't have every bell and whistle, but it's rather small in size and runs off 6 AA batteries (rechargeables preferred) The overall size is 7.25" x 4.5" x 1.5". Naturally it can also run off wall power.
I've also re-instated the multi-color band and brushed aluminum motif for this unit. Unlike the VCSp Rev 6, this thing's screen is mostly recessed into the case. Along with the controls. Come to think of it, why was the Rev 6 thicker? It's the same stuff inside, practically.
#8 - CNC-built Atari 2600 portable Yes, it's a CNC-built Atari 2600 portable. An original Atari 2600 is crammed inside this case (well, some of an Atari at least)
The last time I made a landscape VCSp it was the famous Rev 5. But that had square corners and was 2" thick. This thing is only 1.25" thick, plus it's 2 inches shorter horizontally. How did I get the screen and guts to cram in there like this? I guess you'll have to read my book!
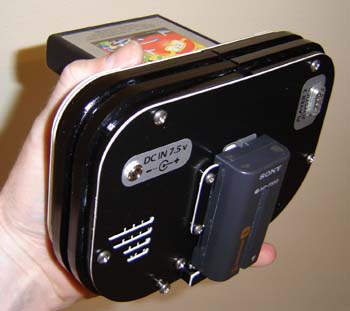
Here's the back of the unit. A Sony Infolithium battery clips on the back and it's exposed so you can clamp on a bigger one if you want. DC AUX power input, Player 2 joystick port and headphone jack are also back there. Along with heat sink air slots (seen on left above) Note how the sides of the case are alternating sizes, kinda like the PS2 case...
Here's the side view. See, when you glue together multiple layers of .25" acylic, some of them are bound to NOT match up. So, you deliberately make them different sizes so no one can tell! It's a design feature. Well, that's the last of the Project 42 portables. It's been an amazing journey since I started this project back in June. Actually, it's only been 4 months, I guess that's really only a zit on the face of time. For more information on the book and how to make these kits check out the Hacking Videogame Consoles book site! Return to Homepage
|
|||||