
So it has come to this – a tutorial for modding my own product!
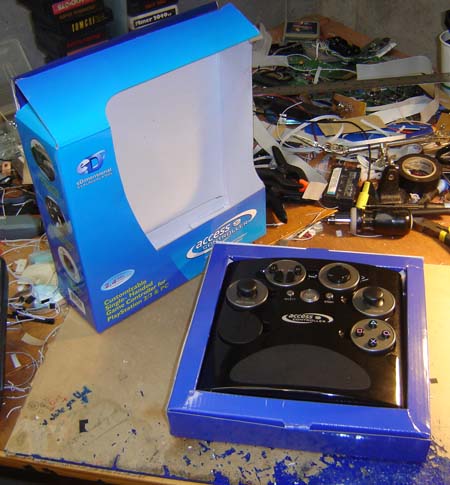
Unboxing the Access Controller
In this article we’ll discuss how to mod the PS2/PS3/PC production model of the Access Controller to add you own custom controls such as foot pedals, extra buttons, etc. You could also build it into a MAME cabinet, use it wirelessly with a PC, all sorts of stuff. Instructions begin below, enjoy!

Words to live by.
Before we start, here is the address of the coolest web site ever: www.digikey.com. That place rocks, and it’ll have everything you need. Some people prefer Mouser.com, and it has no $25 minimum order, but it’s much harder to navigate.
At this point, normally, I would describe how to take apart a product, but you don’t even need to disassemble this thing to add functions!
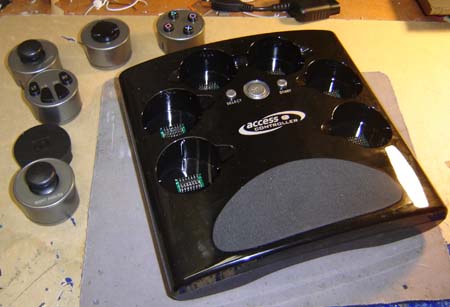
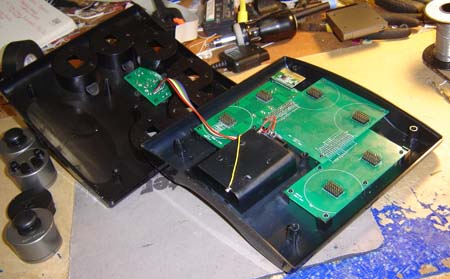
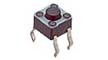
Each of the module slots contains all the pinouts you’ll need. You can pull it apart anyway, if you wish, and it will look like below:
But you don’t need to. I did because, well, that’s what I do. Moving on…
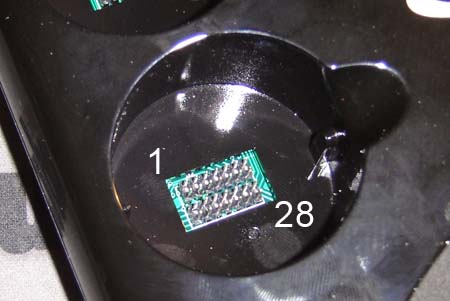
Here’s a close-up of a module slot and the pin numbering I have assigned to it.

This large diagram is the pinout, laid sideways so it is less confusing, though harder to read. For some of you this might be enough, but being the kindly web-dude that I am I shall explain how to wire things to this:
First of all you’ll need a connector for this, specifically two 7×2 female 2mm pitch headers. (For a total of 28 pins) You could rip apart one of the modules but that would be kind of lame when you can just order one:
Digi-Key Part #: S5750-07-ND
Mouser Part #: I couldn’t find one, despite the fact that their search system is somewhat improved from where it used to be. Search terms: 2mm pitch, header, receptacle, 14 positions, 2 rows. Good luck.
Wiring the Buttons
For the purposes of this how-to “buttons” refer to everything on the controller except the analog sticks. This includes the shoulder buttons, which
For the switches/buttons themselves you have a lot of options. Any old switch will work, but personally I am rather fond of tact switches. These are easy to use, have a distinct “click” so you know when they’re engaged, and most through-hole models have a simple .1″ based pin pitch that fits pre-drilled Radio Shack-style PCB’s. The most common size is 6x6mm, with a height of 4-5mm.
A standard-issue tact switch
Tact switch Digi-Key Part #:P8014S-ND, P8006S-ND, P8010S-ND
For meatier applications, such as a foot pedal or arm actuator, I suggest a Cherry-style microswitch… also called lever switches, limit lever switches, snap action switches and variations thereof. “Cherry” is a brand, but like Jello, Band-Aid and SPAM, it’s often used to describe anything similar.
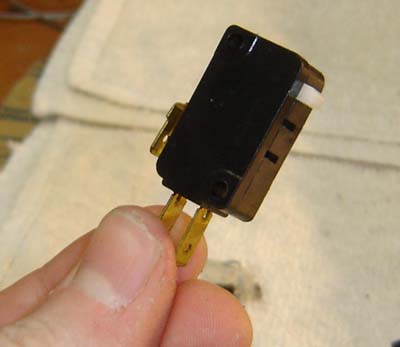
Microswitch Digi-Key Part #:EG4531-ND, EG4529-ND, EG4525-ND, EG4521-ND
You’ll note that a microswitch usually has 3 terminals, labeled COM, NO and NC. This is common, normally open and normally closed. For regular switch use, use COM and NO.
The circuit for wiring all of the buttons, d-pad and shoulder triggers is quite simple, as shown below:

Pretty simple stuff, until we get to the analog sticks at least.
Connect the appropriate pin from the module connector to each switch, and the other end to either the “AD” connection for the main buttons, or “GND” for the L3 and R3 button (the buttons when you push in the analog sticks) Please note that AD is not the same as ground, so this doesn’t wire up as an Xbox 360 controller would for instance. You may wish to wire the L3 and R3 buttons (the buttons when you “push in” the analogs) separately, or leave them with the analogs.
Wiring the Analog Sticks
Let’s move onto the analog sticks. The section above included a schematic for the L3 and R3 buttons, which of course are simple tact switches built into the analog sticks themselves. The main parts of the analog sticks are the pair of potentiometers, which can be found on the sides of any standard analog stick assembly. You can use the analog sticks from the Access Controller itself, or the analogs from most any modern game controller (they’re all pretty much the same).
The main thing to check is the total resistance of the potentiometer (as measured by testing the 2 outer pins with a multimeter). The analog stick needs to be 10k ohms resistance – luckily this is quite common and is found analog sticks from PS2, Xbox 360, Gamecube and most other controller. (You can order one off Digi-Key, part #252A103B60NA-ND) For our example we’ll show the analog stick from the Access Controller itself.

The analog joystick from an Access Controller module.
The analogs work by measuring the position of both the X (left and right / horizontal) and Y (up and down / vertical) potentiometers. The above and below photos show how the pins from the potentiometers are attached to the module slot.

Whichever analog stick you use you can wire it up this same way. Note how 2 of the pins on each pot both connect to AD. The remaining 3rd pin is the “sense” pin and connects to the X or Y position on the module slot for each of the analogs.

Plug the wireless dongle into the included USB adapter for PS3 fun and action! Hint: when using a PS2 controller on the PS3, the “Mode” button is the same as “Home”. Be sure to plug the dongle/adapter into the PS3 before turning on the controller.
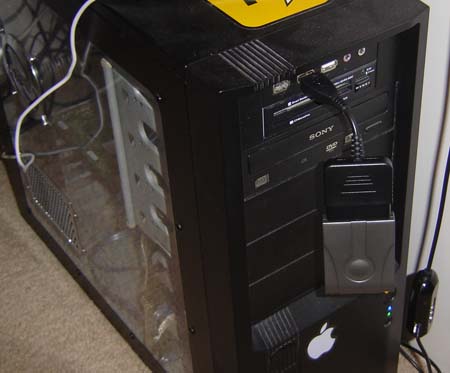
You can plug this assembly into your PC as well – it comes up as “PC USB Controller”
More information to come!
I love the apple sticker on your computer
Oh and btw. I got first. Pwnzreszzss.
Not.
Haha. Triple post. Why hasn’t anyone else posted?
We are all too stunned and amazed to type.
hmmm… one of these as a usb midi control surface jacked into reason or fl with joy2midi? is there a native usb midi driver for it yet?
Nice work Ben,
I believe the Mouser parts are 538-79107-7006 for through hole and 538-79109-1006 for SMT. 14 Circuit, 2mm pitch. The picture and description are not exactly correct, but it is the proper molex part number.
– ayman
We have yet to figure out how to type one-handed yet. Then we can game AND post comments/write e-mail/chat/flame forums.
Nice work Ben. Very impressive.
I love the Rockstar sticker on your computer.
I thought that was a coaster.
A rockstar coaster would be sweet too
Your PS3 needs some dusting off…
how would i make a r3 l3 button ?
nice, ive been wondering how to “hack” this thing….
just wondering ben, but are you going to make one of these for the xbox/360 or going to show us how to hack it to be able to work on the xbox?
thanks man….
regards, Steven
salut j ai acheter un contoller acces et un adaptateur pour ma console xbox 360 mais je n ai pas reussi a la brancher je suis canadien francais et lolll frustrer pouvez vous m aider merci a l avance
Still working on changing the joysticks out for ones that are larger, gonna have to find out what kind of chip the AD line goes to so I can figure out how to change its input impedence…. So far no luck yet.
bonjour
je suis comme michel robert acheter il y a une semaine ce controller et pas moyen de le faire fonctionner que peut on faire
merci pour votre aide
Has anyone used one of these on a mac? does it work?
I gotta tell you, I feel sorry for anybody who was as dumb as I was for buying your controller. Especially those with disabilities like me, who look to alternative ways to try and join the gaming community.After paying three times as much for it than an official Sony controller, I noticed after it arrived that it was made with either cheap or refurbished parts. It was even scratched. I figured no big deal for something that will finally let me game again. After only a few times using it, the Home (PS) button stopped working. I thought I did something wrong or damaged it but after speaking with a customer service rep, I was sent a brand new controller immediately without even any extra charges. Normally this would’ve seemed fishy that a manufacturer was willing to replace the merchandise at no cost to me without even knowing if I damaged it or not, but I was so ecstatic just to be getting a replacement that it went by unnoticed. The replacement didn’t even work from right out of the box. Nice. Again I called customer service, but this time just asking for a refund. I was basically talked into giving it a third try. SUCCESS! the controller worked and quite nicely….for about a week. Again, great job. So by then I noticed that these controllers I’m getting keep having some issue with the Home button. Too frustrated to go through it a fourth time, I decided to to disassemble it to see if I can diagnose the problem. I sure did. The problem was giving you my money. After opening the controller i can see how cheep and careless the assembly of it is. The boards are just fine, but the buttons and sticks are put together half assed at best and in place of soldering, somebody (I’m guessing either you or an assembly person) thought that arts & crafts style hot glue was a great substitute for professional soldering. Awesome. That’s grade A design & manufacturing. But hey congratulations, you swindled a cripple out of over $170. Great job douchebag.
I recently bought this and can’t get it to work for ps3 any help please email me a166524@gmail.com
WOW. So you took the time to delete my comment that exposes the shoddy, second rate manufacturing of your product but not the time to address the issue of why I got a HOT GLUED circuit board, which by the way, even my 70 year old grandmother knew was poor workmanship. And that is not an exaggeration, she was a professional assembly line worker for years. So after selling someone THREE faulty, substandard devices, at what point do you or your techs take responsibility for ripping them off? Apparently that never happens since I noticed my previous post was simply removed without the issue being addressed or even some form of contact telling me not to post messages like that. If you ask me, that is evidence of not only negligence but plain and simple shiftiness. It says that someone (you or your crew, if there is one) knew full and well that I was being sold a faulty device……three times in a row, and just didn’t care enough to put this thing together the RIGHT WAY. You know, after the THIRD faulty device i was sold crapped out in less than a week, I gave up trying to get a refund…..which by the way, your “customer service department” practically refused to do, but were more than willing and eager to send me a replacement device each time after the previous one stopped functioning. Look, I’m angry but justified. And I’m not posting to defame anybody or anything. I want a solution, and quite honestly for the amount of money I spent, I feel like I deserve one. Your controller is actually pretty good with only minor design flaws and the fact that you released the schematic for it tells me that you’re OK with people modding it. But I just don’t think its fair that everybody else is enjoying this product, and I keep getting the refurbished, broken one that the tech didn’t care enough to even assemble the correct way. I left my email, and can only assume that if I’m not contacted about this, that no one cares and that I was ripped off. If that’s the case, I’ll be posting here quite often.
I really need help with my access controller. I did an update on my PS3 for playing Modern Warfare 2 online and now my access controller wont work at all, it switches on ok but does not seem to connect to the console. can anyone with the access controller remember wen setting it up do you have to push any buttons to pair it to the wireless plug that you insert in the USB socket on the PS3. Also when the controller is not switched on one of the green lights on the usb plug-in thing flashes, then when the controller is switched on both green lights are solid green (not flashing), i dont know if this holds any relevance to the problem, but thought i’d mention it anyway.
can anyone help in anyway, i love this product and enjopy using it as im unable to use a proper controller 🙁
any help or advice would be greatly appreciated…….thank you.
My email is nuglol@hotmail.com
if anyine has any advice or help please email, thanks
I understand the fustrations of not being able to use conventional controllers for all the great games and listening to everyone say how great the games are thesedays. I lost the use of my an arm almost 18 years ago and I was playing my Sega MegaCD at the time looking forward to the future graphics that would be available in games but well shit happens eh!
I bought the Access Controller for the XBox 360 last Xmas and it still playing for me without too much trouble.But after almost two decades in the wilderness these few little problems I are no problems at all as far as I am concerned. Sorry to hear about the problems you had Ivan with your Controller but the solution is the XBox 360 adapter unless you have a problem with Microsoft. It just has an extra wireless adapter connection plugin for the XBox 360 which you then have to plug an XBox controller into it and the Access Controller you have now will play on the XBox 360 for most of the games. I would recommend you get yourself an official Microsoft Controller to connect to the plugin for your XBox because I had to try a few controllers not Microsoft products at the time before I found one that played properly when connected to my XBox 360. I have a MADCATZ Controller now plugged into my plugin to my XBox 360 and it plays for almost all the games I bought.
As I said the Access Controller will not play on every game but I’m sure you probably know that already.
There is a problem I’ve had trying to play Homefront and also The First Templar but I am going to get a wired Microsoft Controller and see if that will solve the problem. Maybe just my MADCATZ Controller has a problem with these games being connected through the plugin.
Anyway I hope this helps you and from a fellow gamer with a disability I do understand the frustration all too well. Keep up the good fight bro, give em’ hell.
Trevor
Just received my access controller and plan on checking it out tomorrow. Not quite sure how to hook all this up. Any advice would be appreciated. I have the access controller, controller host with cable, and a crossfire converter. Just need to find out how all this goes together. thanks
This device isn’t working. Any instructions on how to properly hook this up to the xbox 360 would greatly be appreciated.
Access controller.